IRONCAD vs Fusion 360 Lesson 1 3D Modeling Techniques Defined Streamlined Sketching/Feature Based Modeling
When I introduce IronCAD's very
flexible design paradigm I have a hard time to get the Pro/e clone
users, like Solidworks and other programs to understand the drag and
drop design paradigm.
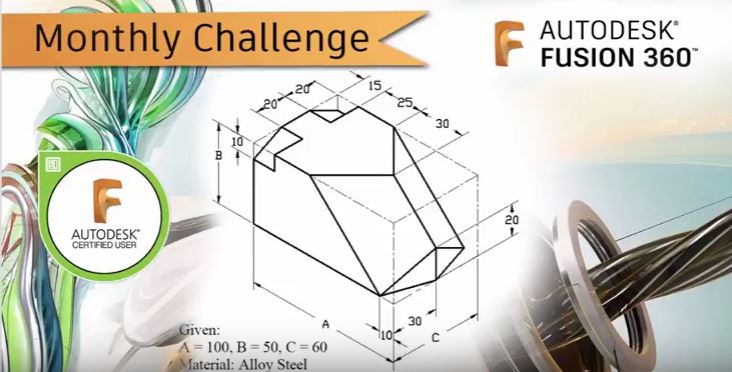
I saw the
following video challenge on linkedin and thought I would give it a
try on IronCAD. I actually did it before I watched the video, so I
did it a bit differently. This will give you an idea how different
and flexible IronCAD is compared to the conventional Pro/e clone and
to the not so conventional Fusion 360.
I would do a
video, but I really am not good at it. So I will show you step by
step. I will try and get IronCAD support to create one. They are
very good.
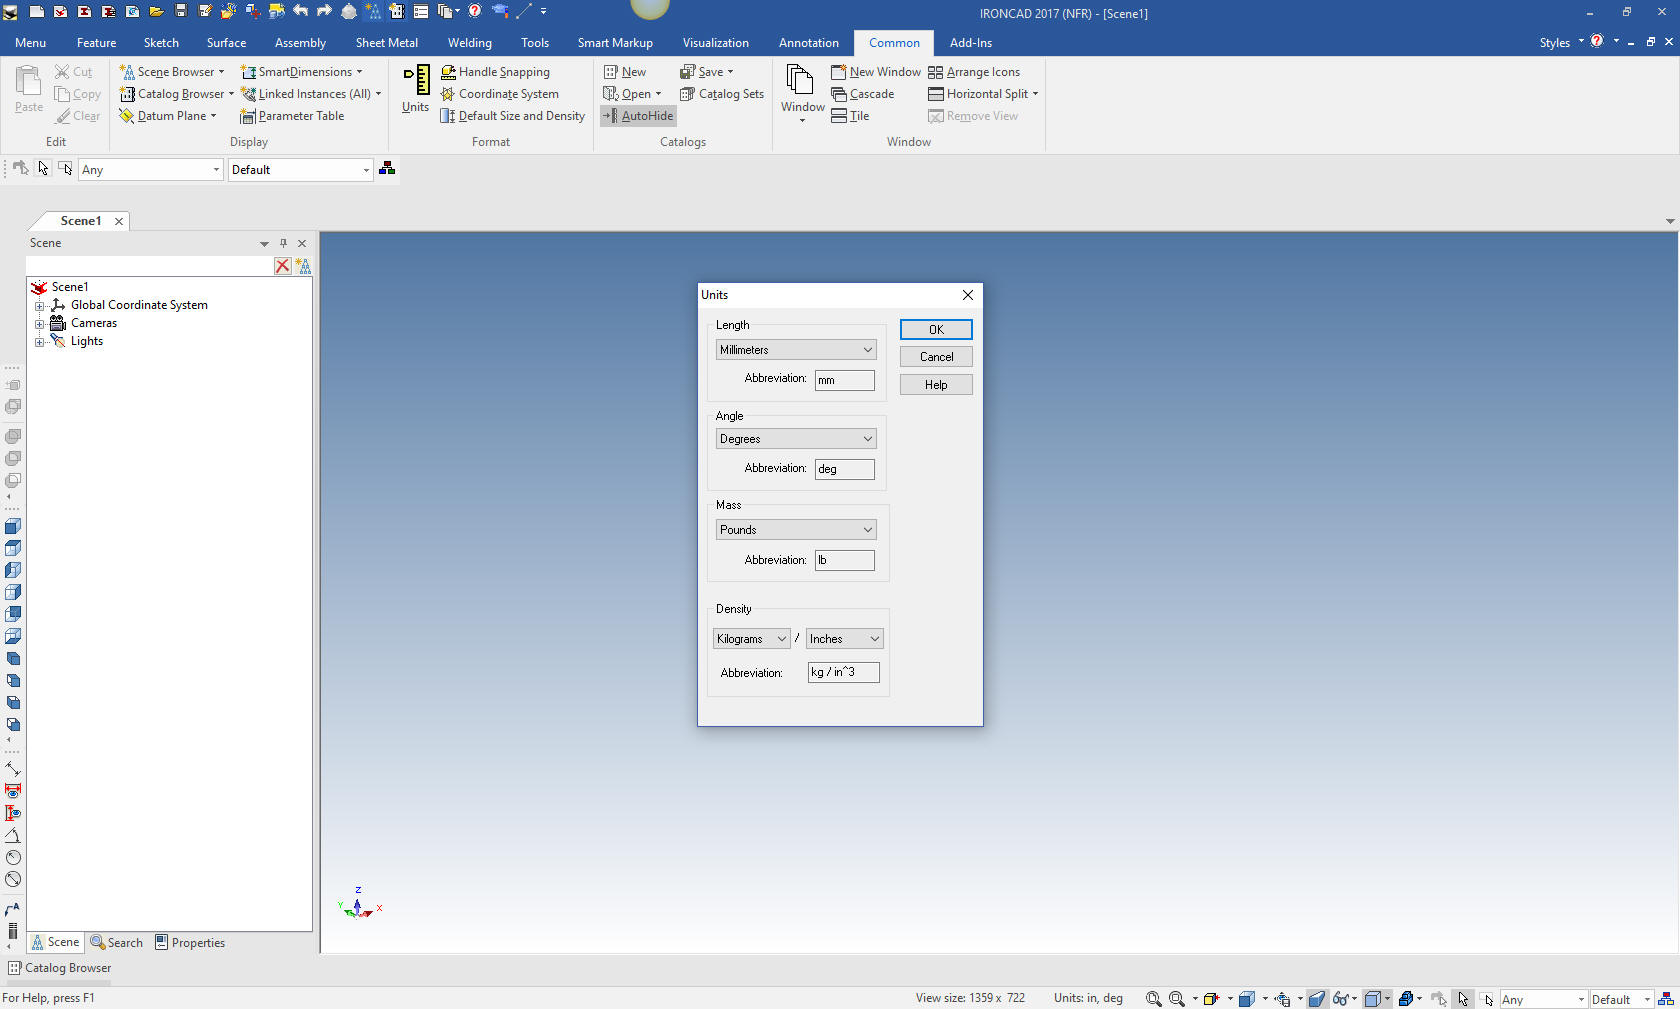
Here is IronCAD. We set the units to
millimeters.
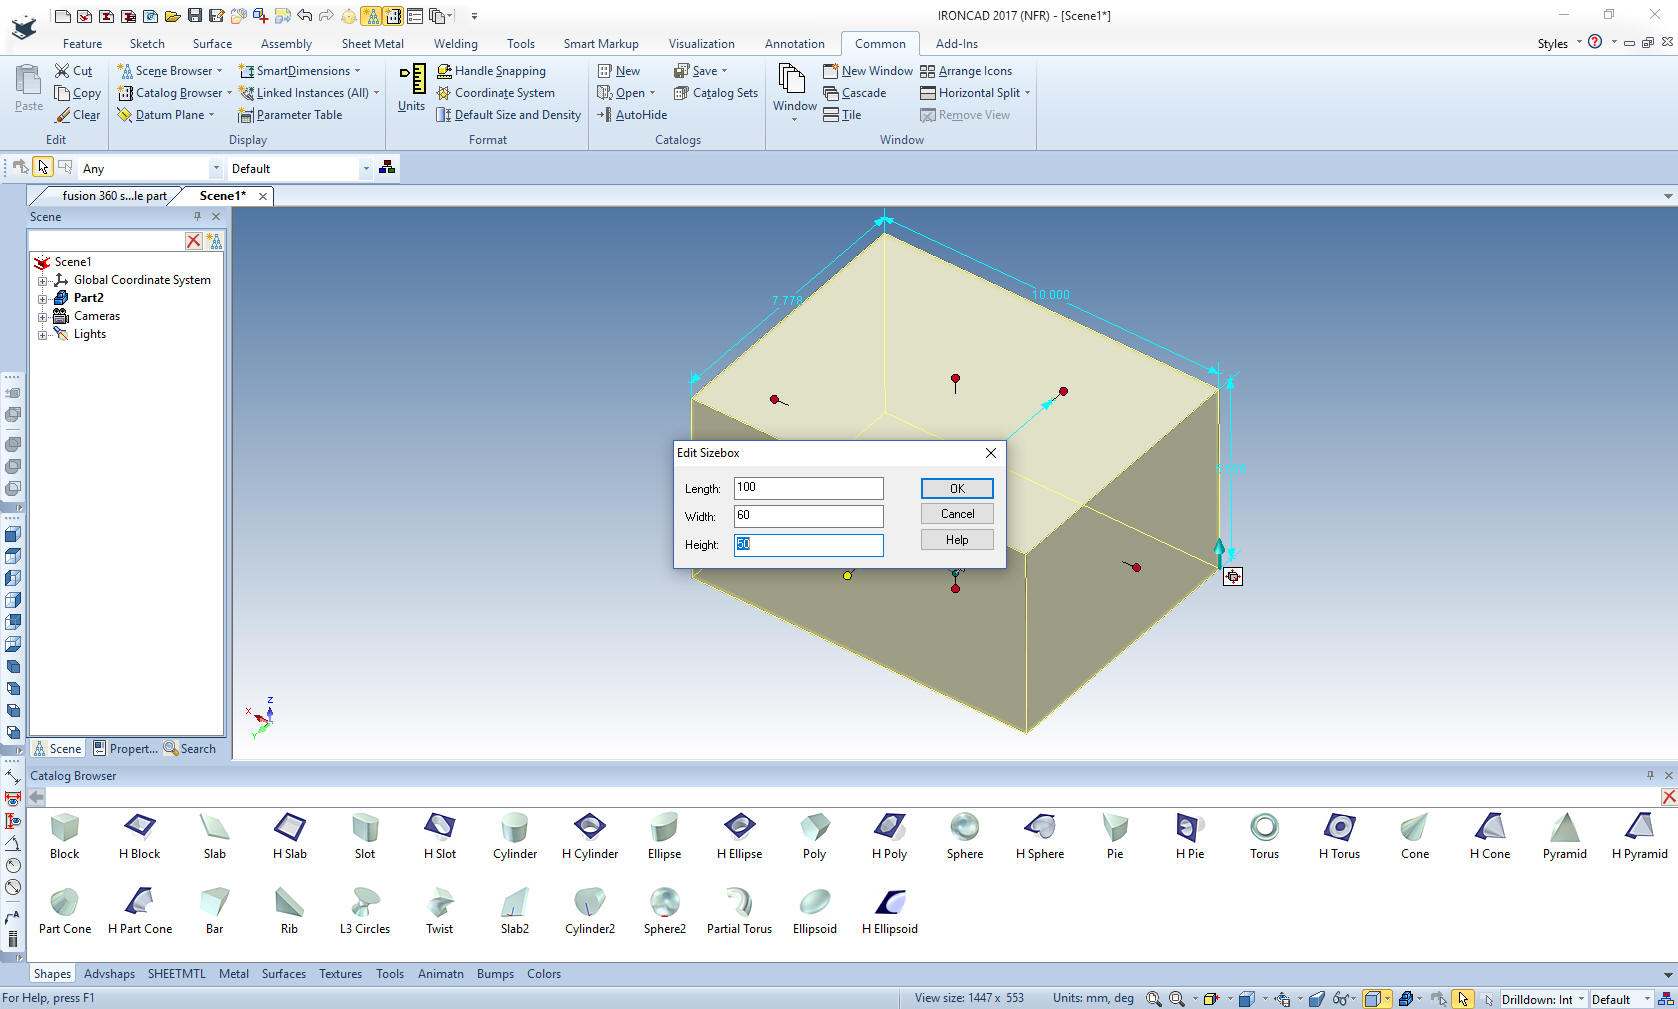
The first thing we
will do is drag a block from a standard catalog. Notice that is has
handles and the size box dimensions. There are a variety of standard
catalogs and you can create custom catalogs. We set the block size.
100x60x50
The catalog can be
shown or automatically hidden. Hiding the catalog increases the work
area. We now have the basic block ready to modify.
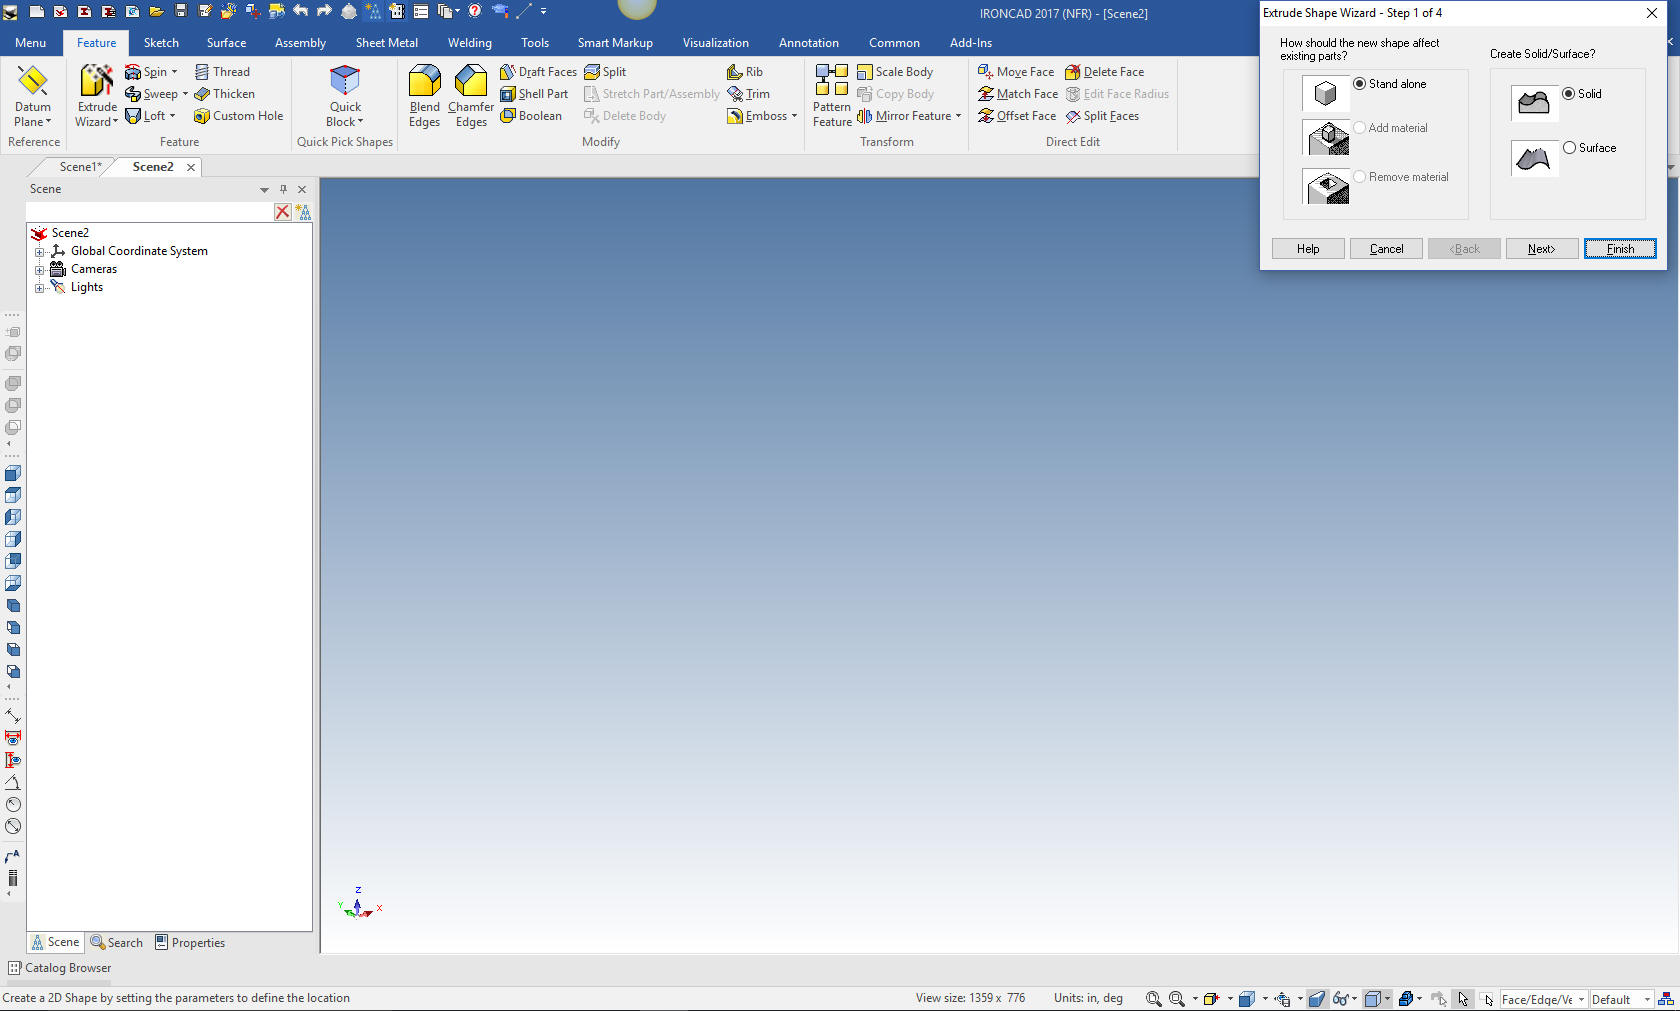
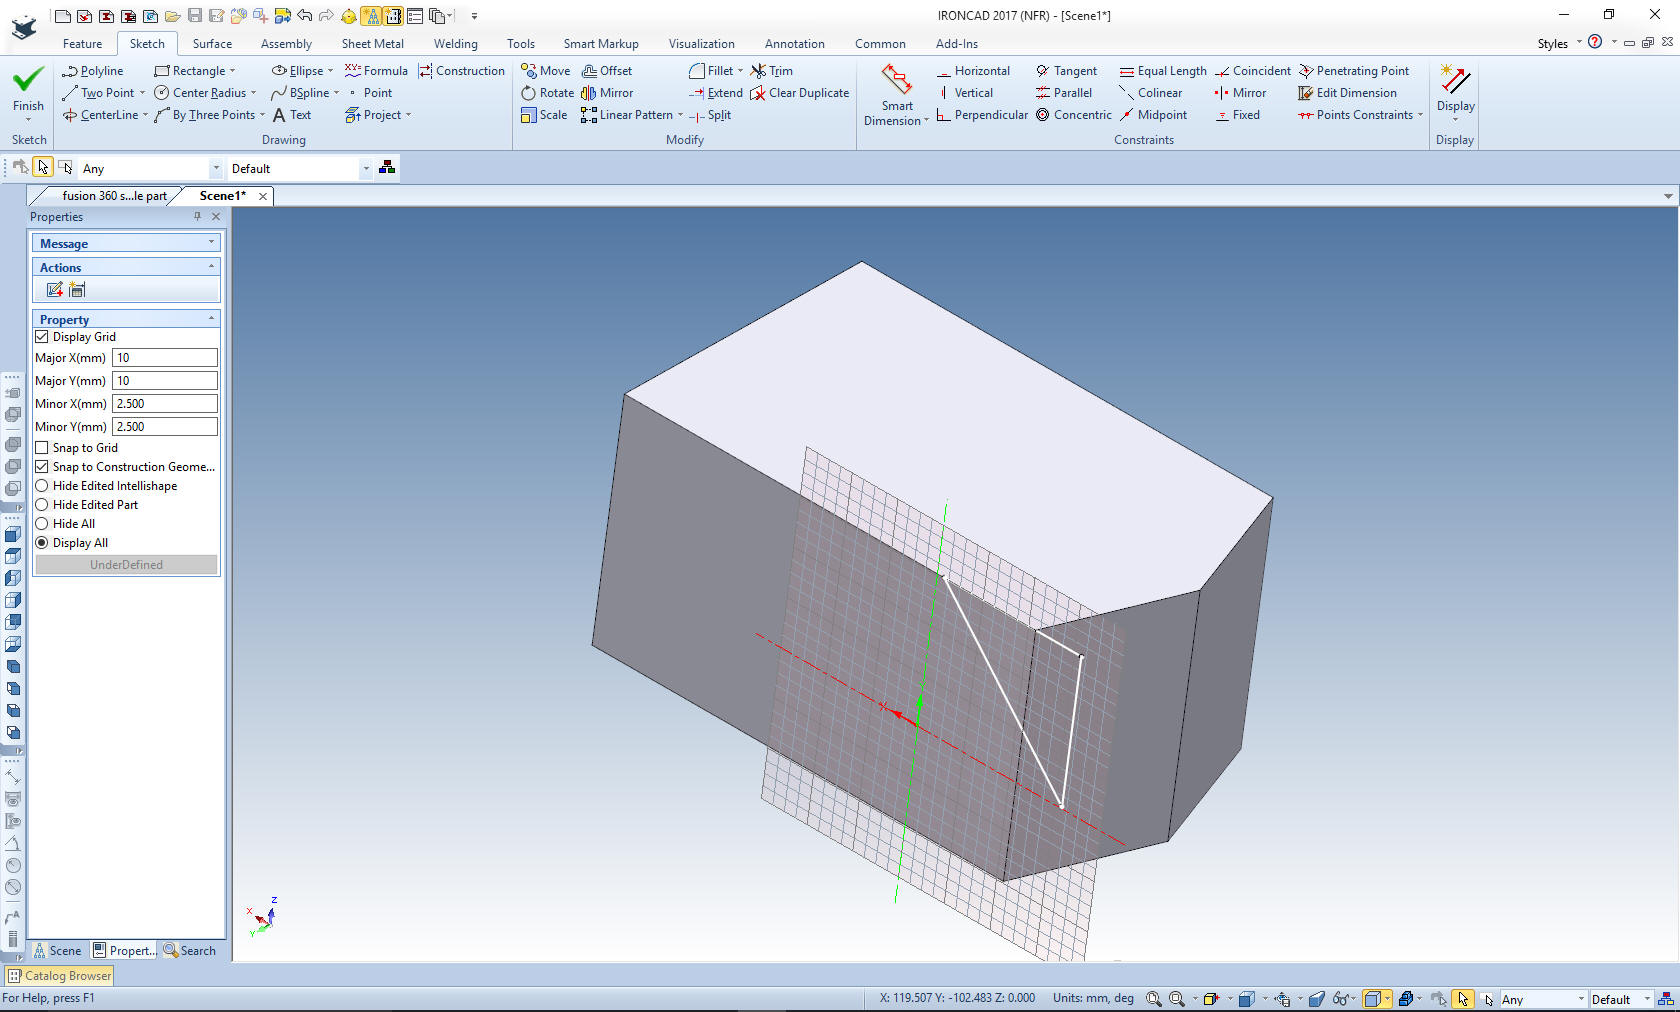
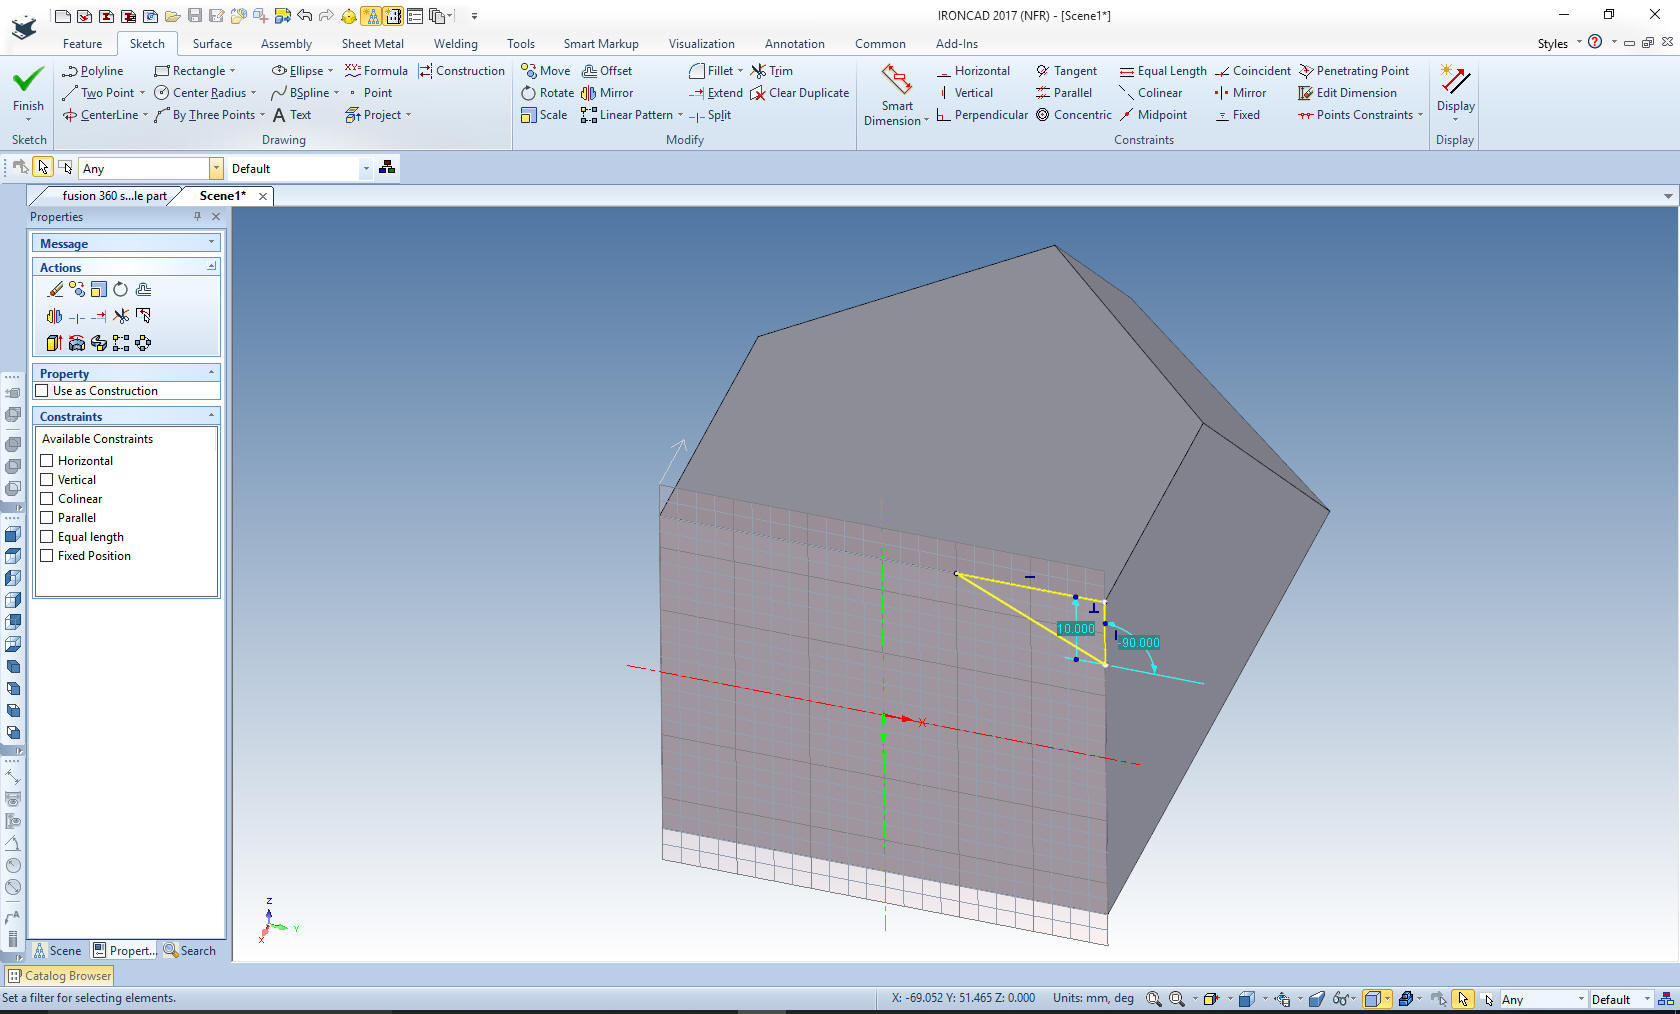
I will create the
front cut with the Extrude Wizard by selecting the top face and we will remove material.
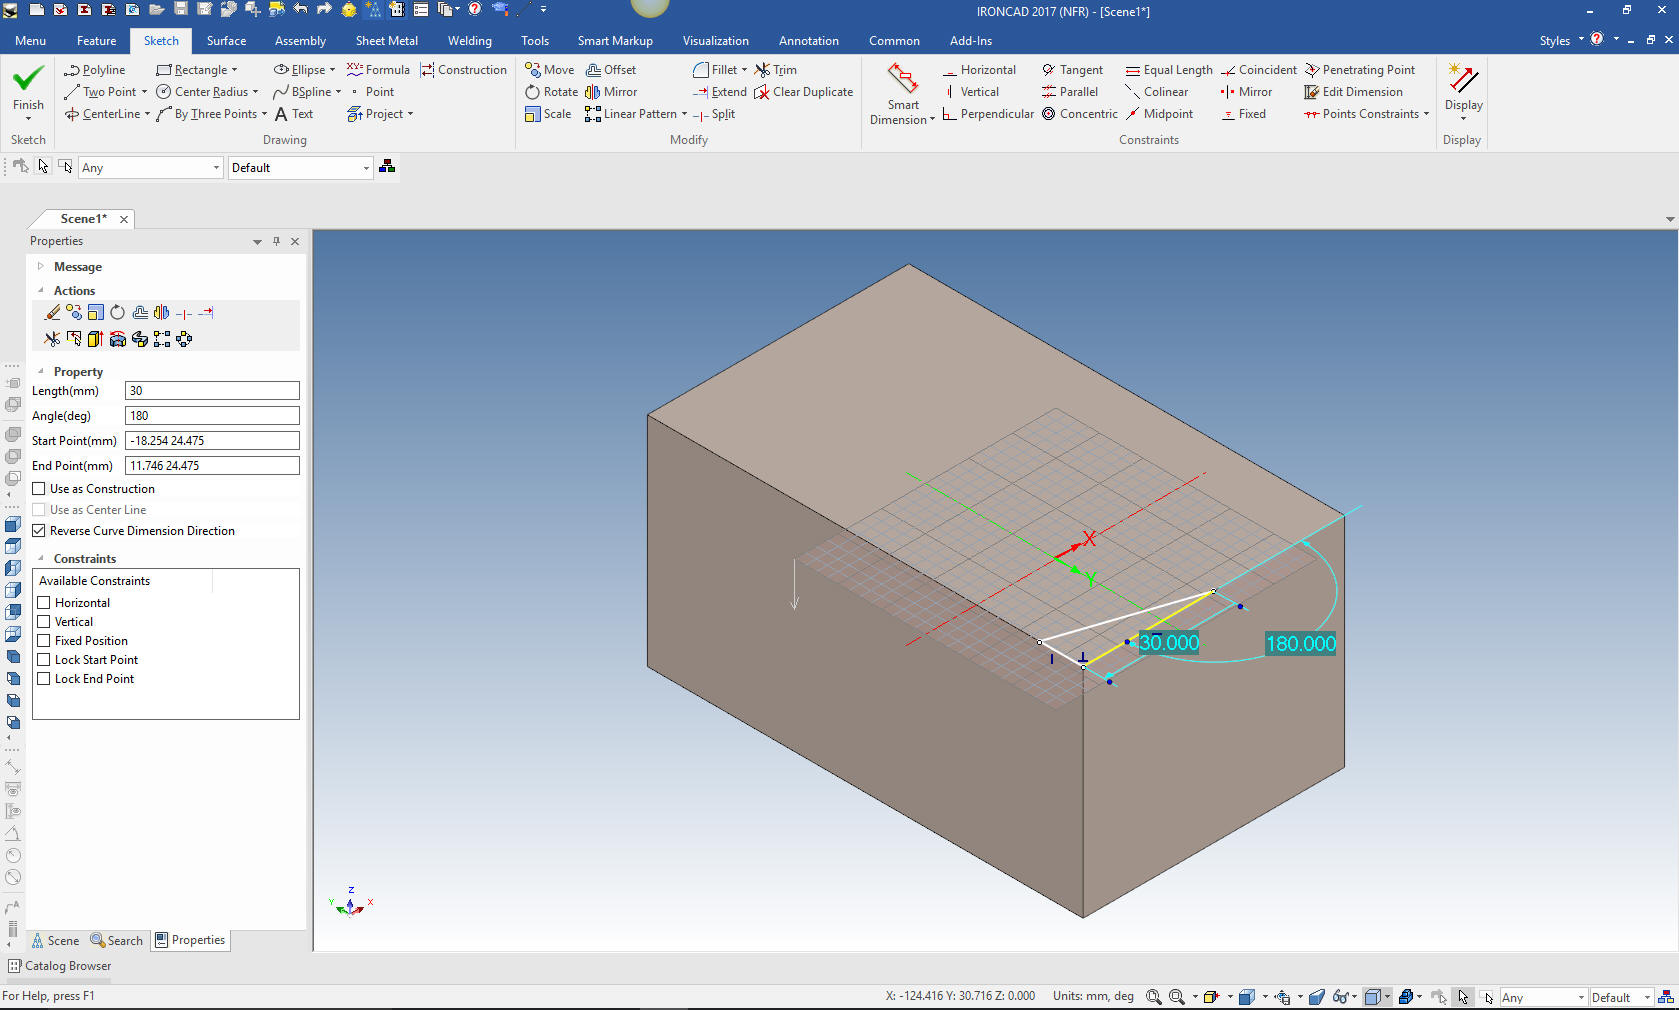
As you can see the
Extrude Wizard creates a plane on the relevant face that we will be
creating the extrusion. It is nothing more than projecting the two
edges, defining the length of the pertinent edges and creating the diagonal line.
Notice the projected entities
already had editable dimensions, so there was no need to add
dimension and there was no need to add any constraints.
Now
that I think of it, we also could have used a chamfer here. That
would be using Feature Based modeling. We have to make sure we see
the many options, as compared to the sketching only mindset.
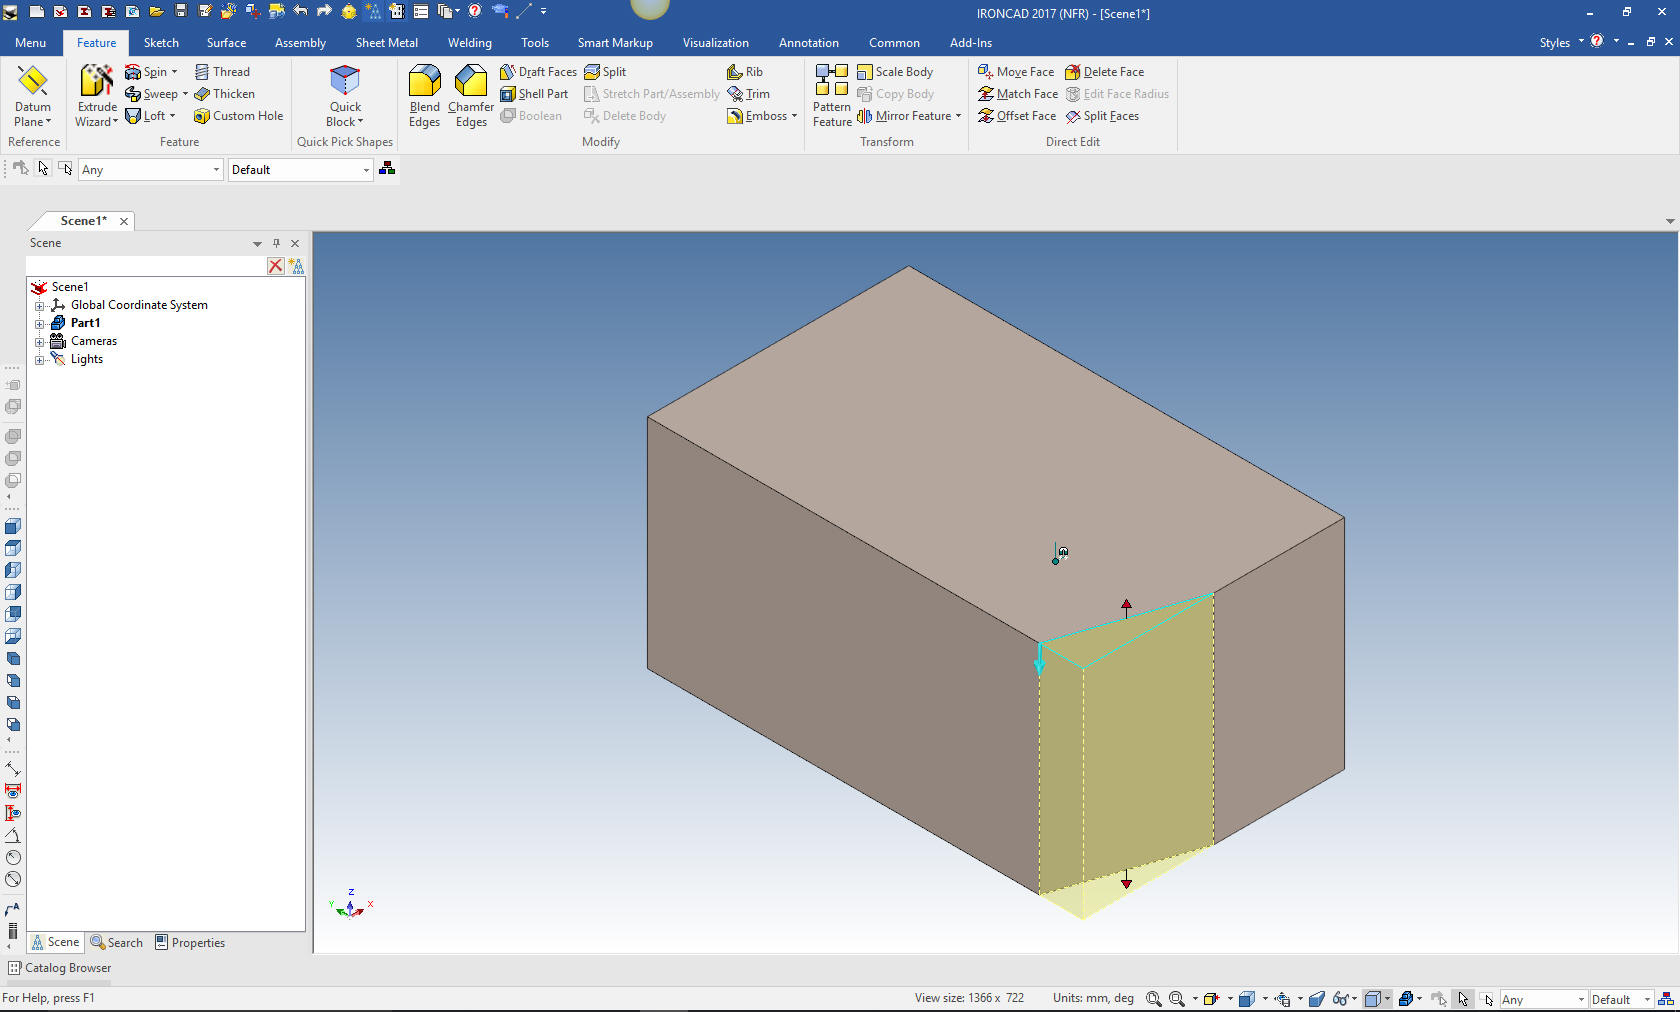
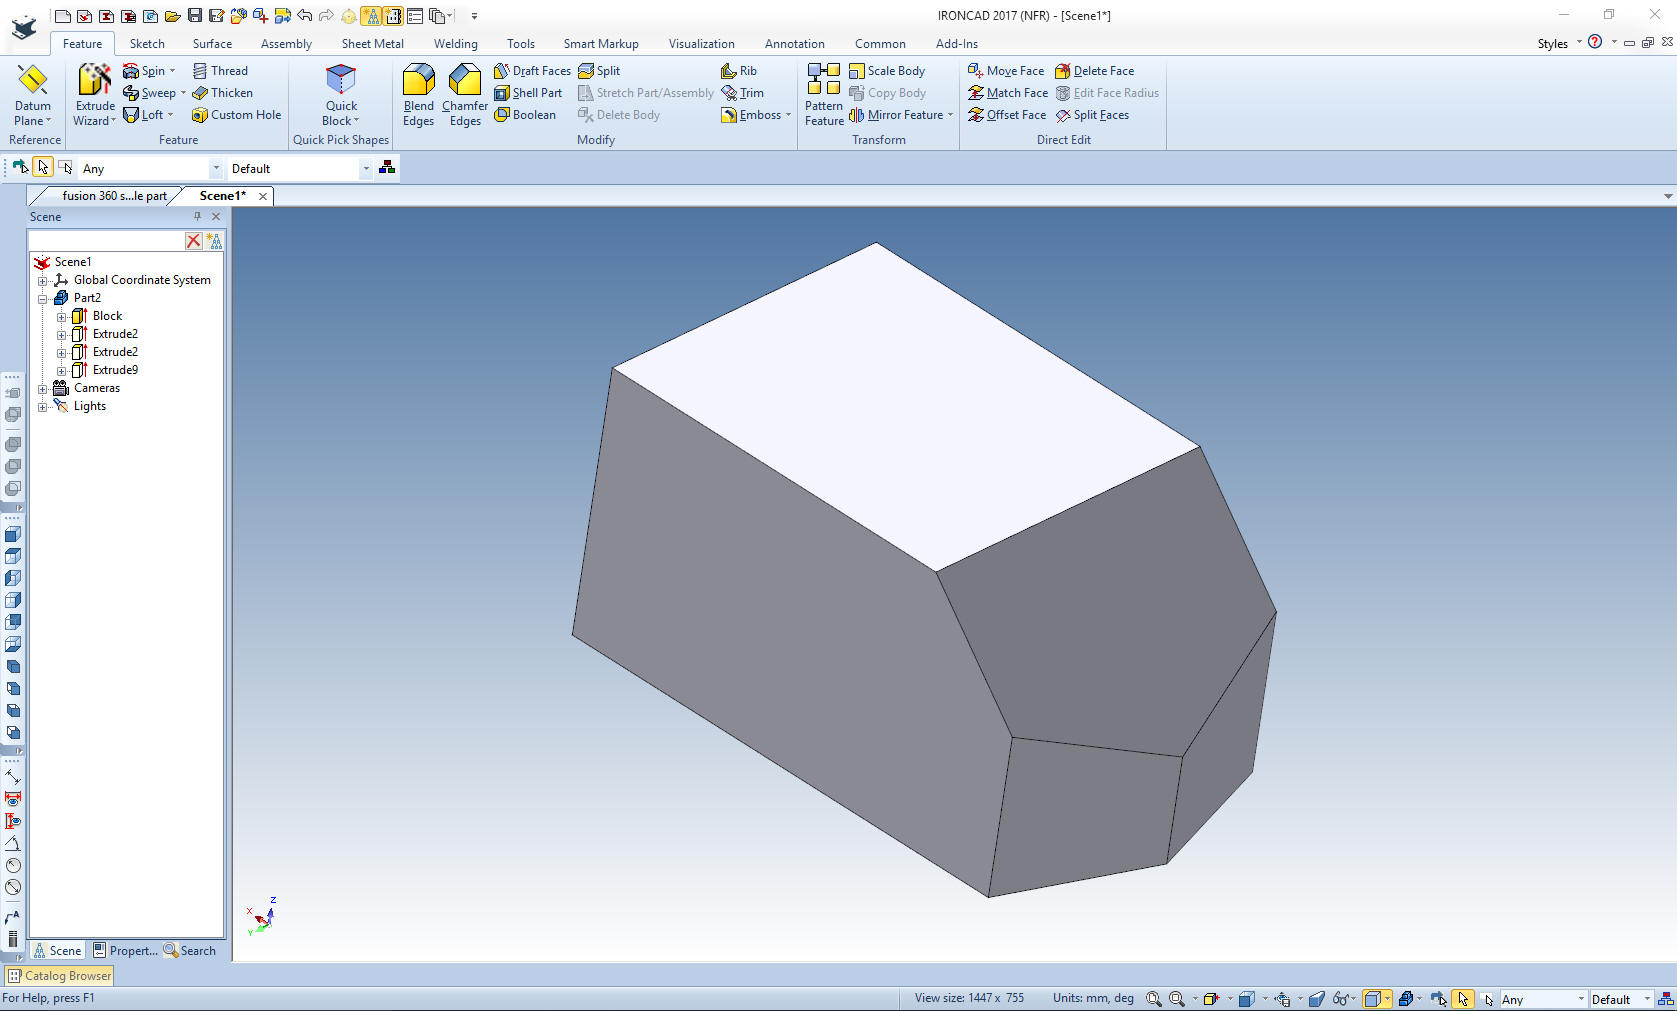
We select finish
and pull the extrusion to the depth required.
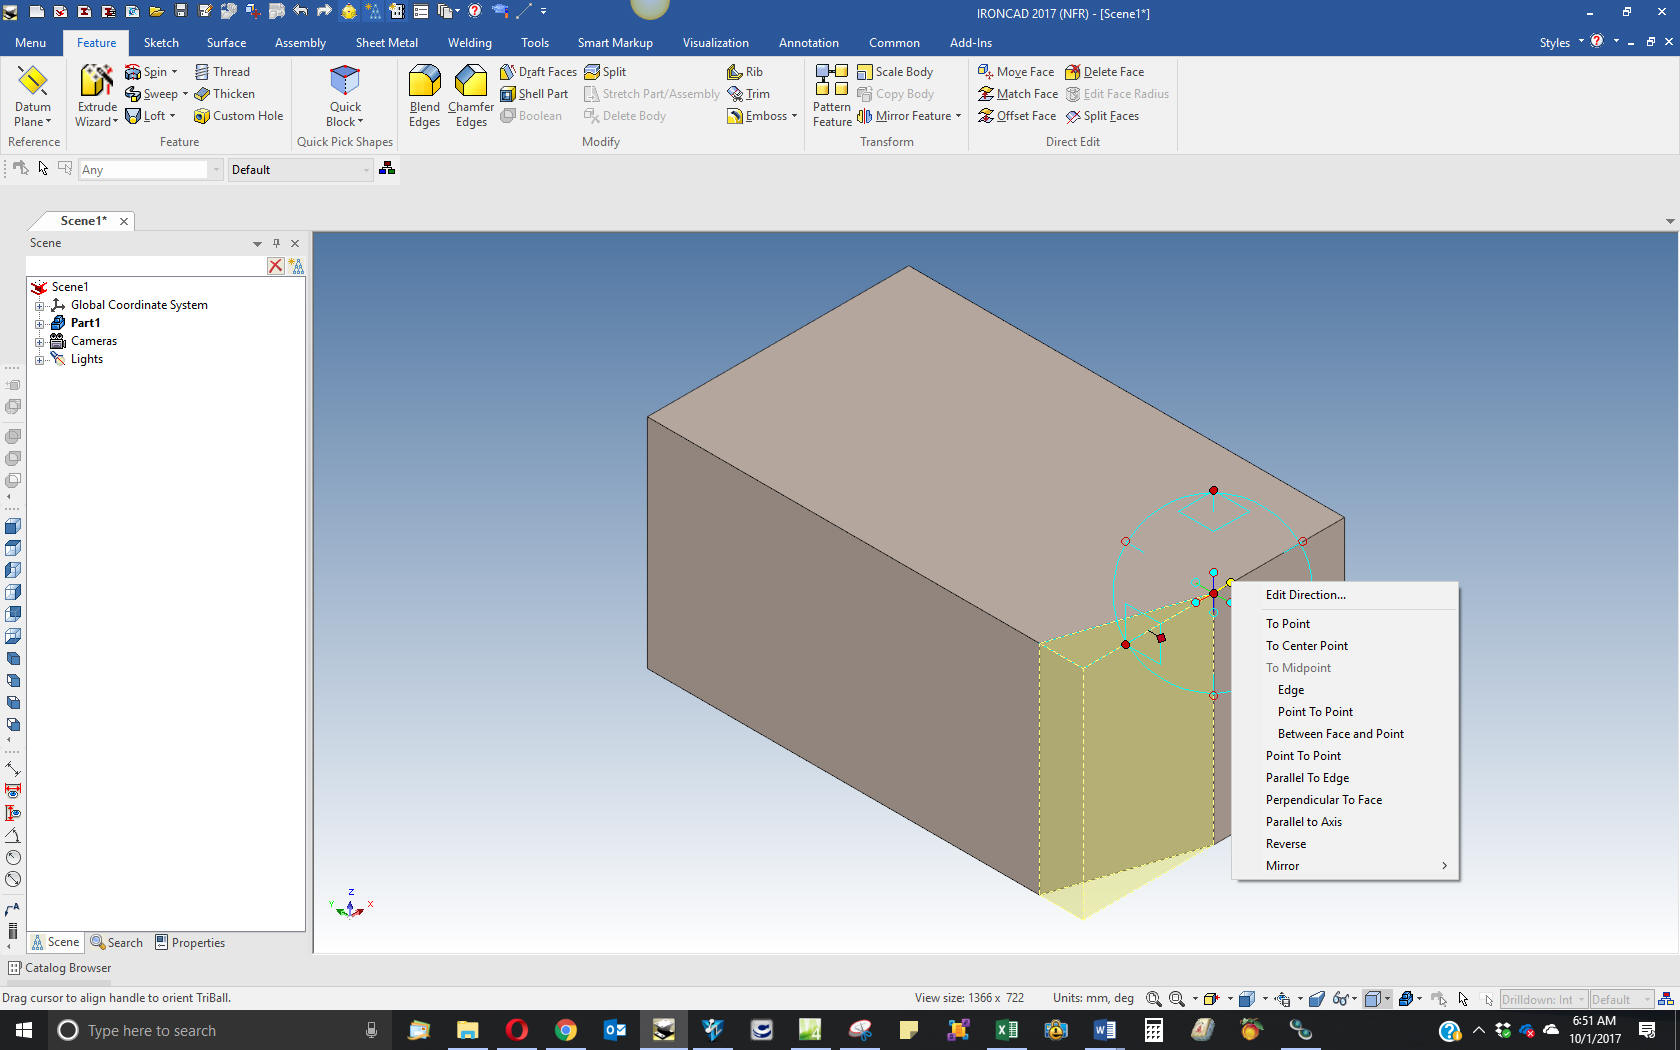
We will now mirror
the feature with the triball. With
a push on the spacebar we can move the triball only to any location. Of course, we
move it to the point to which we need to mirror the feature. We
select one of the small inner handles that set the mirroring
direction. We can move, copy or link the feature. Linking will
automatically show any changes to either of the extruded cuts.
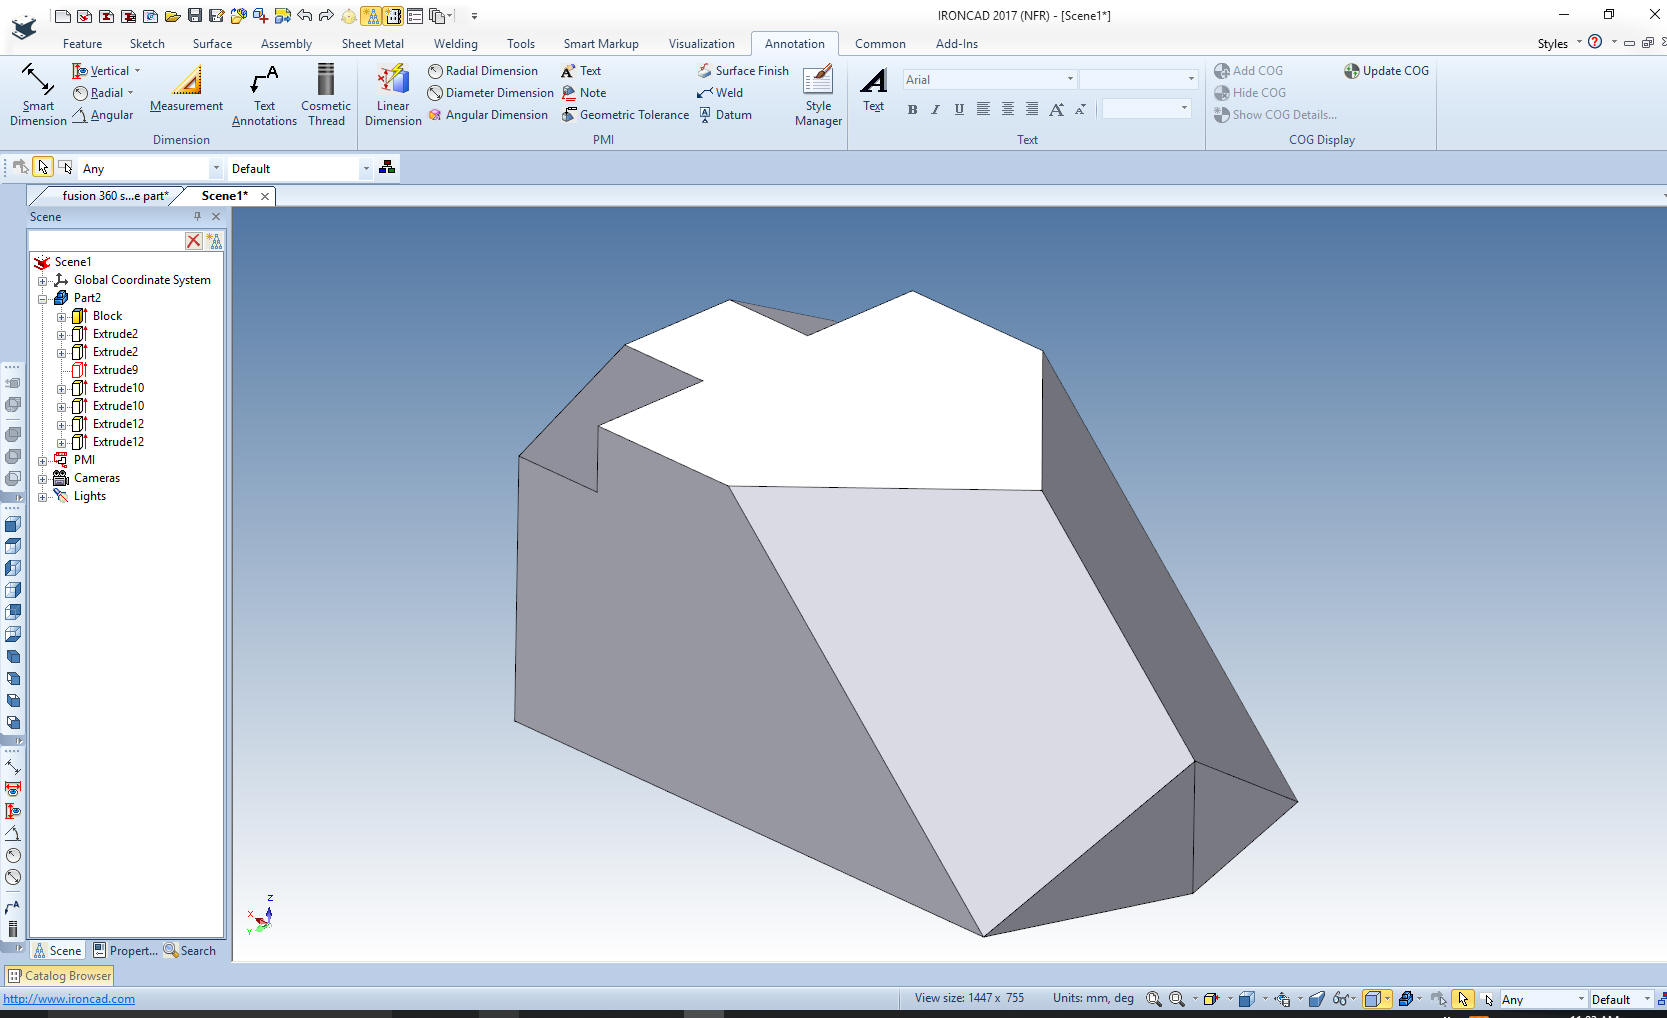
This is where I
differ from the Fusion 360 example. We will now make the other front
cut by again using the Extrude Wizard. We project the edges add the
diagonal line and edit, trim or extend the two other lines depending
on how we project the lines.
Finish the
command.
I am sure the
Fusin 360 example could have also used this function. I am not sure
why he split the solid, maybe just to show the command. Using the
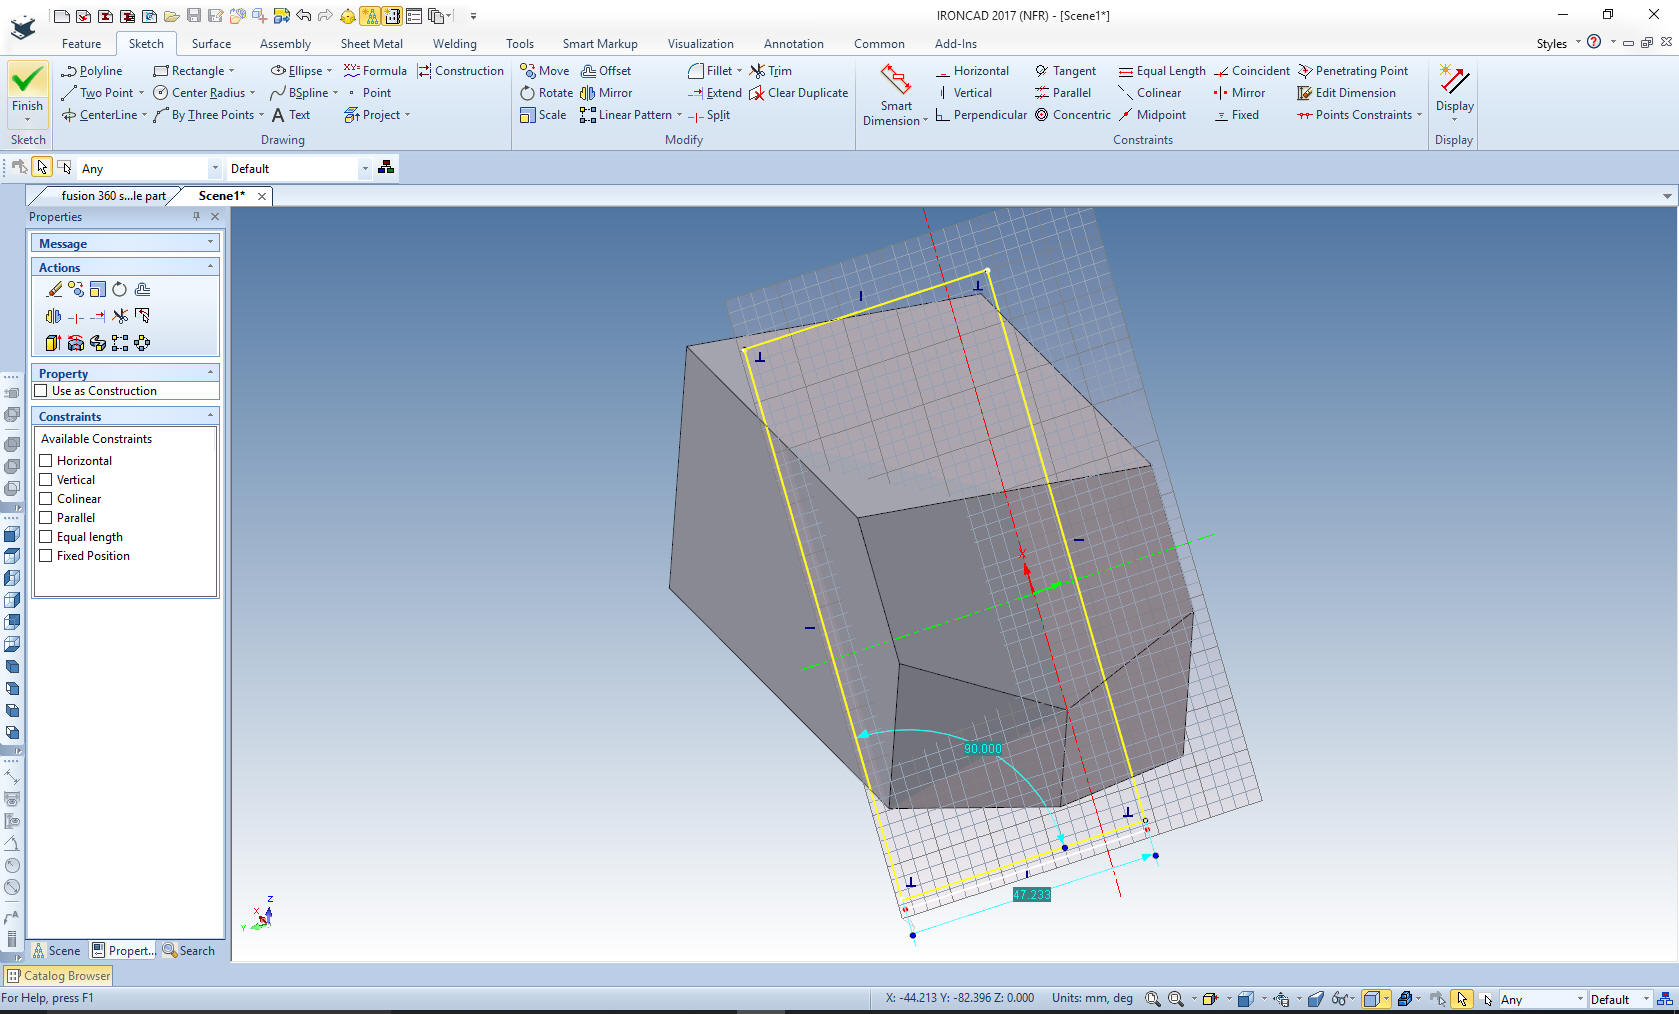
Extrude Wizard I create another plane, Using the Triball, I put it in the center of the
inclined face and then lock the axis that I want to rotate the
plane, then using the inside handles I point to the lower left
corner of the part setting the plane in the correct orientation.
I turn off the
triball with the escape key and proceed to create a rectangle. The
size is not important as long as it includes the faces we need to
cut.
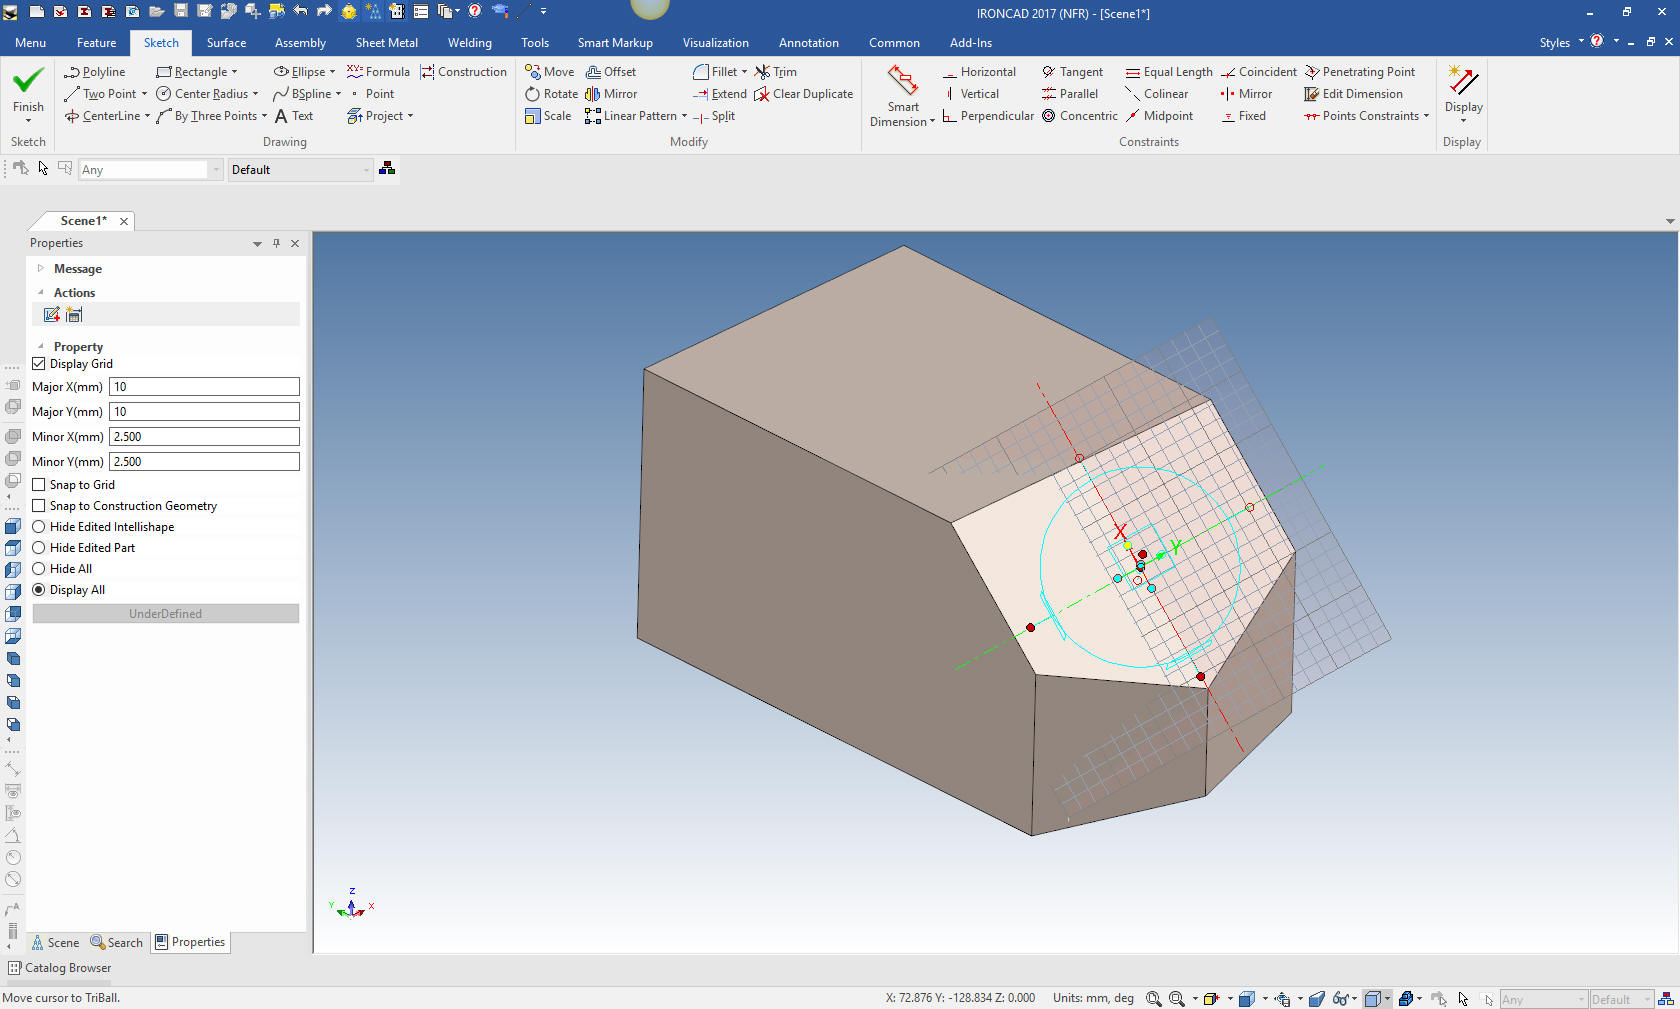
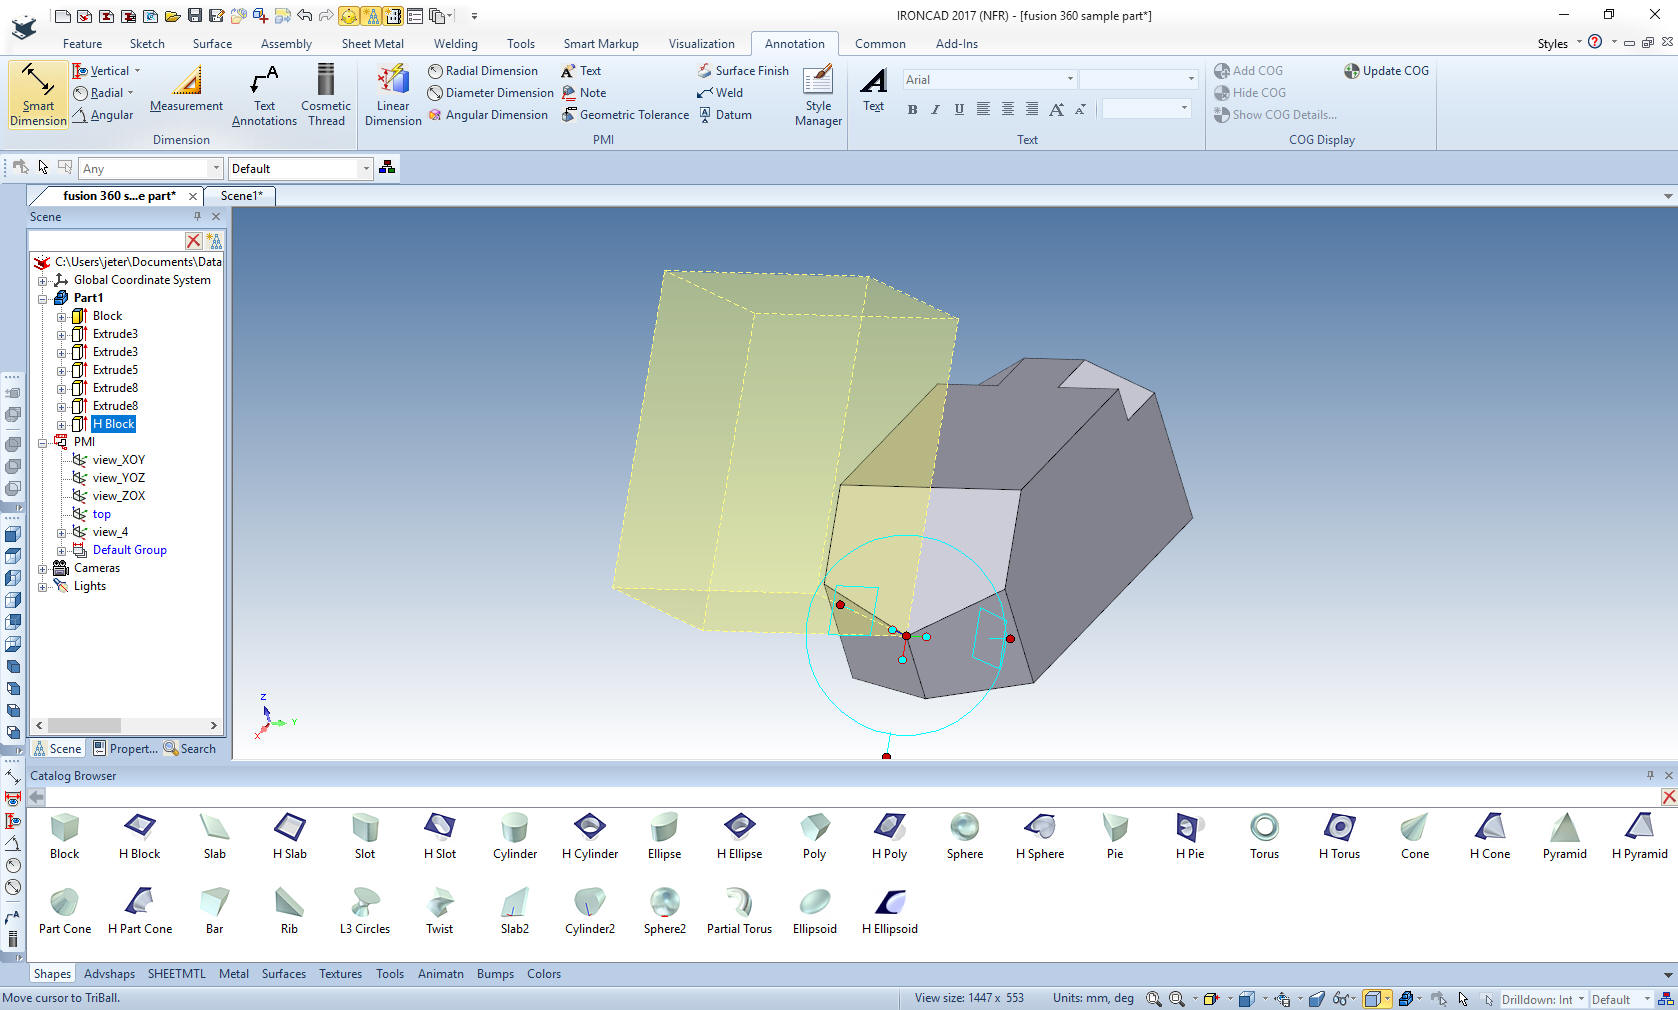
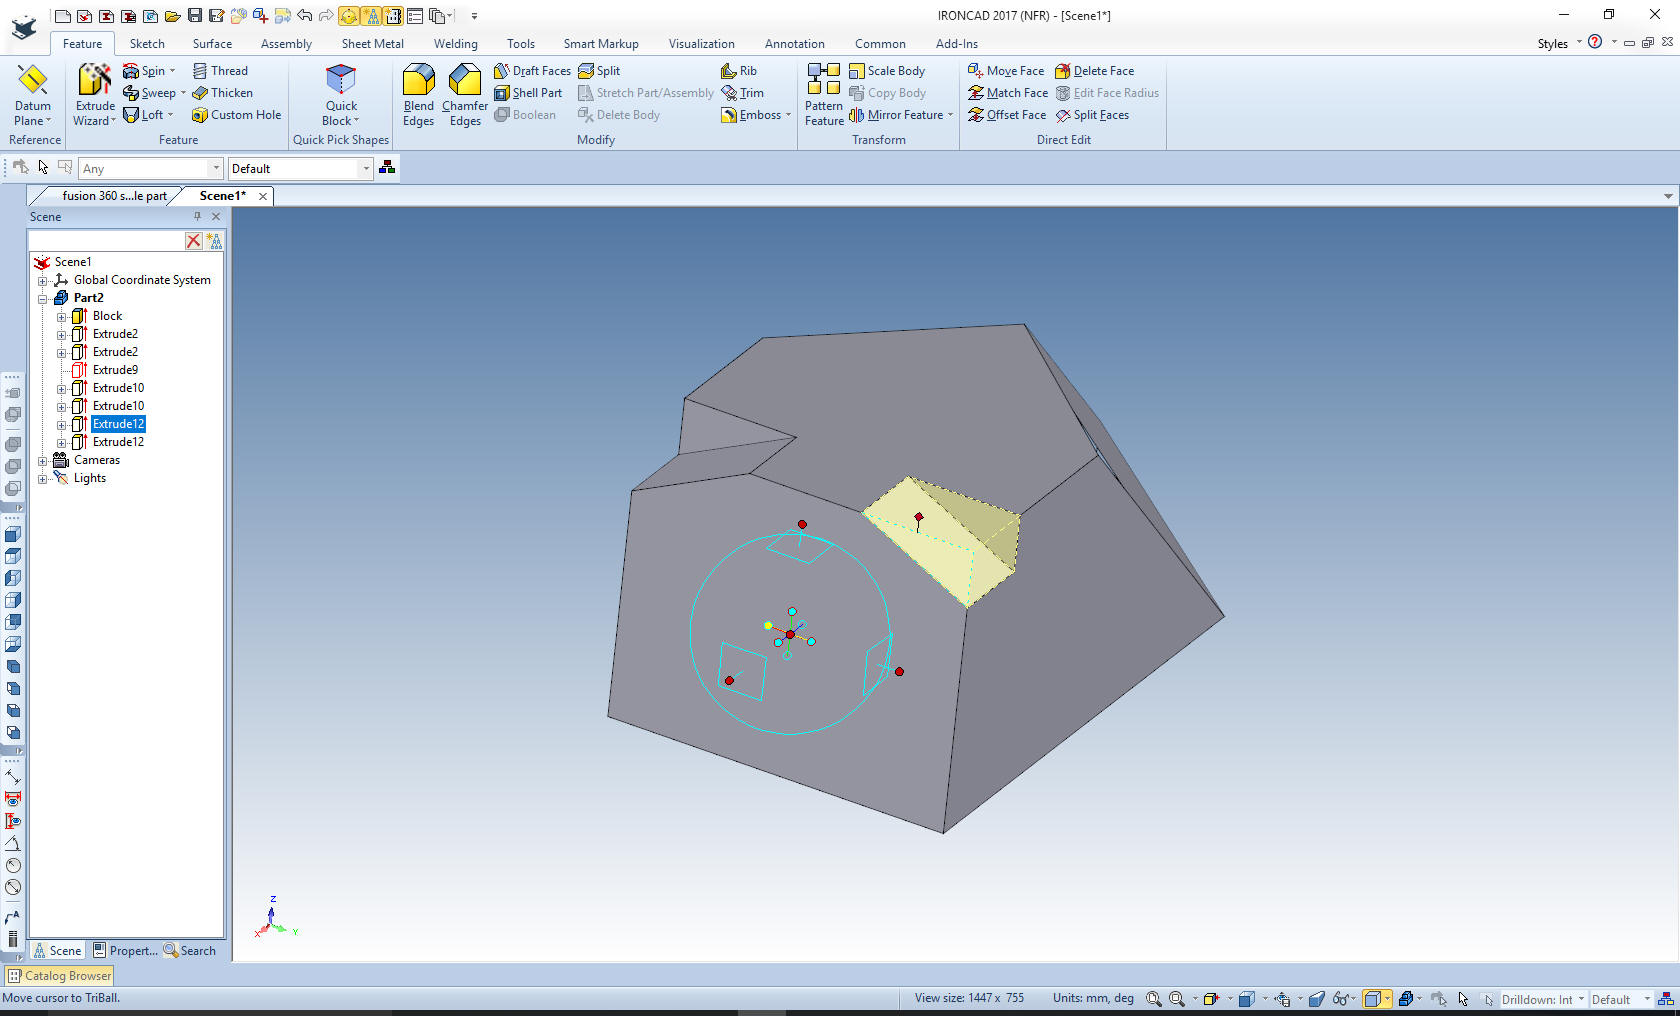
Let me show an
alternative method on creating this feature by using a Hole Block. I
drag a Hole block on the diagonal face. I have sized it by putting
it on top of the face and aligned the points to the center by
pulling the handle and snapping to existing features. Then locating
the Triball to the center to rotate the Hole Block. With IronCAD's
unique flexibility, rarely would we split the body.
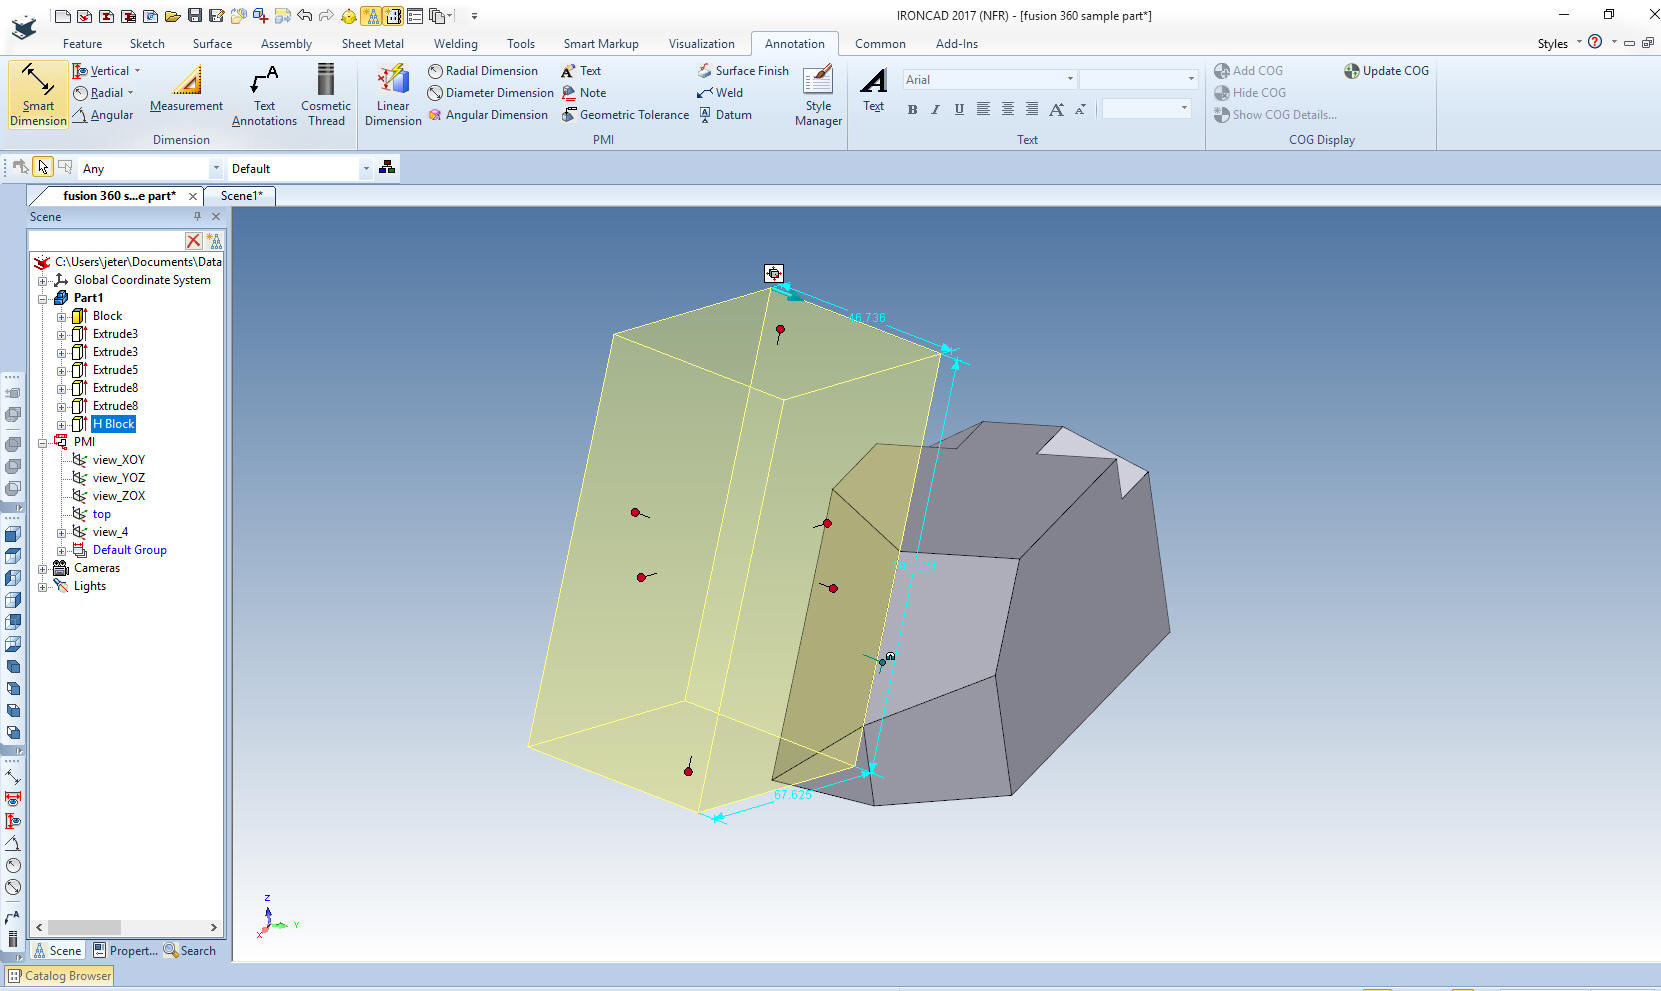
Again
with the Triball I lock in the axis of rotation and select the
inside handles to point to the lower left corner in this case. You can see I have
the same results. Just pull on the handle of the Hole Block to
extend the block to include all of the faces that need to be cut.
We
finish the command and we have our cut.
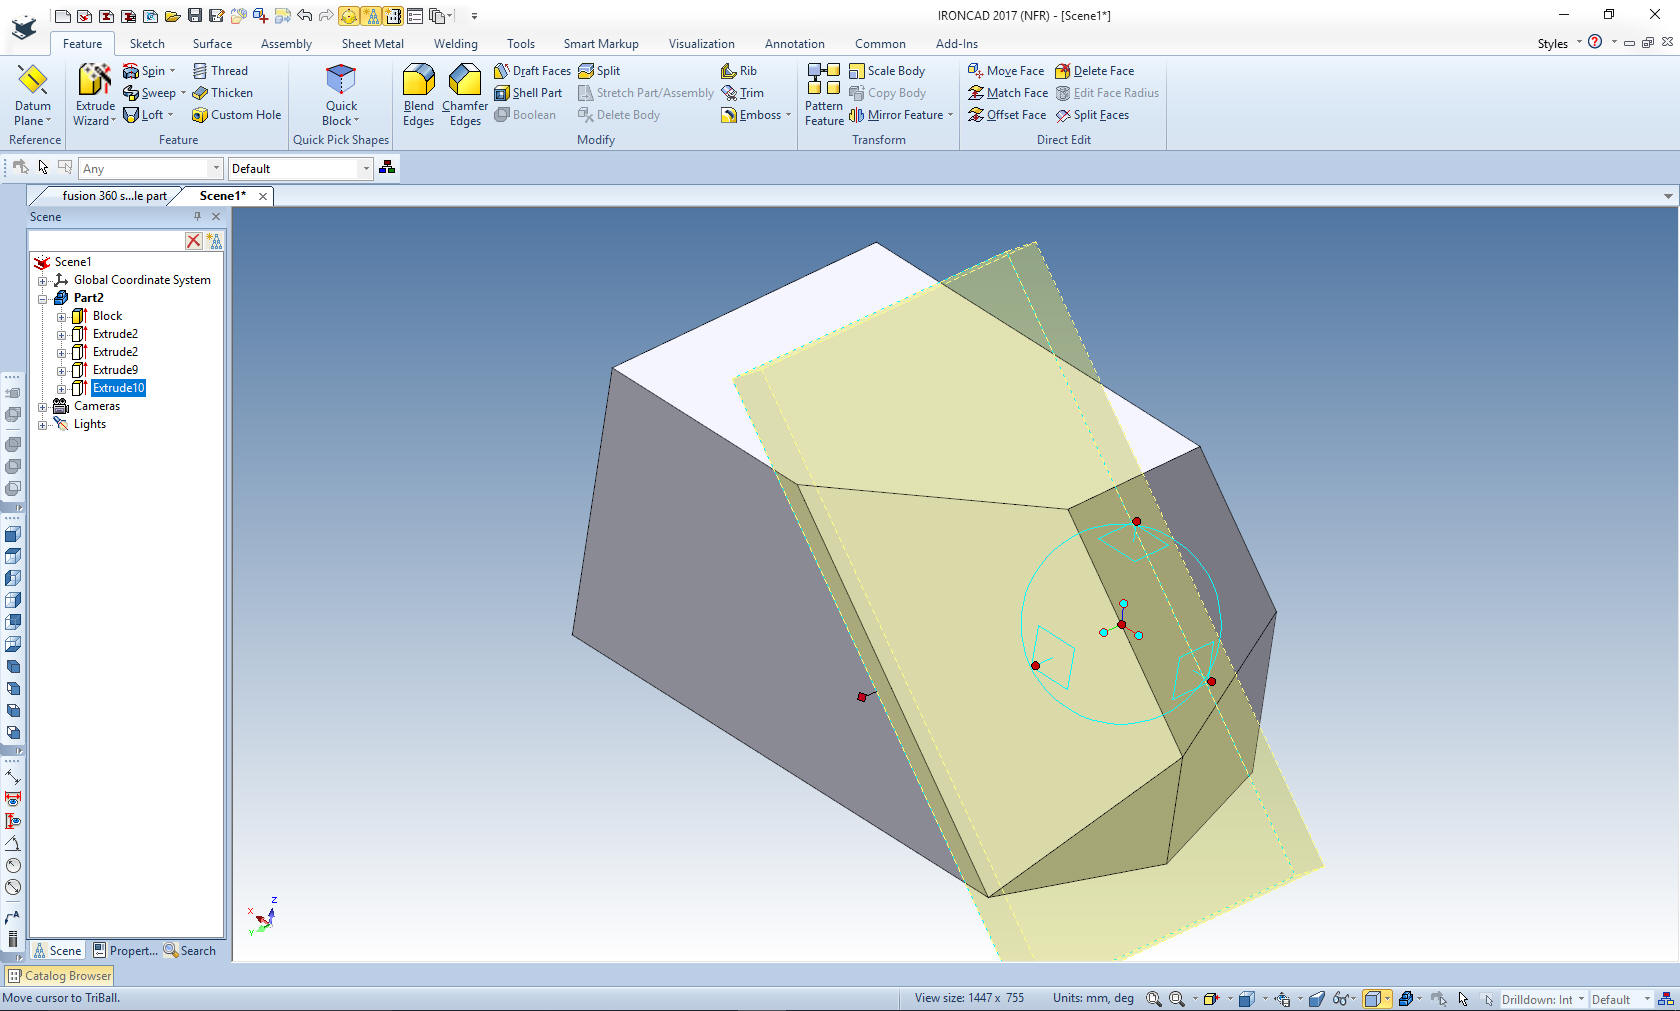
We have to mirror
the new feature. I select the feature and turn on the triball. I
reorient the tribal by hitting the spacebar and and selecting
global. I then select the inside handle that allows me to correctly
mirror link the feature.
The feature is
mirrored.
Again using the
Extrude Wizard we now do the back cuts using the same as the front
cuts. Just projecting the two edges, editing the lengths and adding
the diagonal line.
Finish the command
and setting the depth and again use the triball to mirror the
feature.
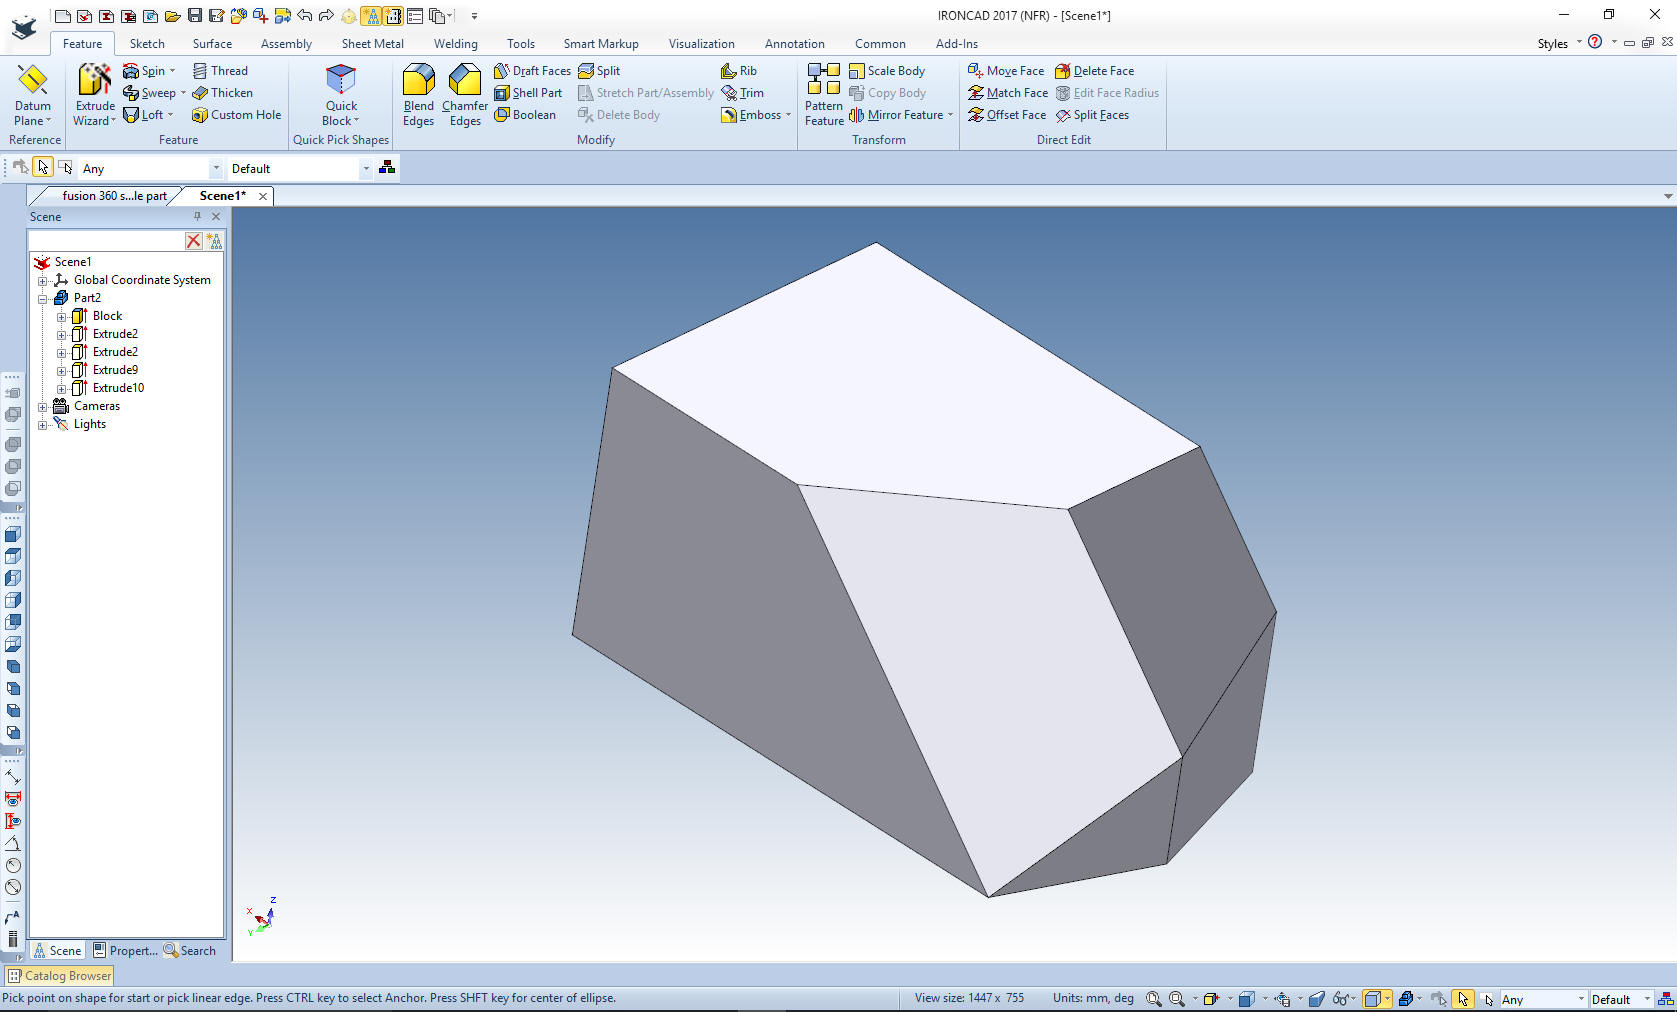
The part is done.
How long? No more than 5 minutes. Never going to a sketching format.
Just creating the planes in 3D space. Projecting the edges and edit
the length of the lines. With effective use of the incredible
triball.
It is
very important that you look into how you or your engineers are
creating the parts. Streamline Sketching and Feature Based Modeling
is easy to learn and implement. It, alone, will increase
productivity 10X. Now, IronCAD with its unique integrated
history/direct edit functionality can increase your productivity
another 5X or more with changes! Again, time is money in
engineering.
More on Streamline Sketching and Feature
Based Modeling.
3D CAD Modeling Techniques To experience this increased level of productivity, please download
IronCAD for a 30 day evaluation. Legacy data is no problem, IronCAD
can read the native files of all of the popular programs. IronCAD is
a great replacement for the subscription only Autodesk and PTC
products. For more
information or to download IronCAD
Give me a call if you have any
questions. I can set up a skype or gotomeeting to show this part
or answer any of your questions on the operation of IronCAD. It
truly is the very best conceptual 3D CAD system.
If you are interested in adding professional
hybrid modeling capabilities or looking for a new solution to
increase your productivity, take some time to download a fully
functional 30 day evaluation and play with these packages. Feel free
to give me a call if you have any questions or would like an on-line
presentation.