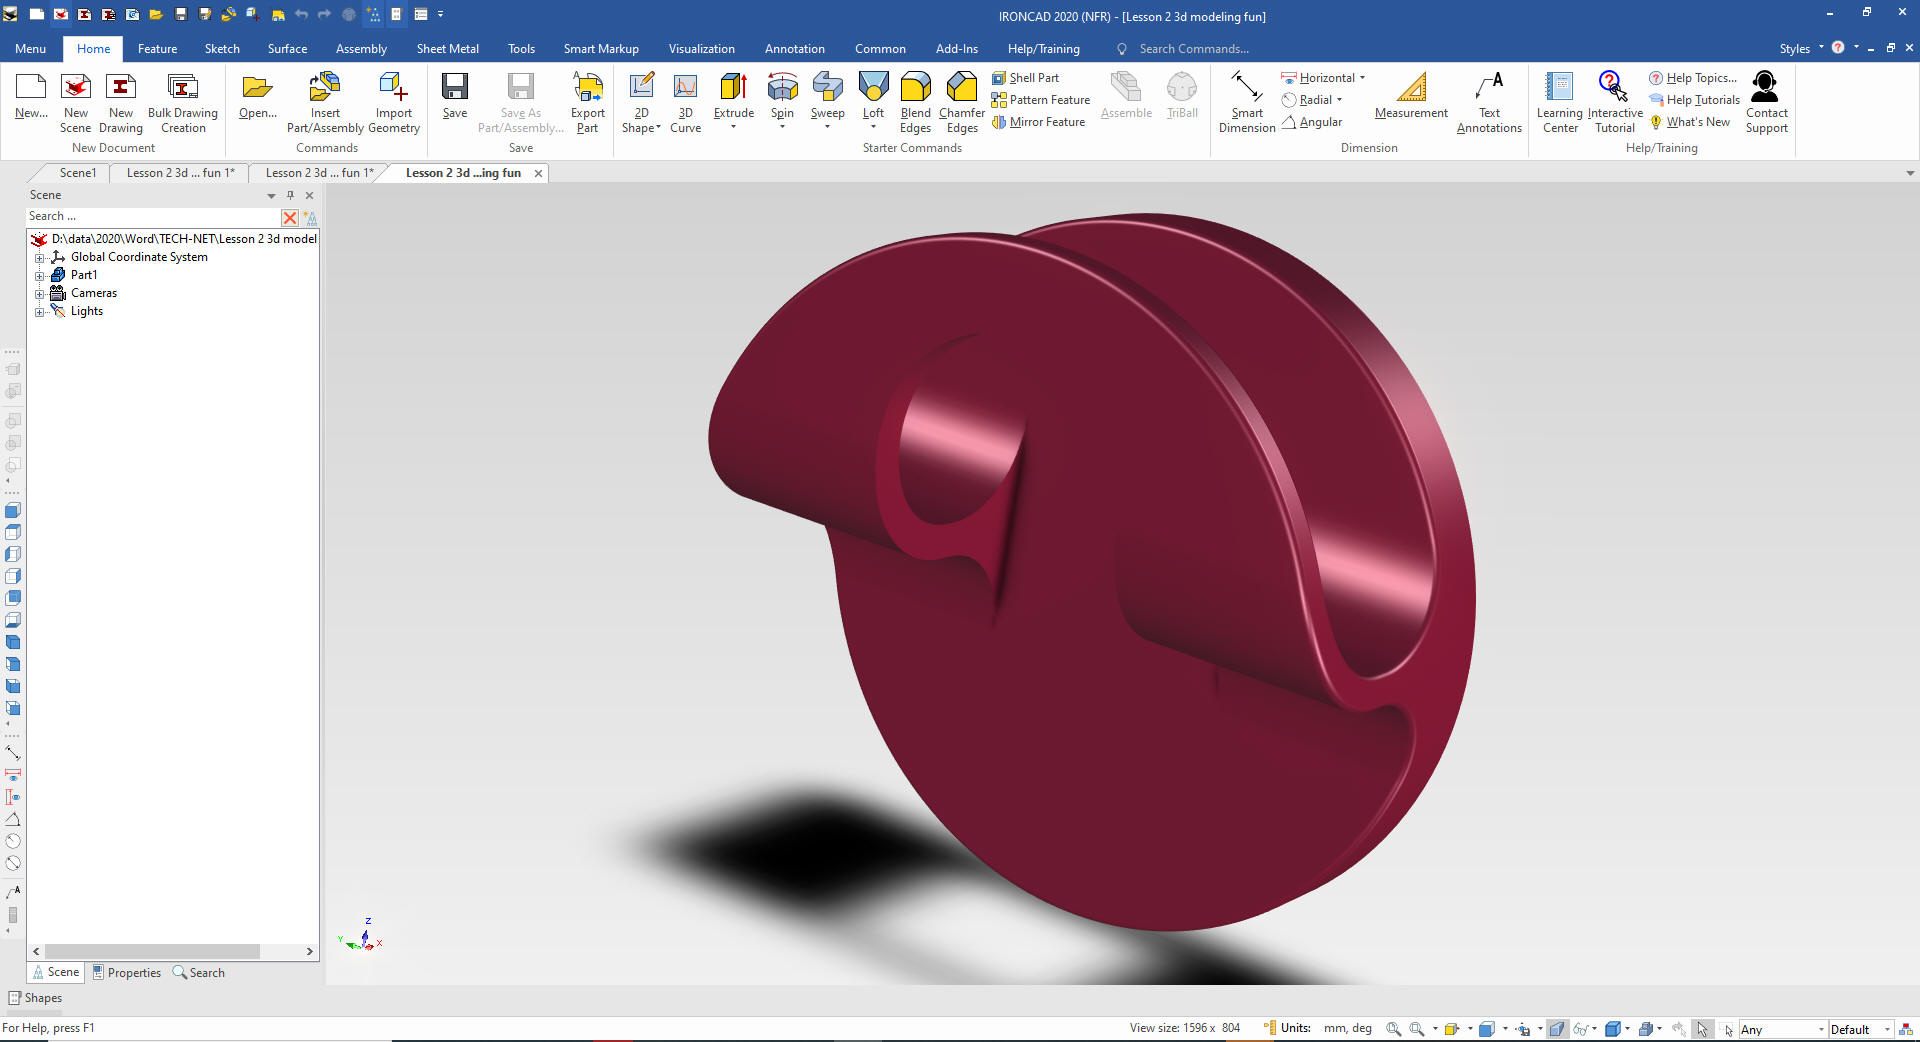
I saw this great simple
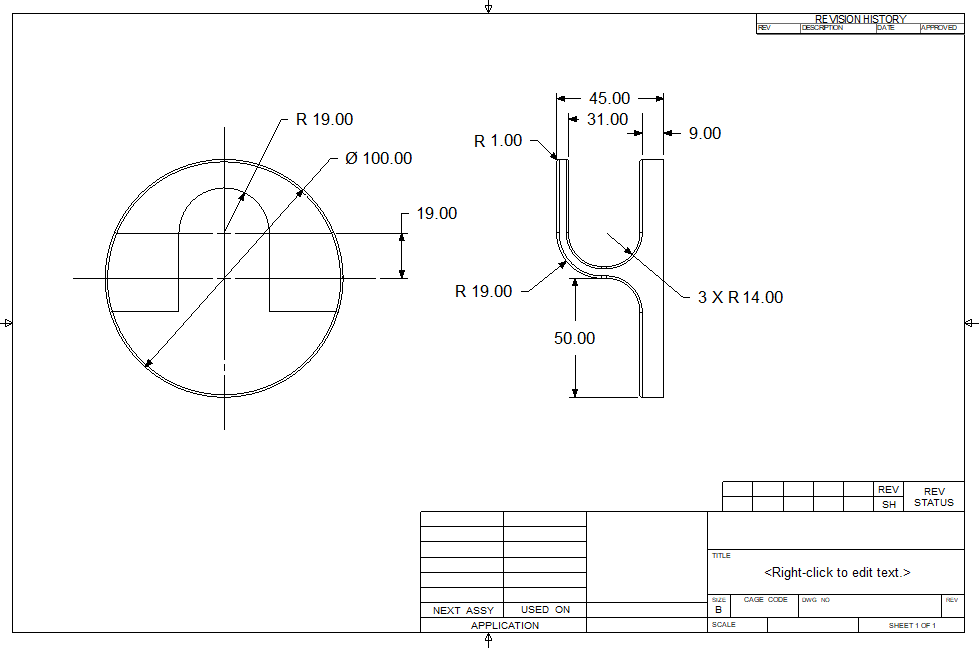
part. I thought of the cool way I would model this. It is funny a
Creo fellow said four steps! They count each sketch a step, I count
each entity created a step.
When I introduce IronCAD's very
flexible design paradigm I have a hard time to get the Pro/e clone
users, like Solidworks and other programs to understand the drag and
drop design paradigm.
IronCAD Drag and Drop is based on primitive
shape design but uses much more sophisticated Intellishapes
available in a standard or custom catalog. It is the only integrated
history/direct edit MCAD system. You usually use start with drag
and drop functionality then you have the option of sketching,
direct edit or surfacing when required, making it the most flexible modeling
system.
Watch how fun this is with drag and drop, shell and editing
an intellishape. A totally different, more productive and much more
"fun" to do!
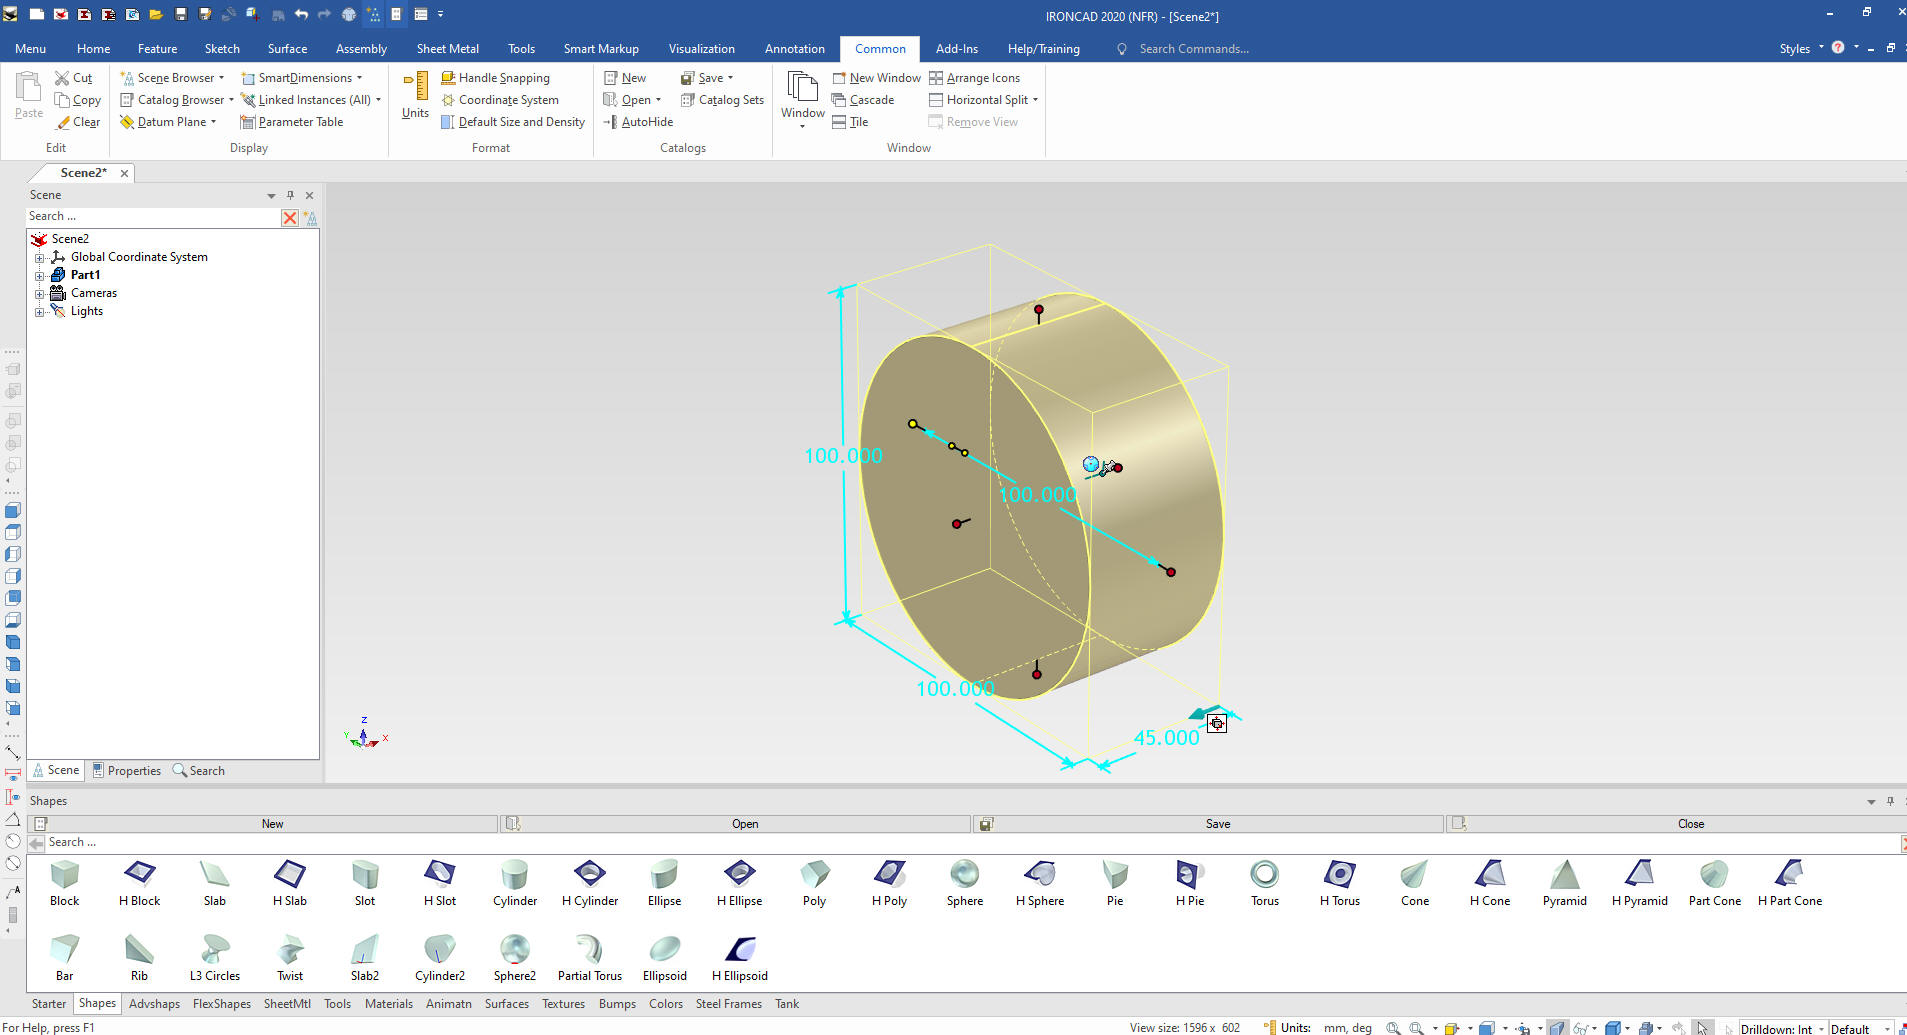
We will set the units to MM and drag and drop a
cylinder into the scene, rotate it with the Triball into the
preferred orientation and size it.
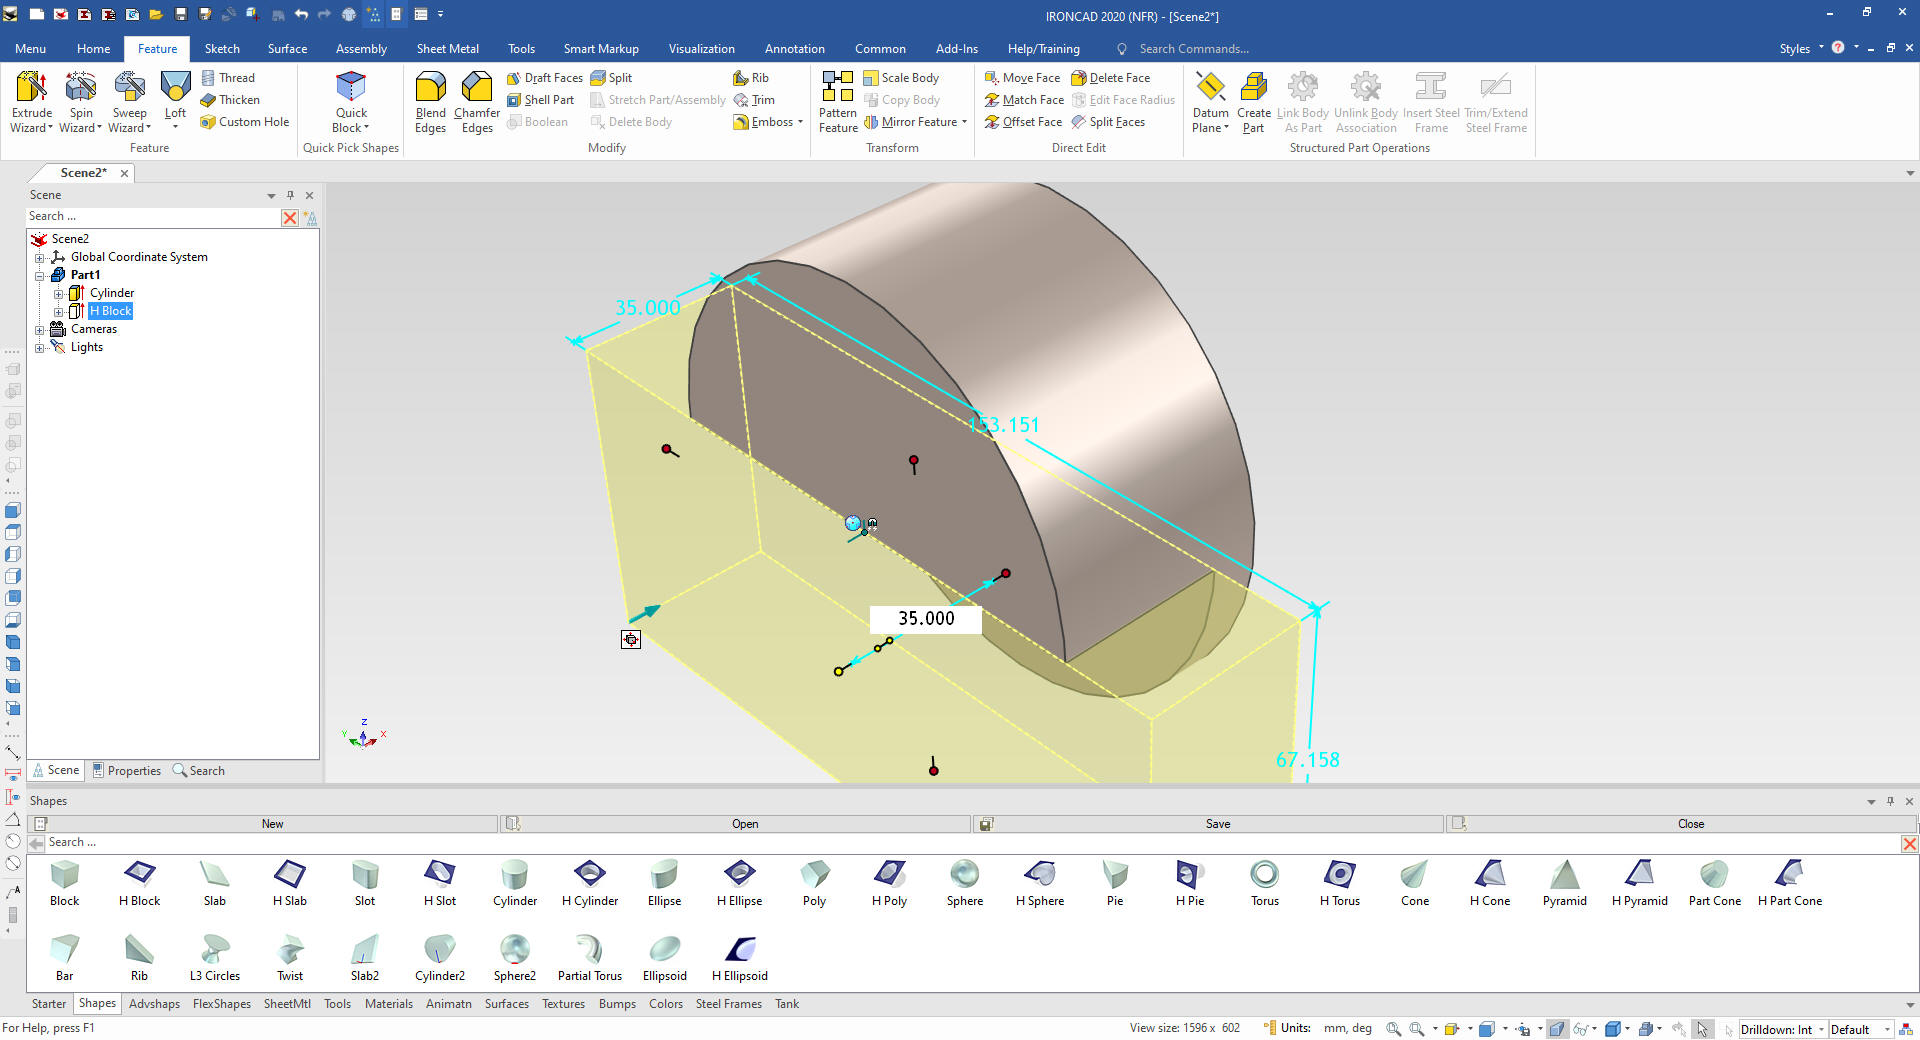
Now
drop a hole block, locate and size it by setting the top handle to
the center of the cylinder, pulling the side handles outside the
shape and set the depth to 35 mm
I have found that shelling is not one of features considered by many
of the constrained sketching only users. I look at a part and see
shapes. I can do this because I was first introduced to Boolean
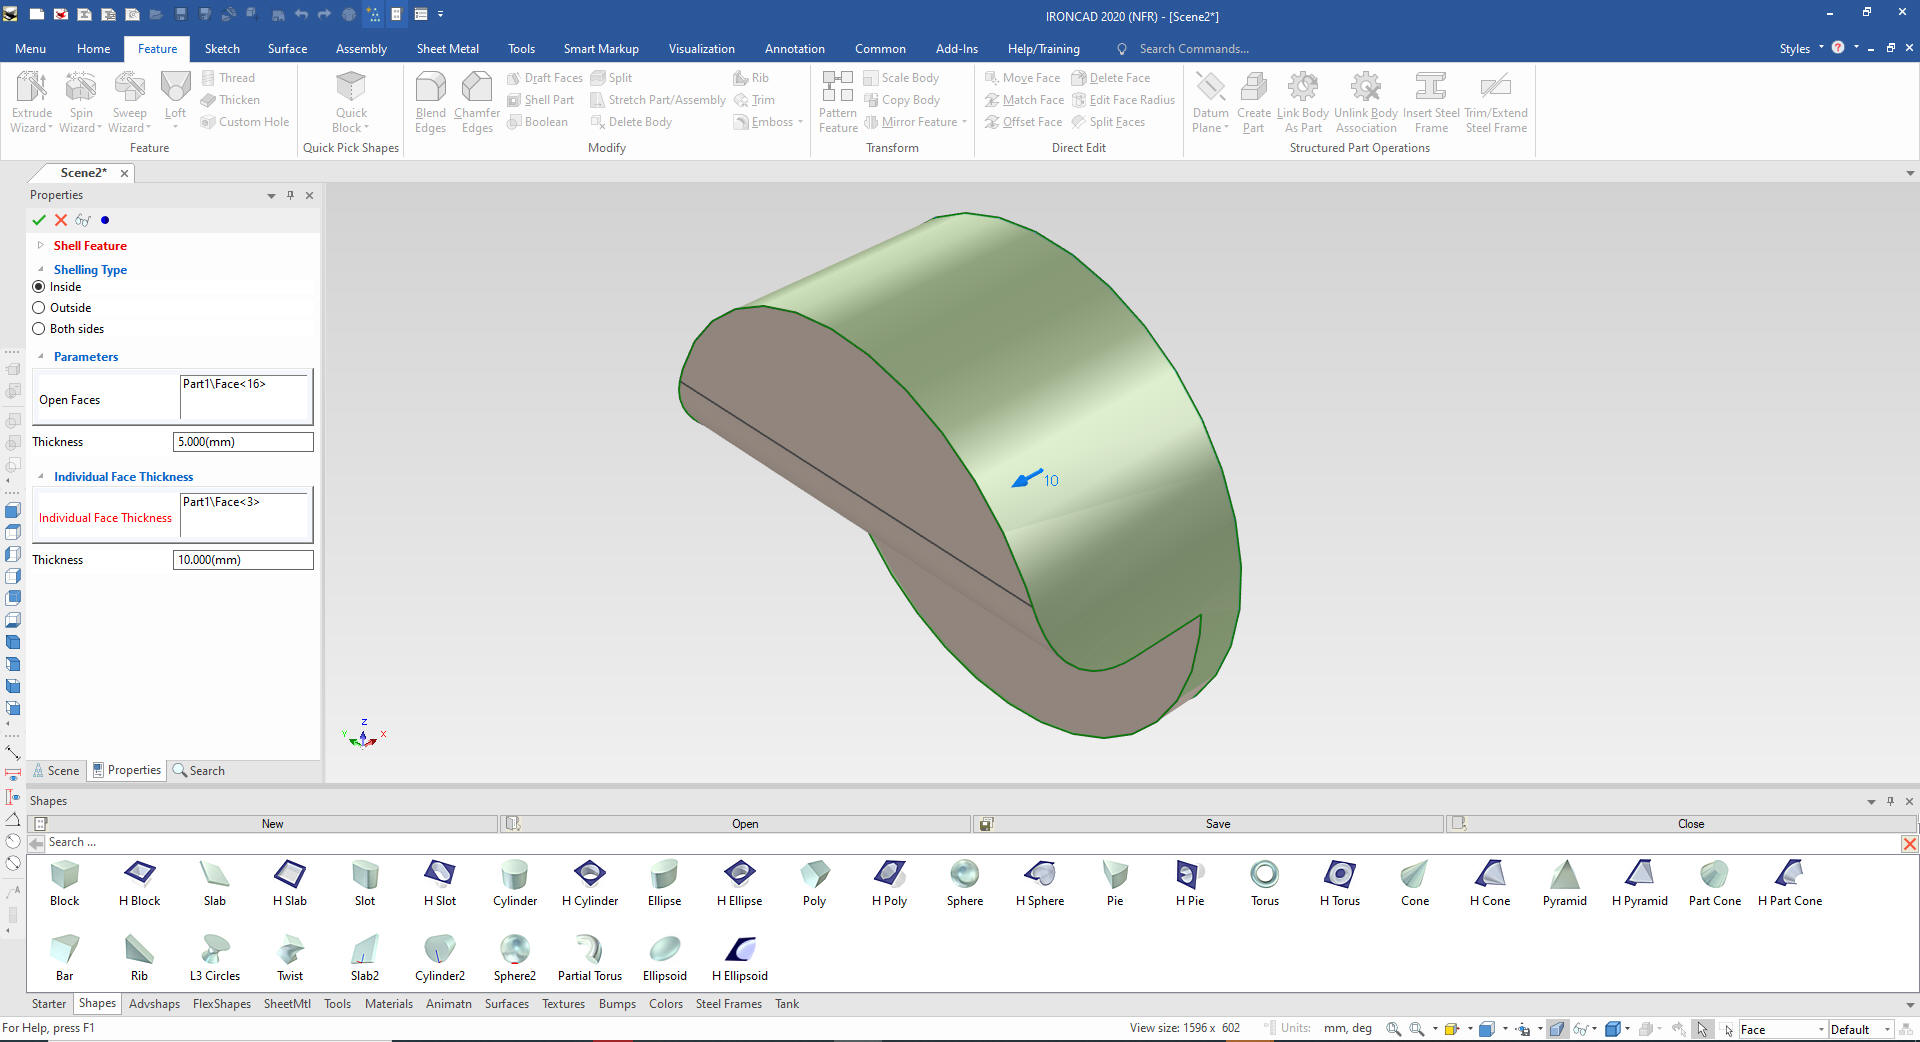
based solid modeling, now called direct edit. We will using shelling
here.
We put in the 19 mm fillet and shell the shape at 5 mm wall and 10
mm on the farside.
We
add the blends
We
will first do this next step by just dragging and dropping shapes.
We
drag a hole block to the front face and size it.
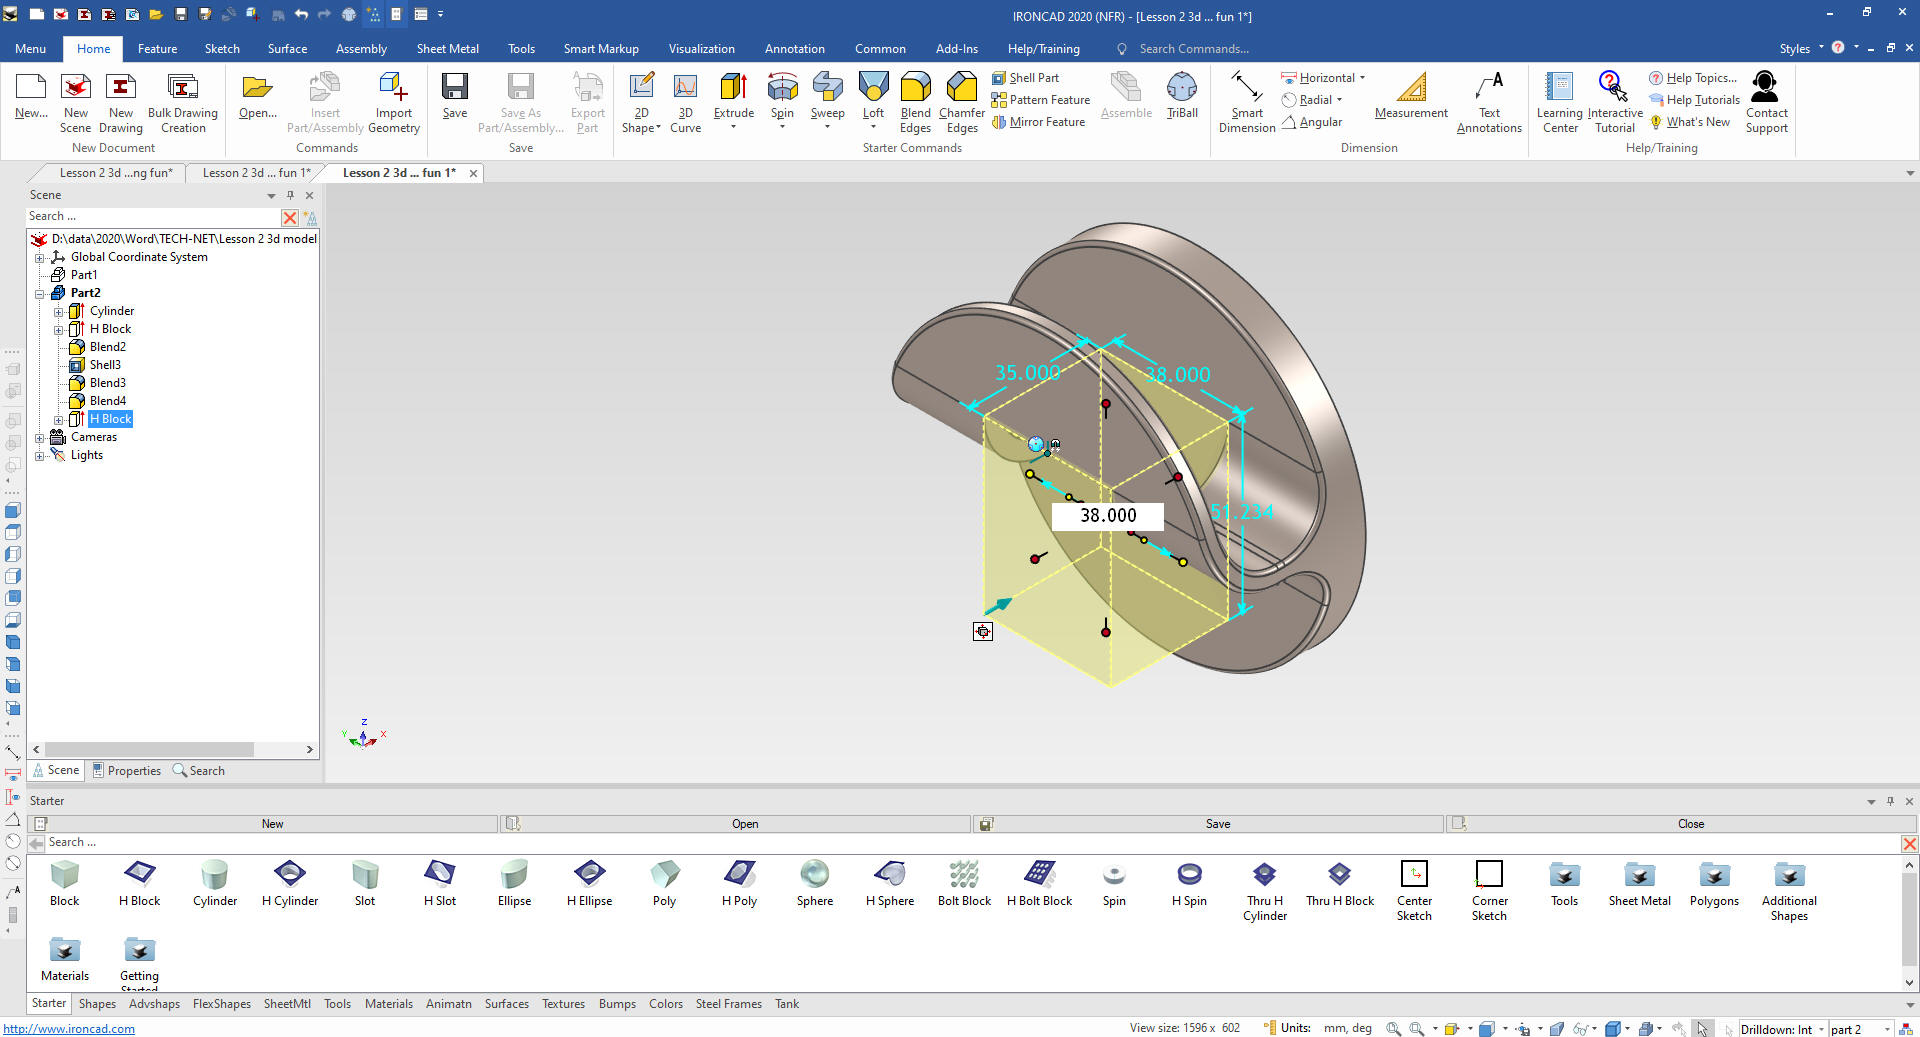
Then
drag and drop a hole cylinder to the midpoint of the top edge of the
block and size it. Cool huh? This type of design make you realize
you are creating basic features with Feature Based Modeling.
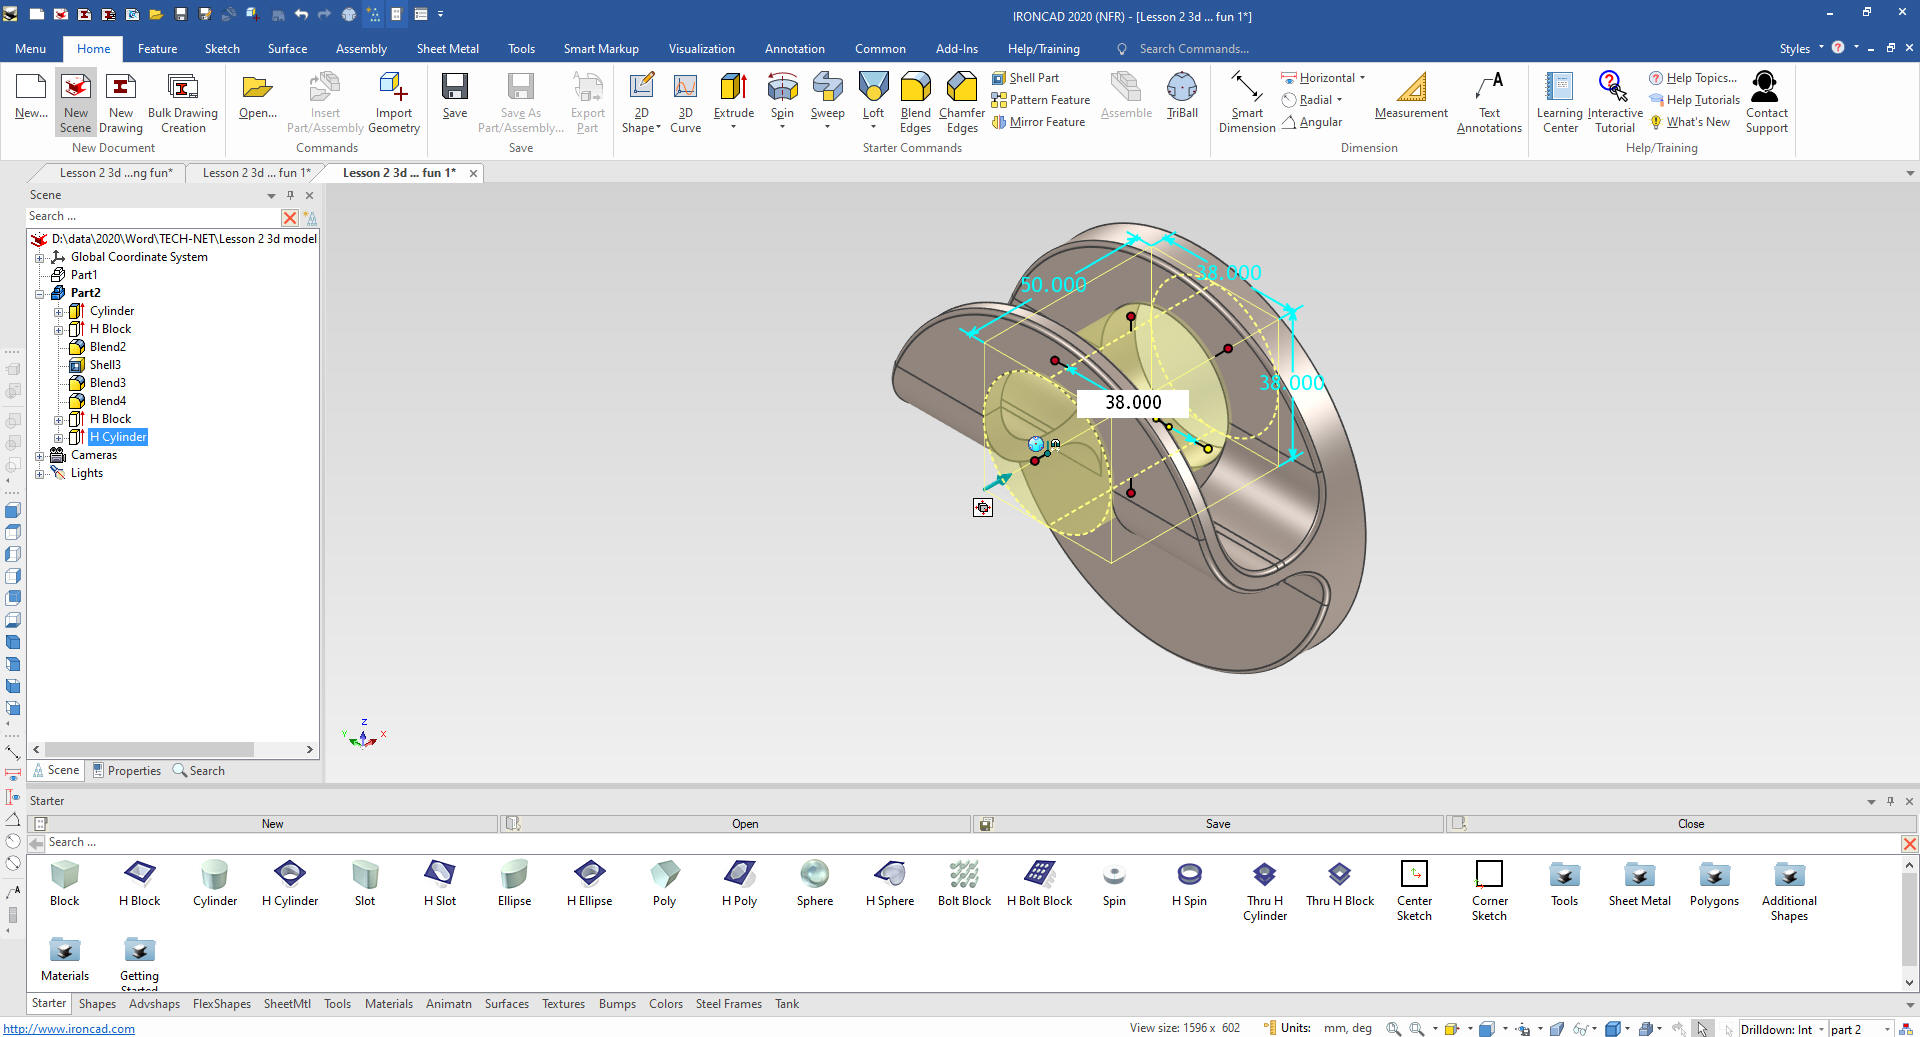
You
can see see the completed features.
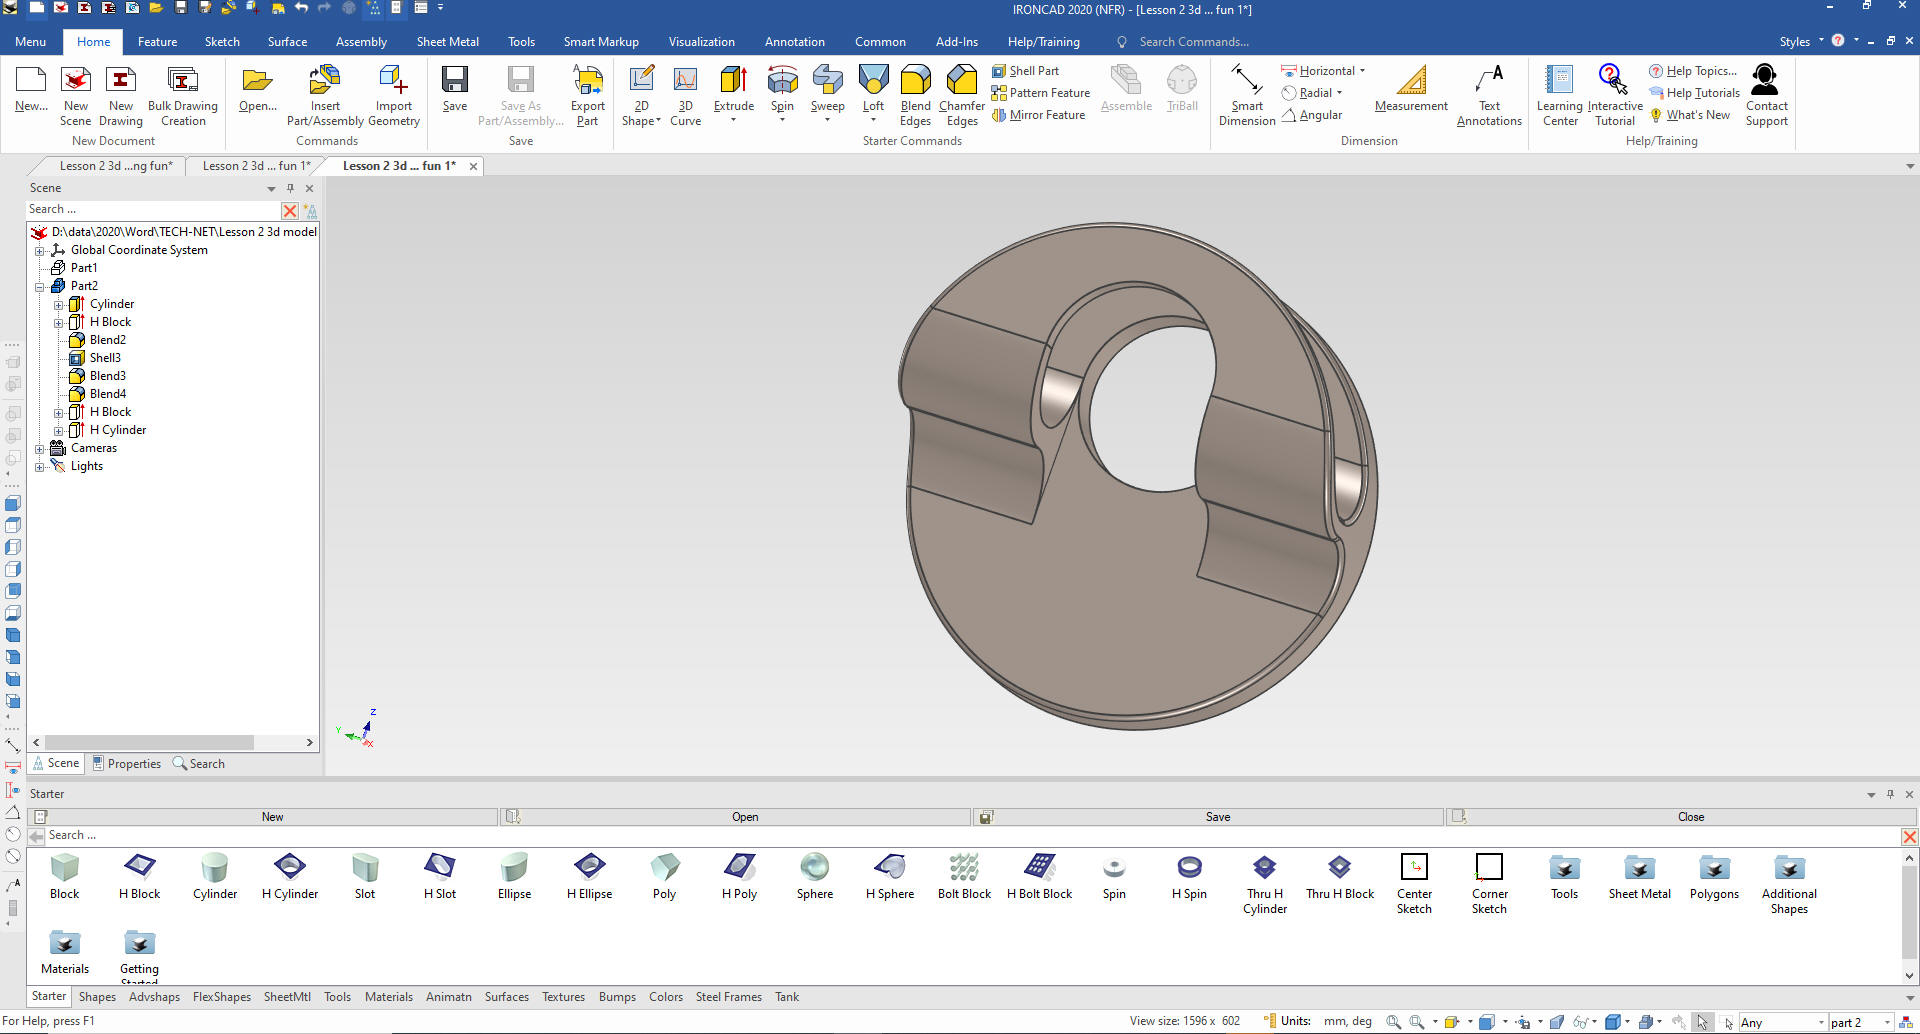
Alternate method
This is to show you that the Intellishapes
are made up of editable sketches. Watch as I edit this sketch to
create the desired effect.
Now we
drag and drop a hole cylinder on the front face and located and size
it.
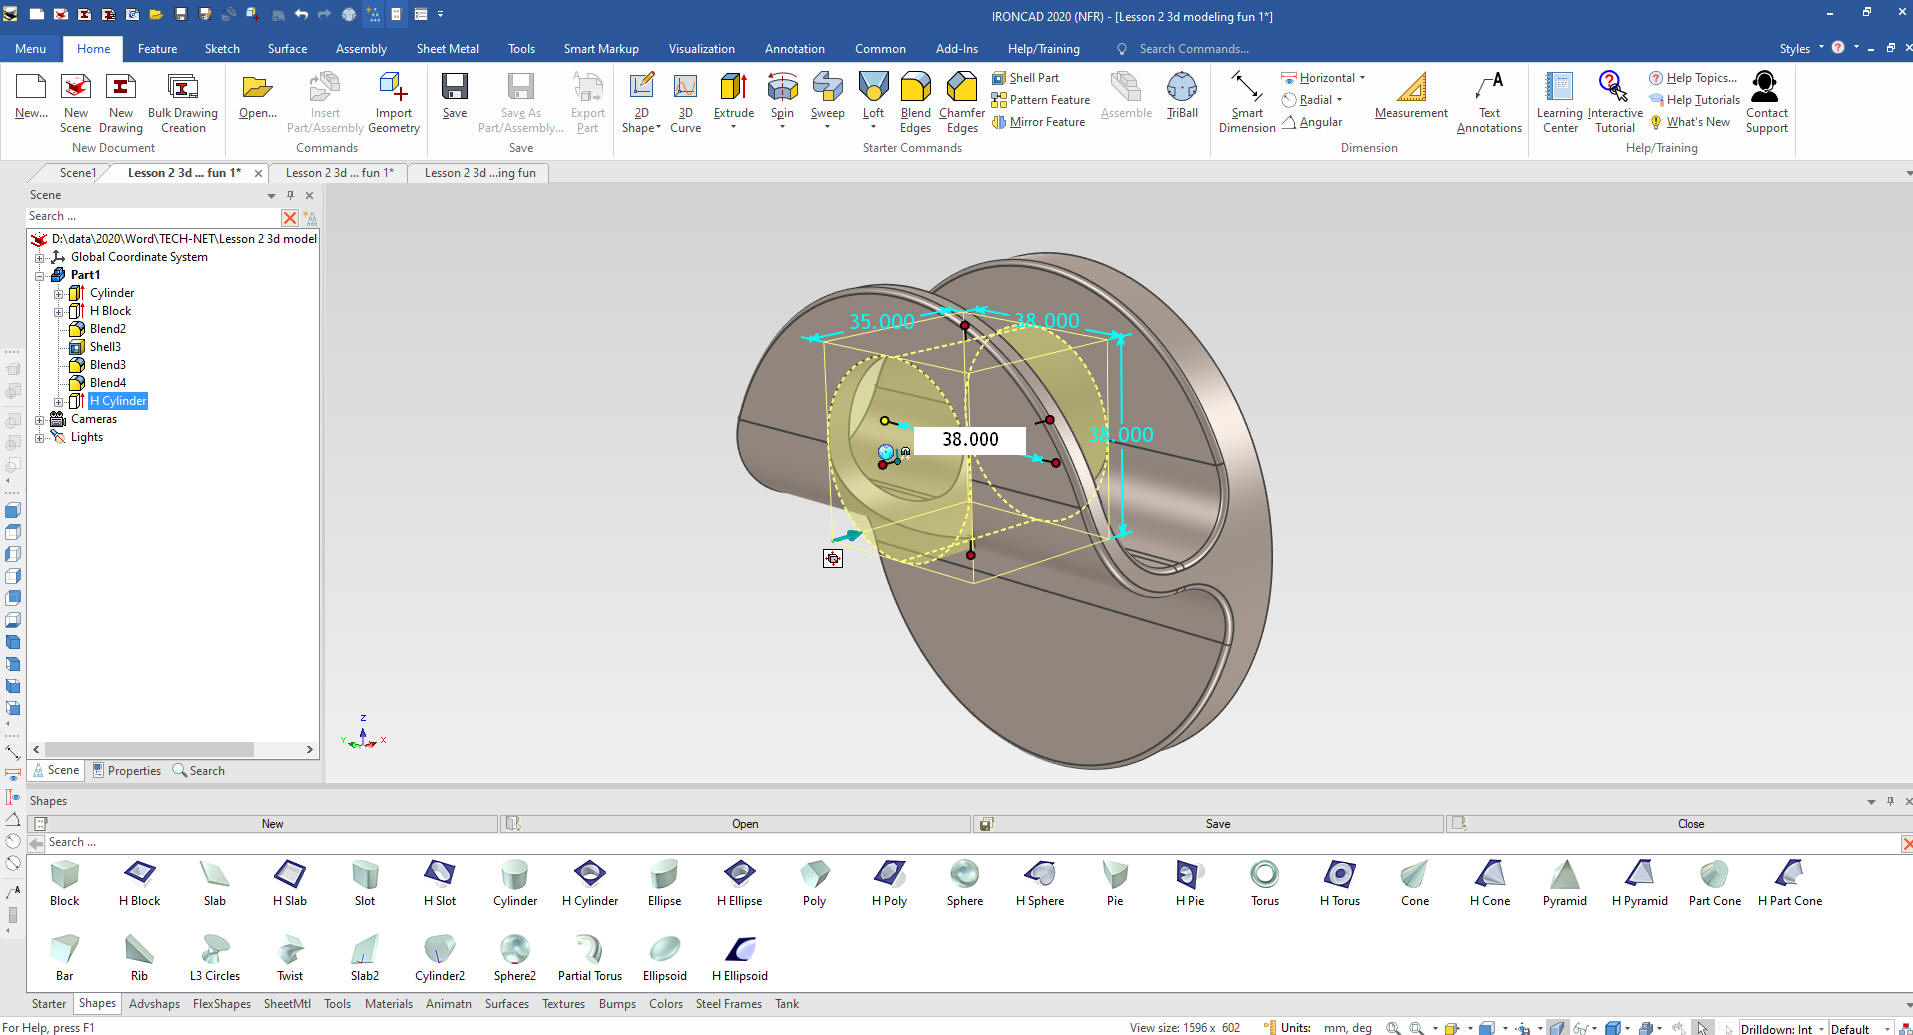
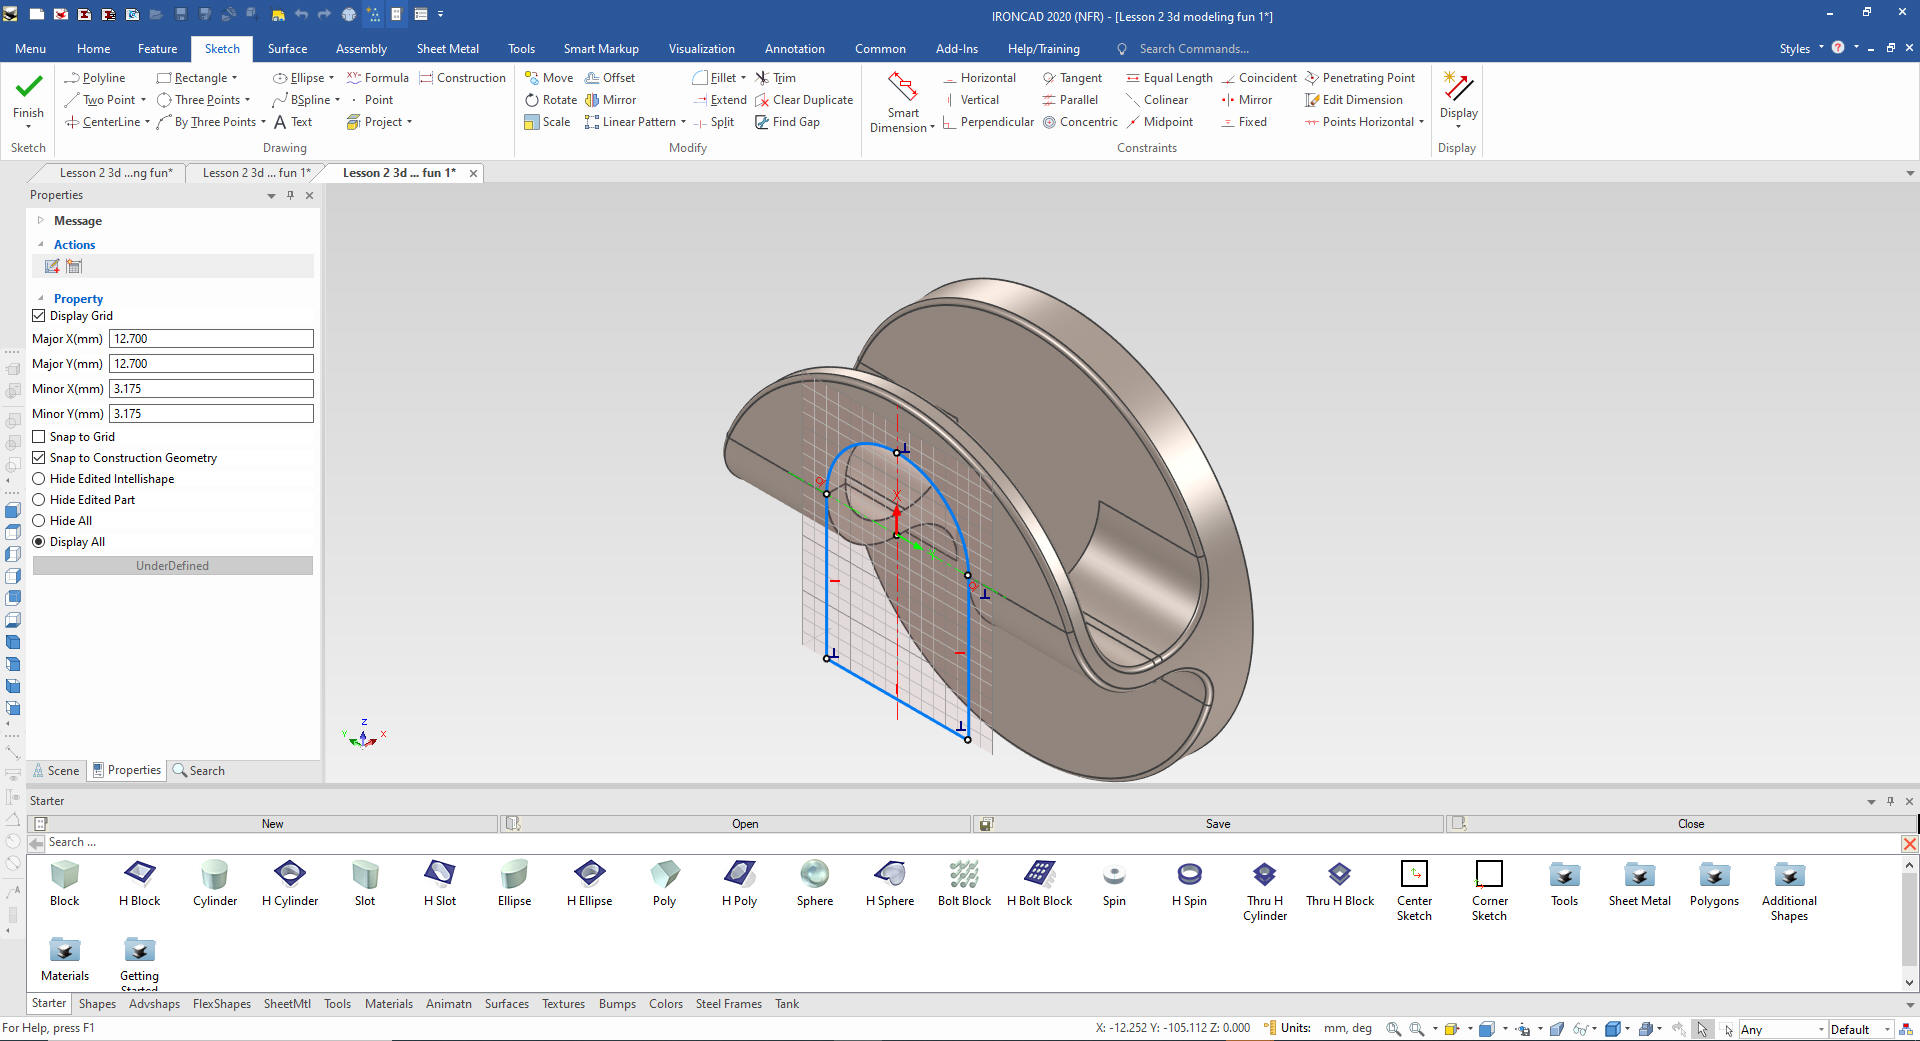
We then select the Intellishape hole feature right click and
select "Edit Cross Section" and edit the sketch as shown. So much
flexibility especially in design.
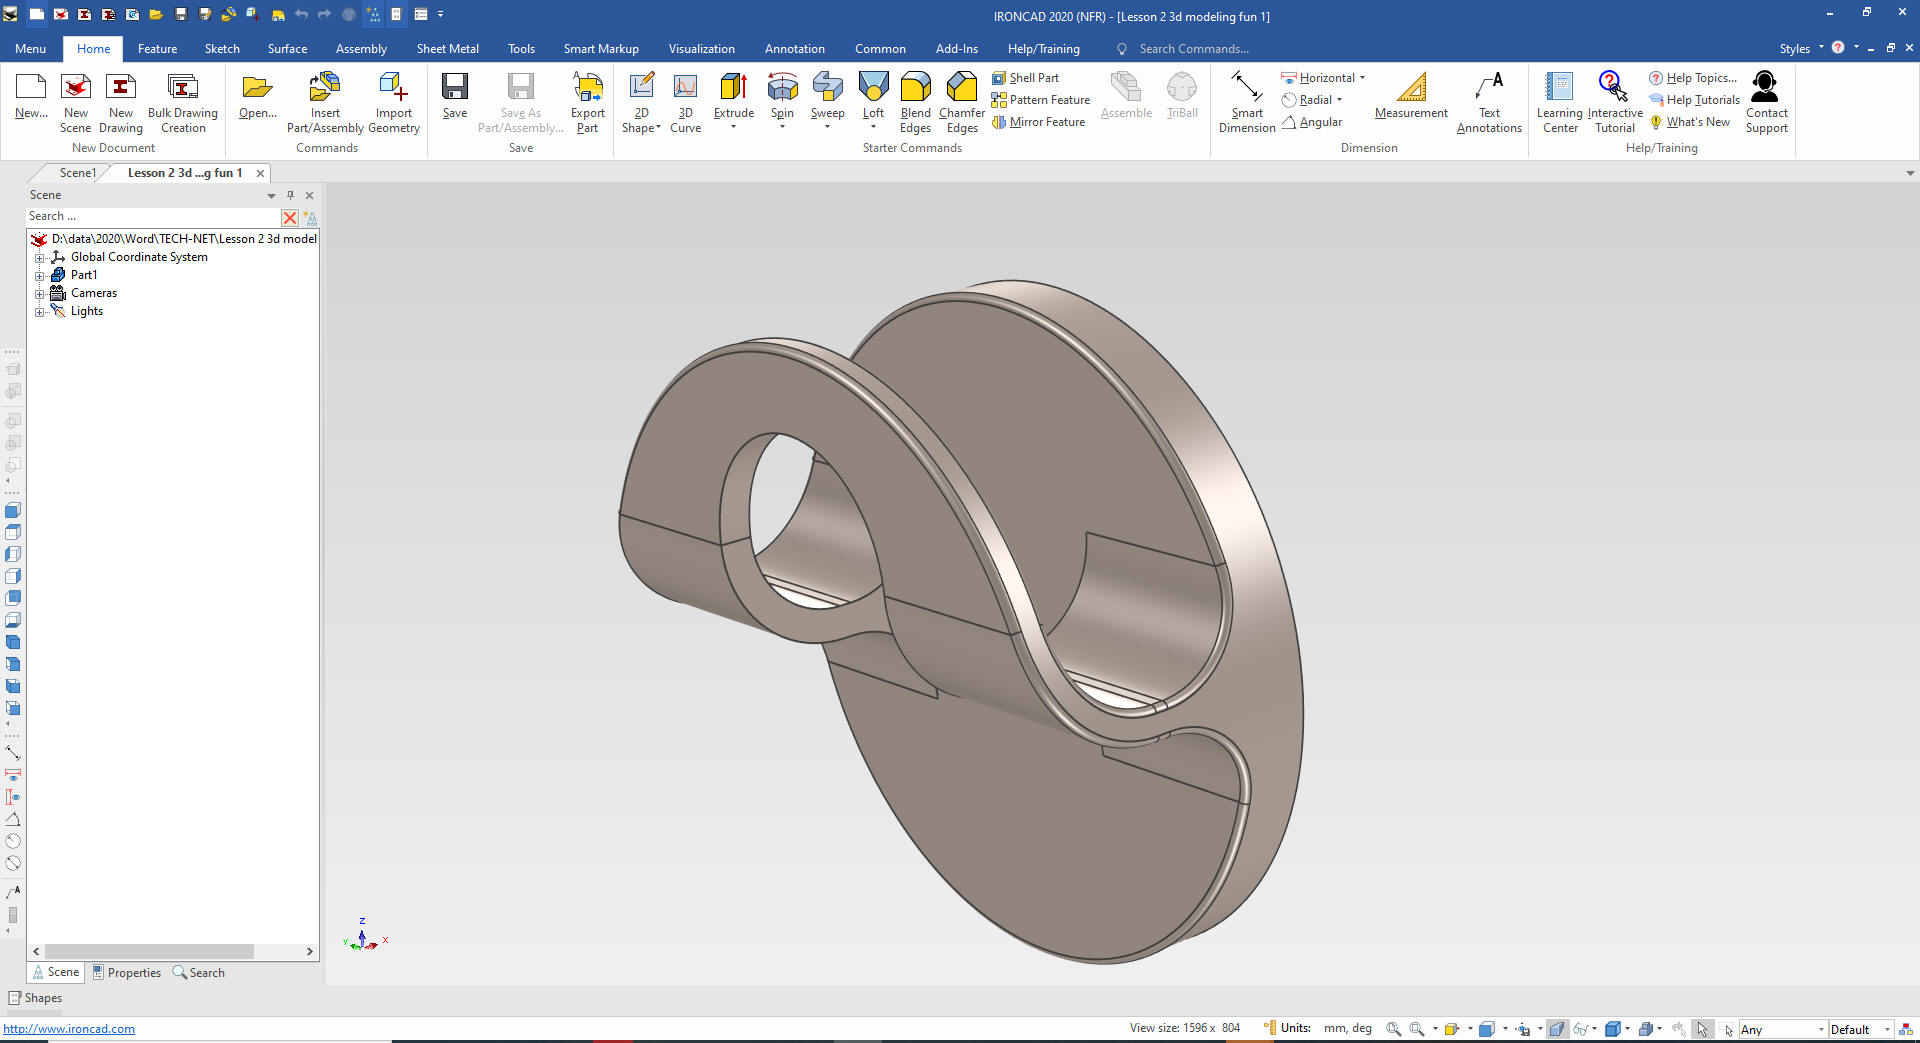
We add the blends and we are done. I know this was very simple but I
want to show a much different design paradigm! We set the catalog to
autohide. That is the way we usually work with it to have more scene
real estate.
If you would like
to try IronCAD, please download for a 30 day evaluation.
If you would like more information or download IronCAD
To get more familiar with
IronCAD please got through the following course.
Self-Paced Training Guide - Introduction Course
TECH-NET
Basic IronCAD Training
Learning IronCAD in ONE Minute!
After you feel
comfortable with IronCAD, import a part or an assembly from your
current system and start modifying the parts and assembly.
Assemblies will come into one single model space with all the parts
available, usually named and organized into assemblies and
sub-assemblies. IronCAD will import parts and assemblies from all of
the popular packages.
Give me a call if you have any
questions. I can set up a skype or go to meeting to show this part
or answer any of your questions on the operation of IronCAD. It
truly is the very best conceptual 3D CAD system.
Please review these other exercises that
show the unique productive advantages of IronCAD, Streamline Sketching and
Feature Based Modeling over the constrained sketching of the
experienced Major CAD system user.
IronCAD vs Fusion 360
IronCAD vs Solidworks
IronCAD vs Creo
IromCAD vs NX
IronCAD vs CATIA
IronCAD vs Inventor
IronCAD vs Onshape
IronCAD vs Solid Edge
You
can see more on modeling techniques with ZW3D.
3D
Modeling Techniques Defined
TECH-NET Engineering Services!
We sell and
support IronCAD and ZW3D Products and
provide engineering
services throughout the USA and Canada!
Why TECH-NET Sells IronCAD and ZW3D
If you are interested in adding professional
hybrid modeling capabilities or looking for a new solution to
increase your productivity, take some time to download a fully
functional 30 day evaluation and play with these packages. Feel free
to give me a call if you have any questions or would like an on-line
presentation.
|
|

