Learn Solidworks in
Five Minutes! So?
Learn IronCAD in "ONE" Minute"30 Seconds"!
I hope you all realize I am doing this tongue in
cheek. No one could learn a 3D MCAD package in 30 seconds, one
minute or even five minutes, but it has been a fun exercise. Take a
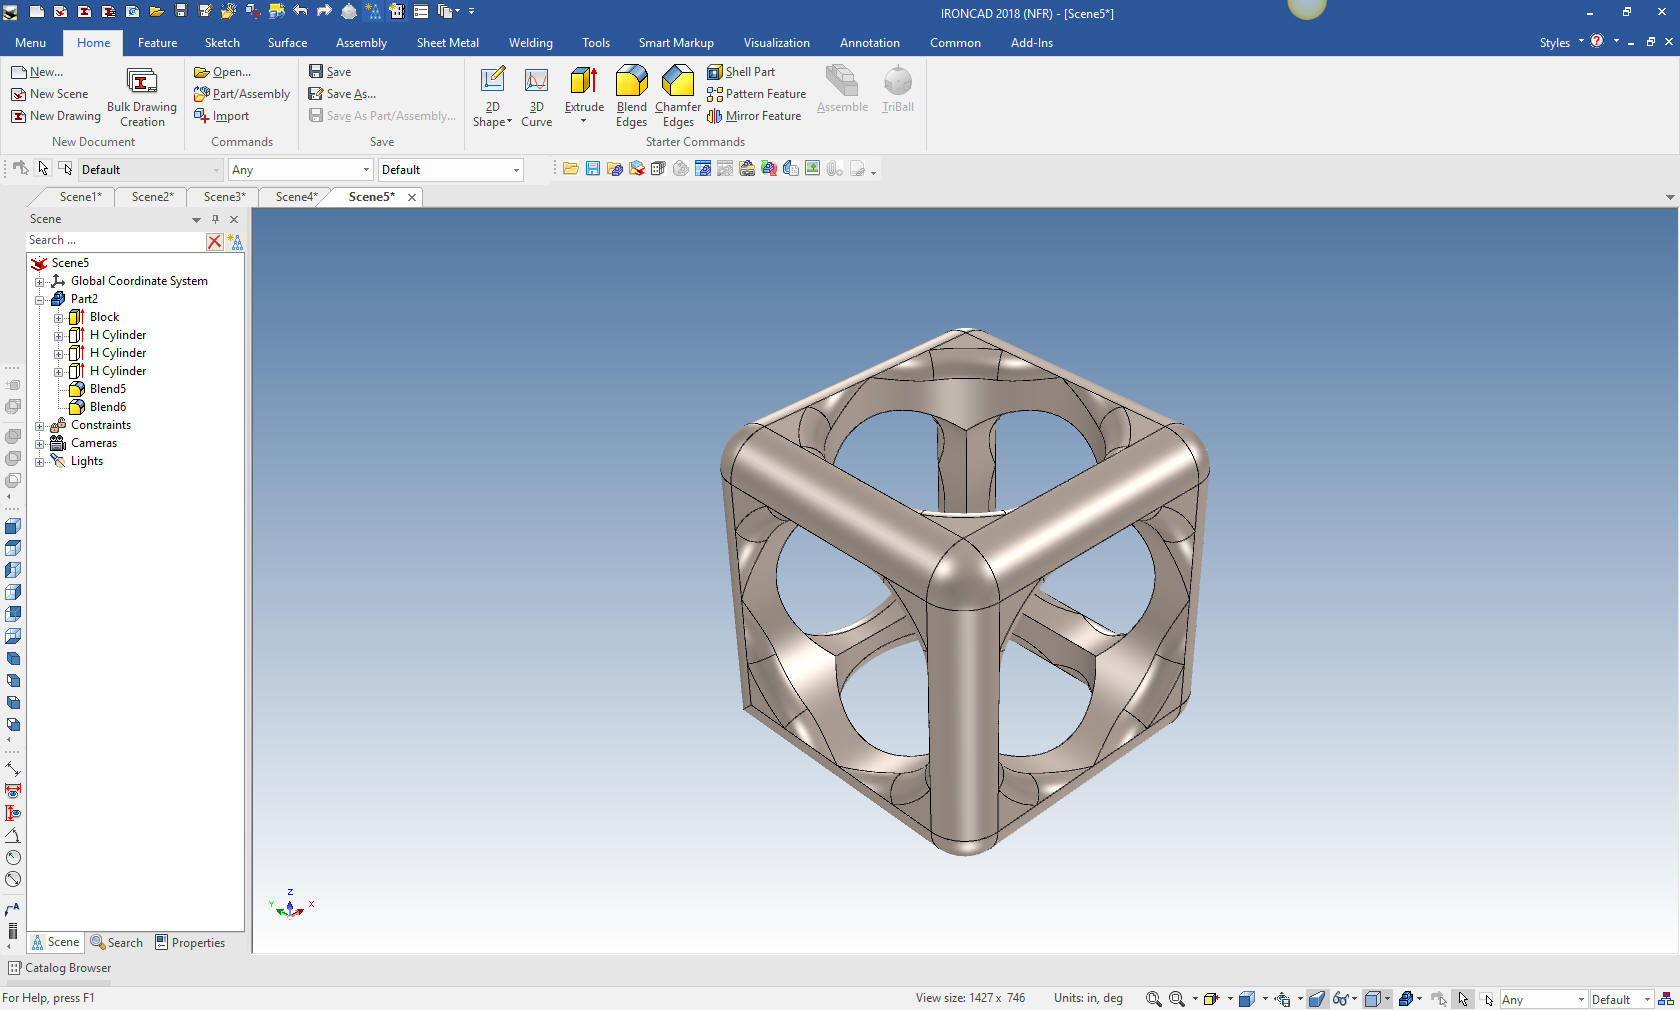
look below, I have added two new ways of creating this part in IronCAD.
Take a look at the incredible flexible modeling options available to
us. It is fun!
When I saw this video, I thought I would
show this simple part done in IronCAD. It shows the time consuming
extra steps of constrained sketching so prevalent in the use of Solidworks and all of the
Pro/e (Creo) paradigm clones.
No, not all 3D MCAD is based on constrained sketching!
IronCAD stepped out of that box long before constrained sketching was the
de facto standard, with the introduction of Trispectives in 1995.
Sadly the industry was influenced by the hype and marketing efforts of
PTC's Pro/e (Creo) and its clone, Dassault's Solidworks.
What a stark difference in
modeling. In this exercise there is no sketching just dragging and dropping
Intellishapes
from standard catalogs. So easy, so fast and so pleasurable.
Here is the original Video
Learn Solidworks in Five Minutes!
Here is our own Video
done by our international sales manager based in England, Richard Serna aka “IronCAD's
Geico Gecko!” When you watch the video you will see why!
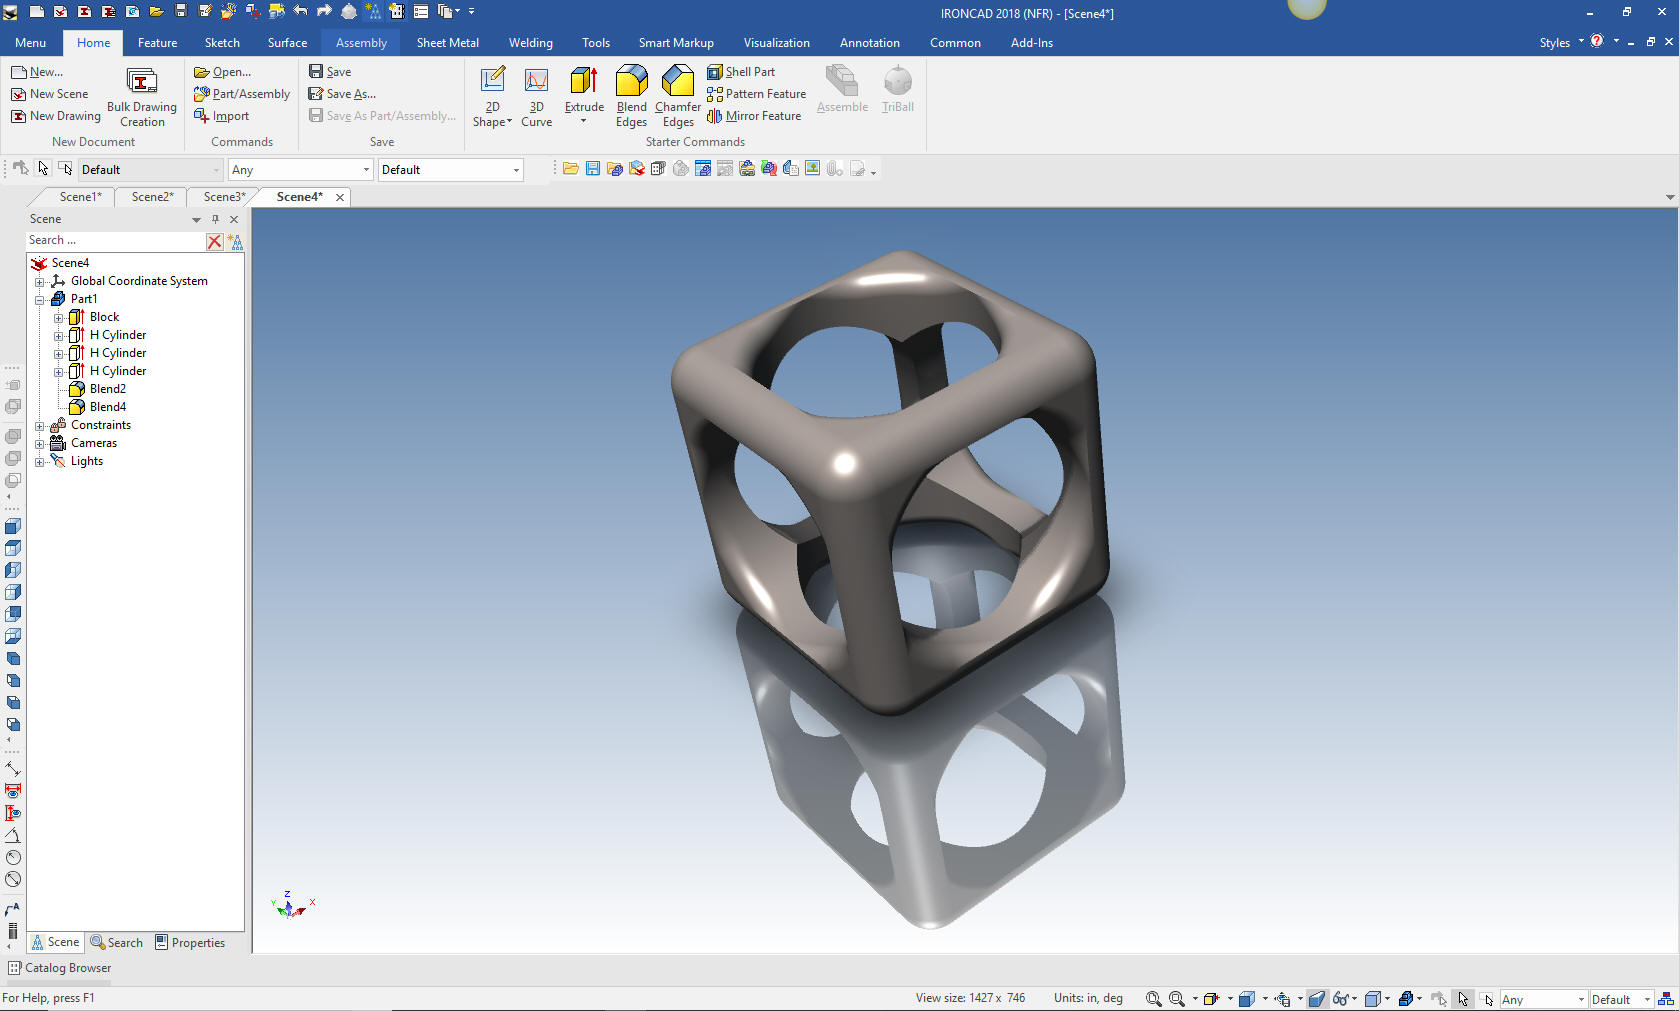
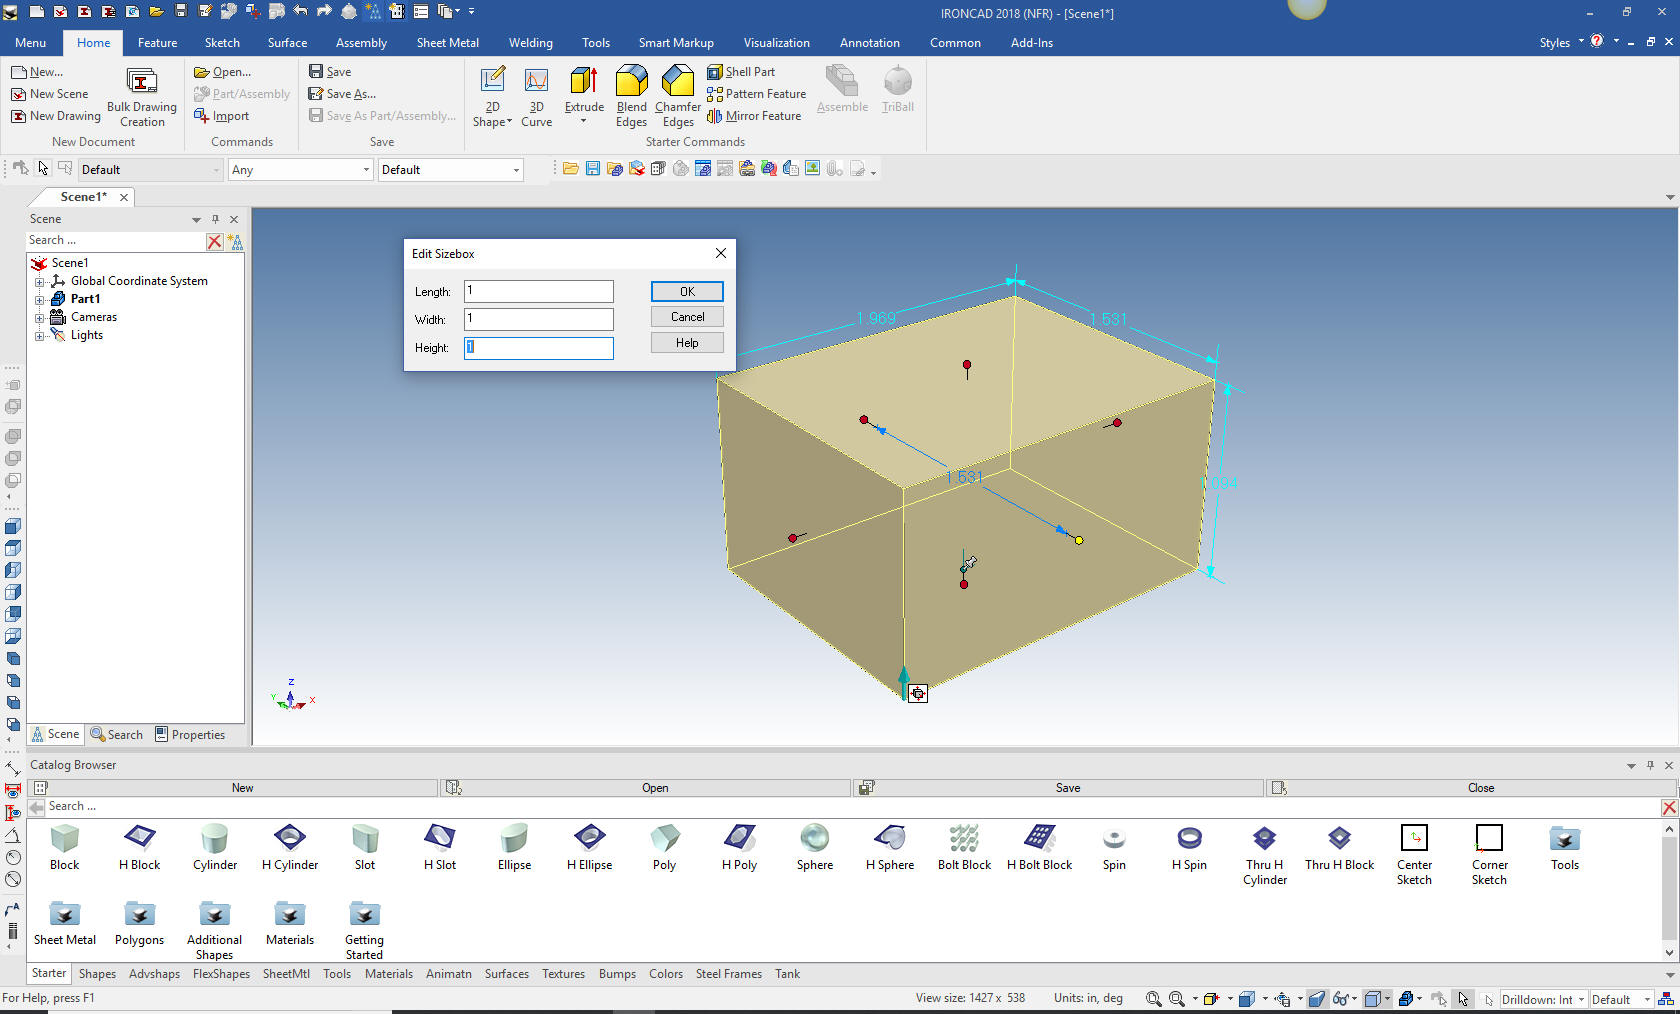
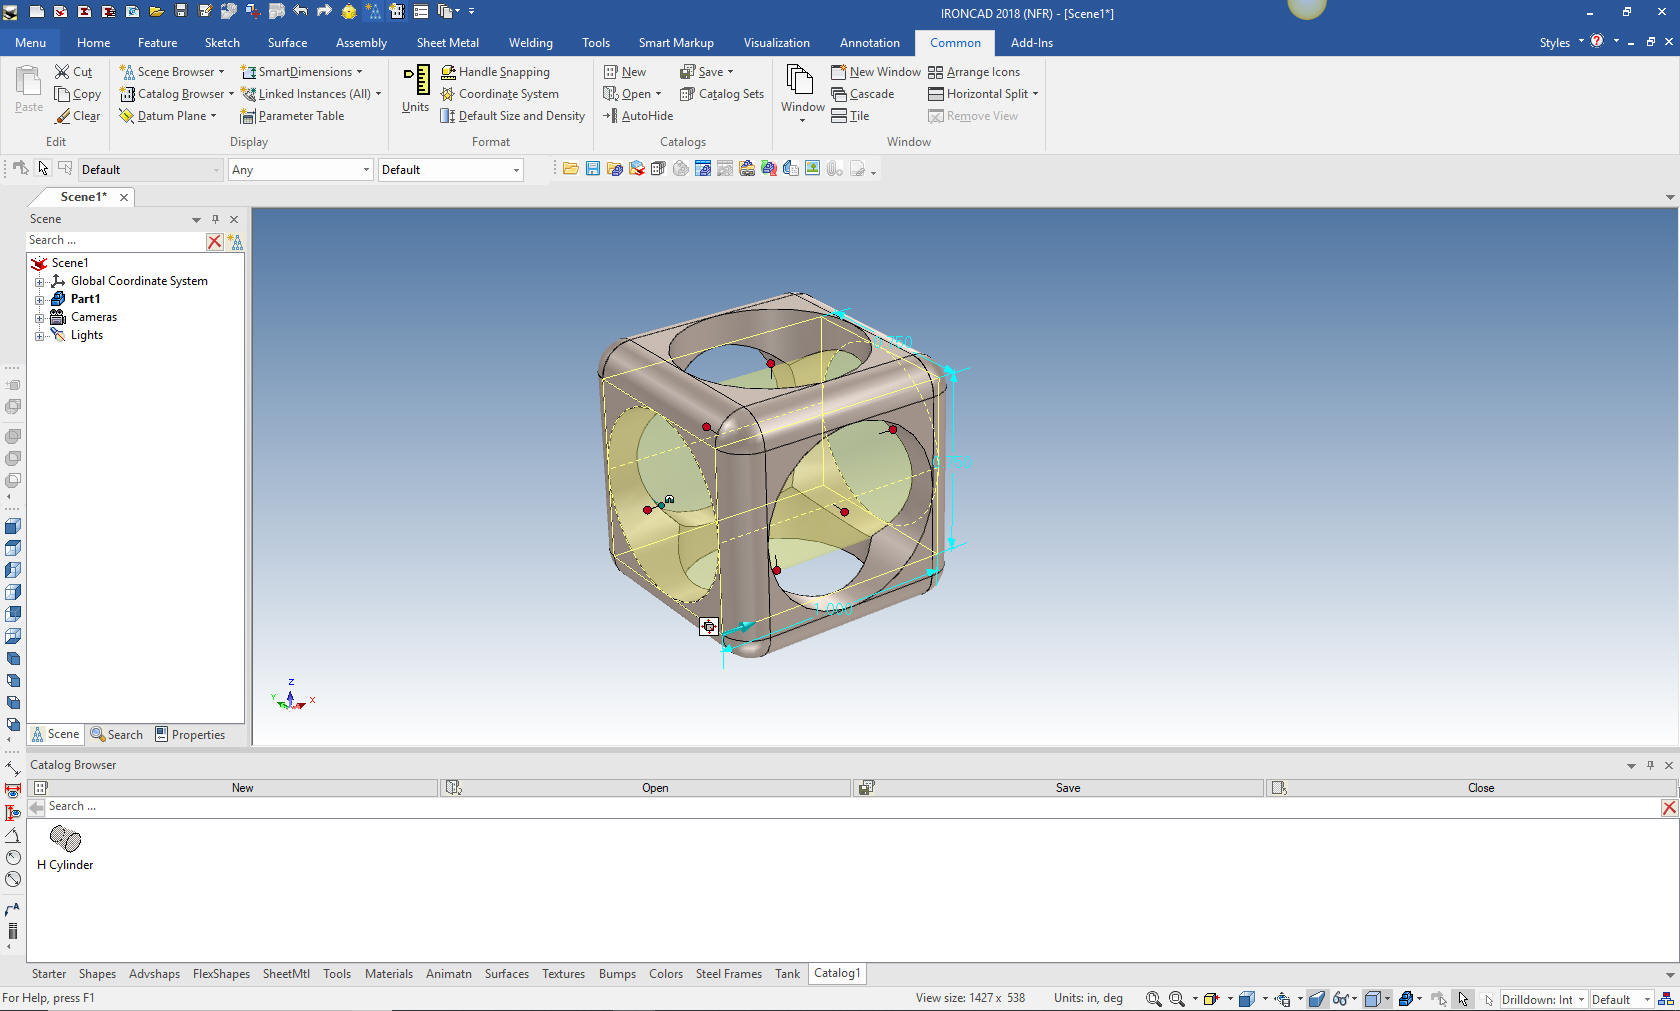
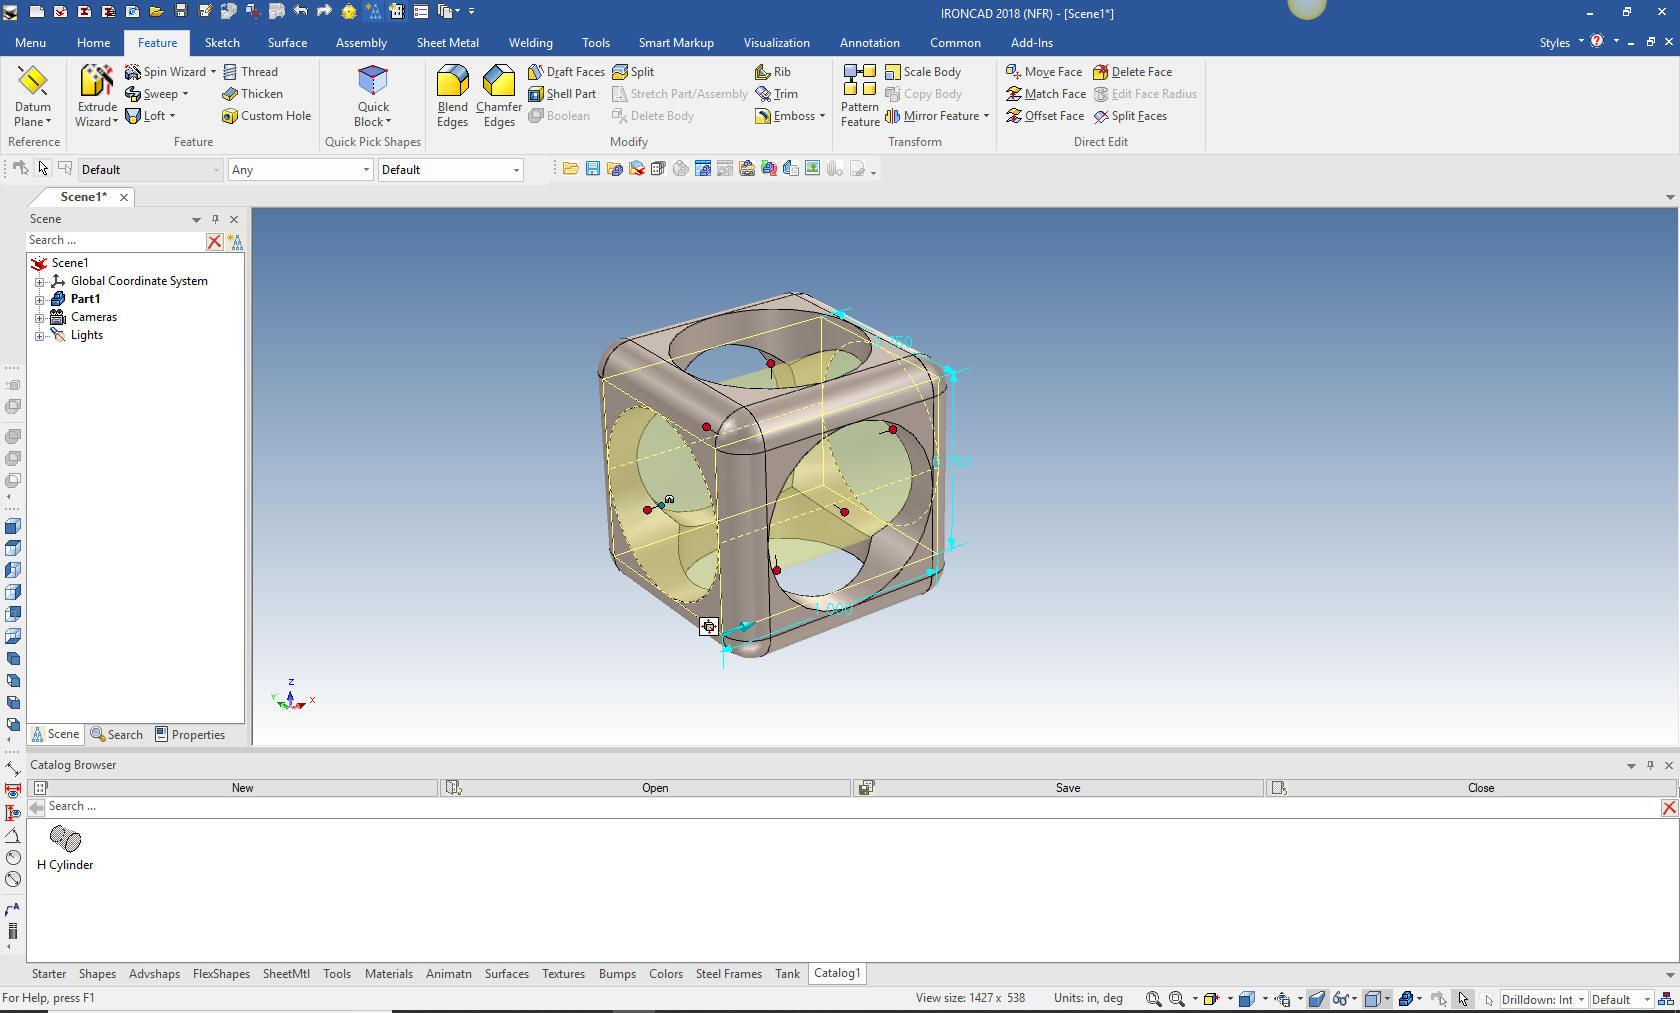
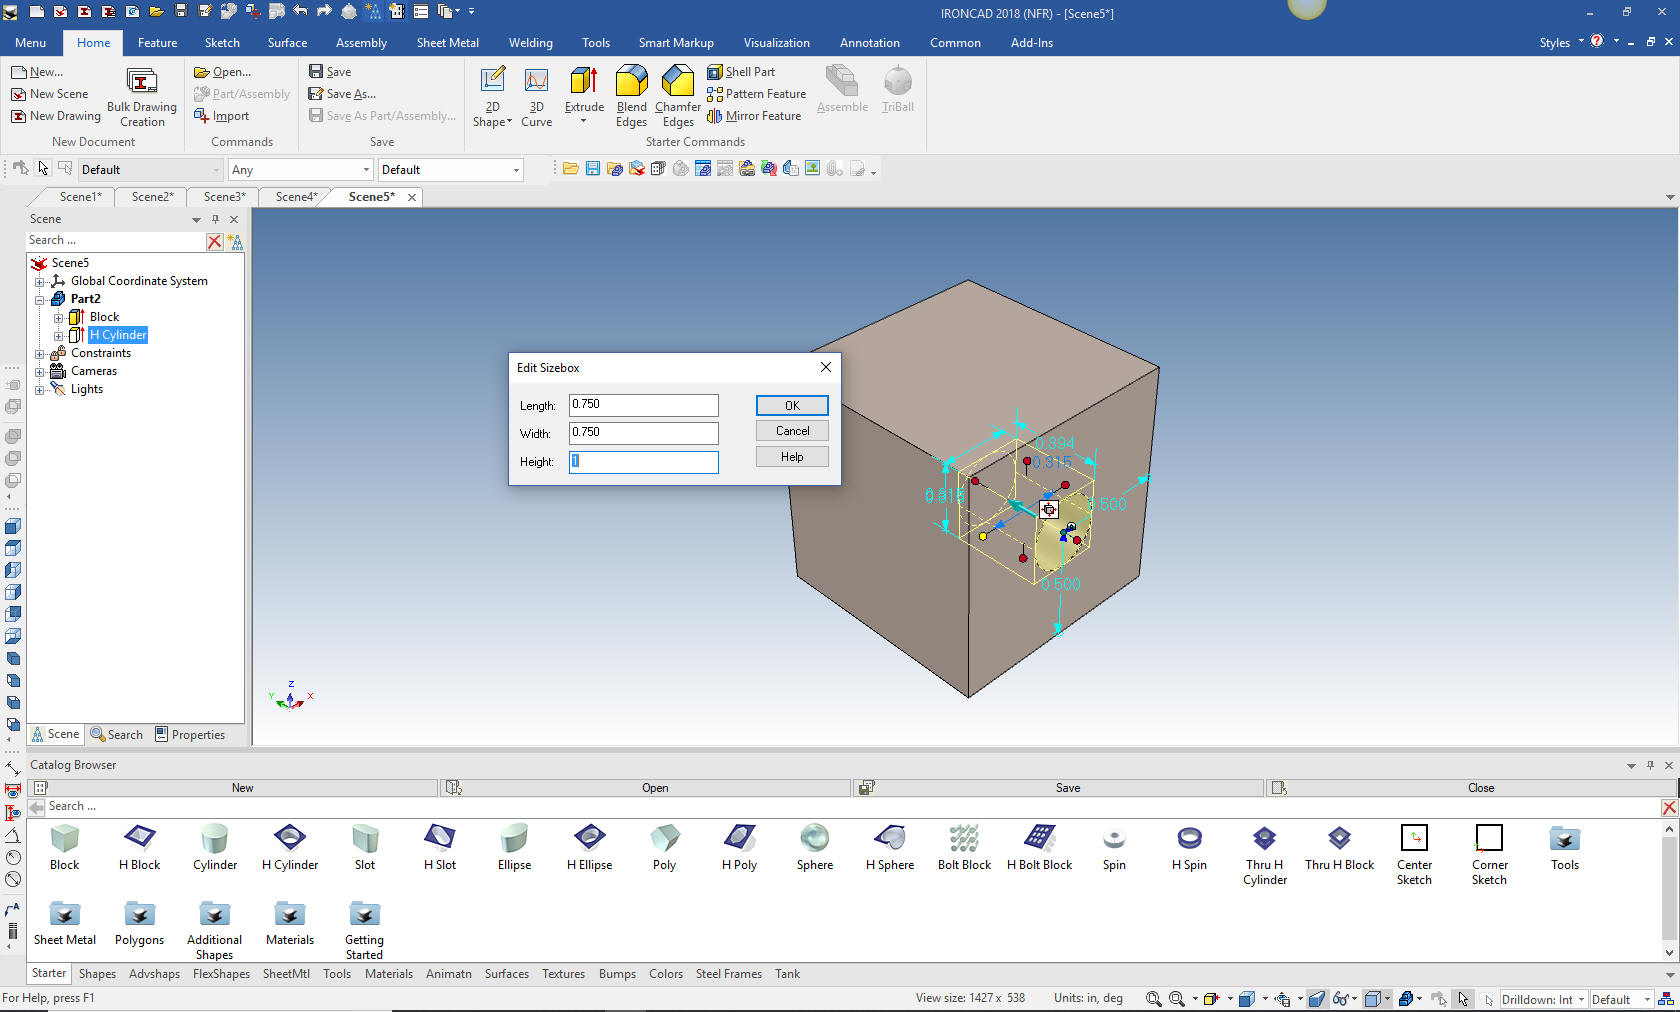
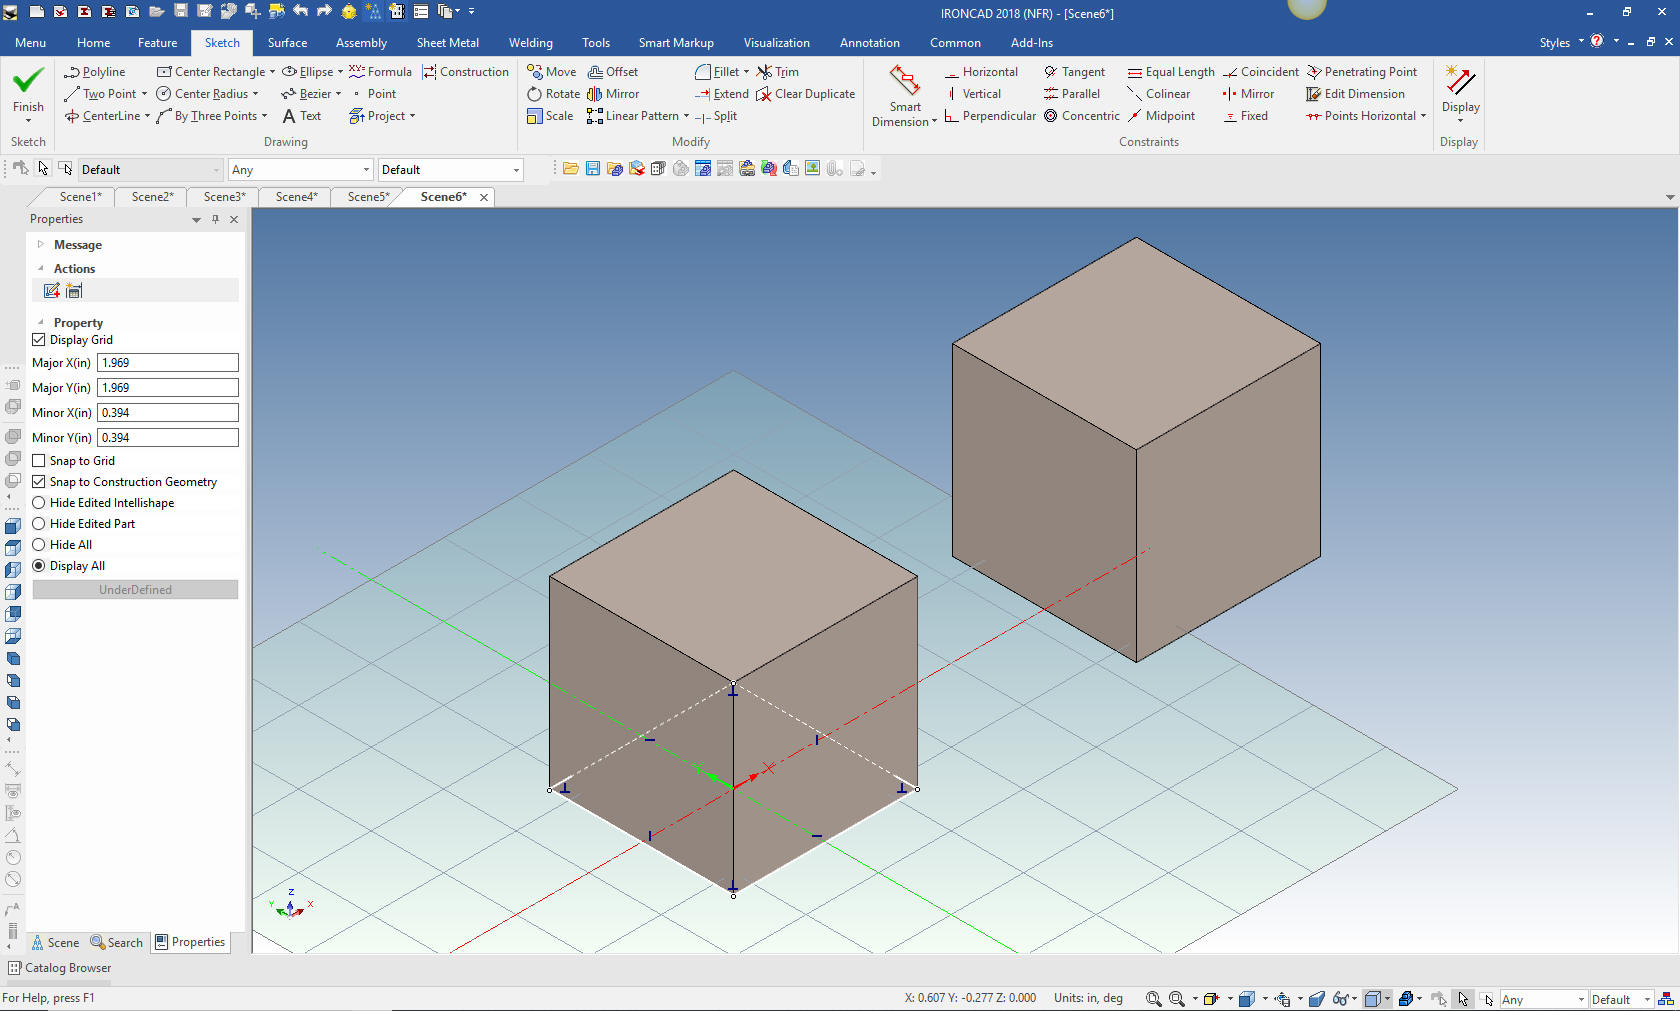
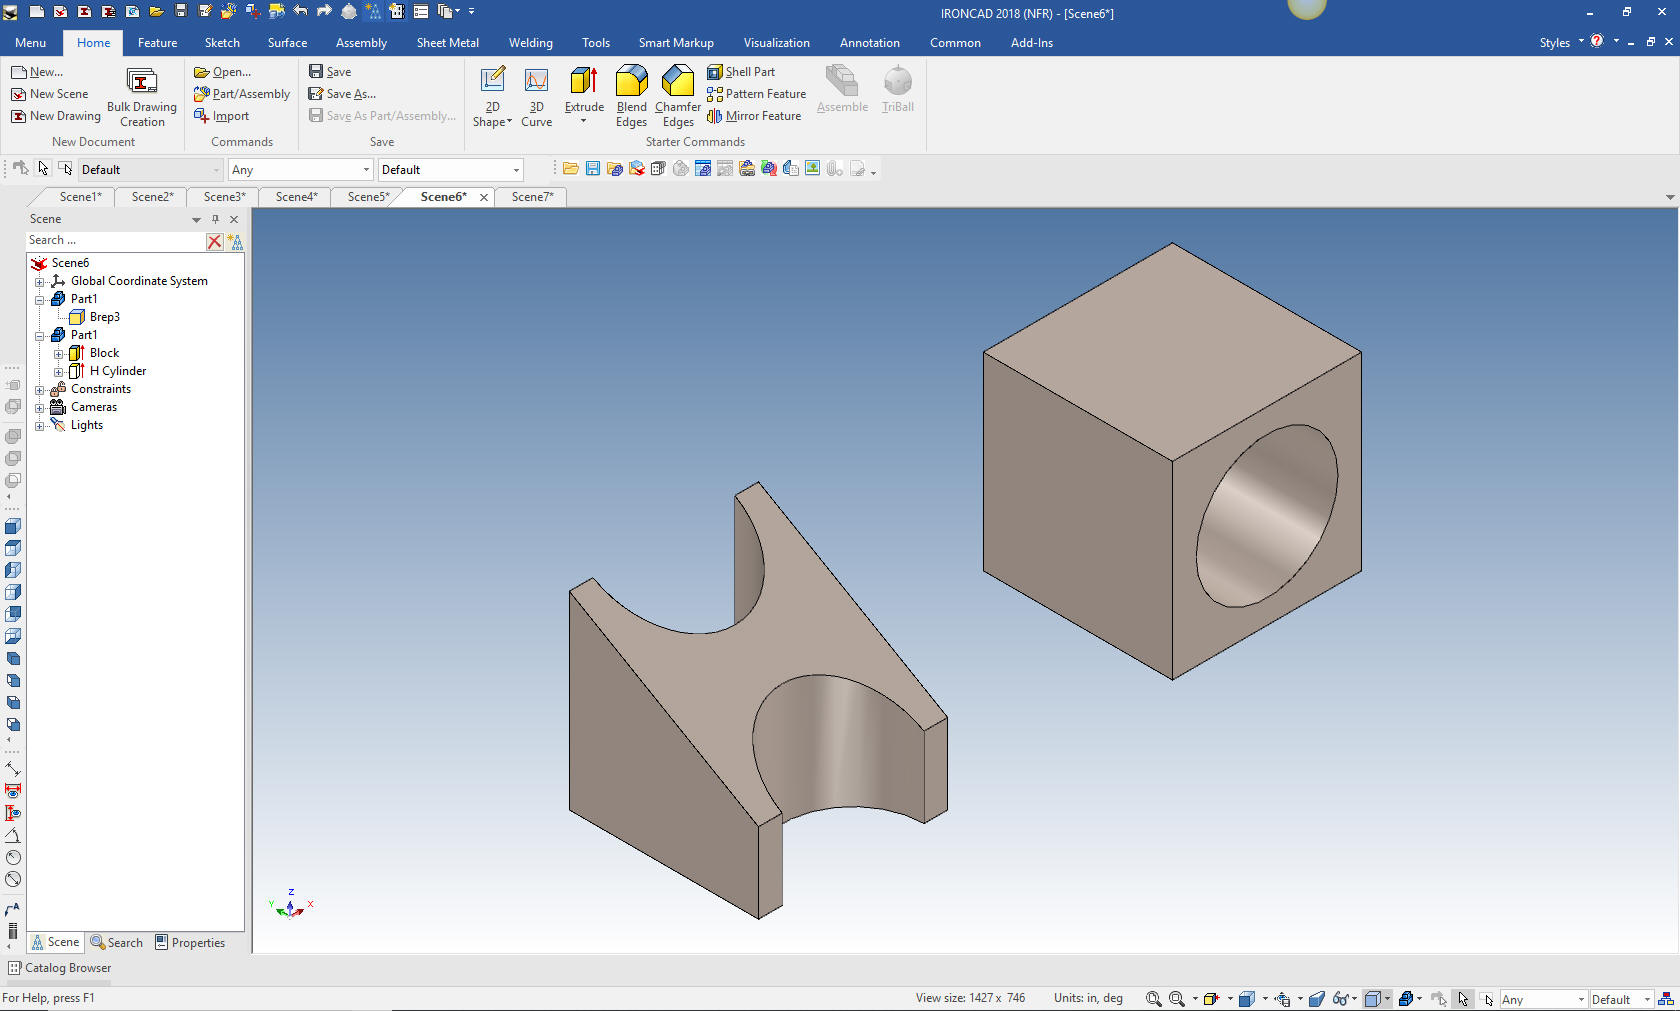
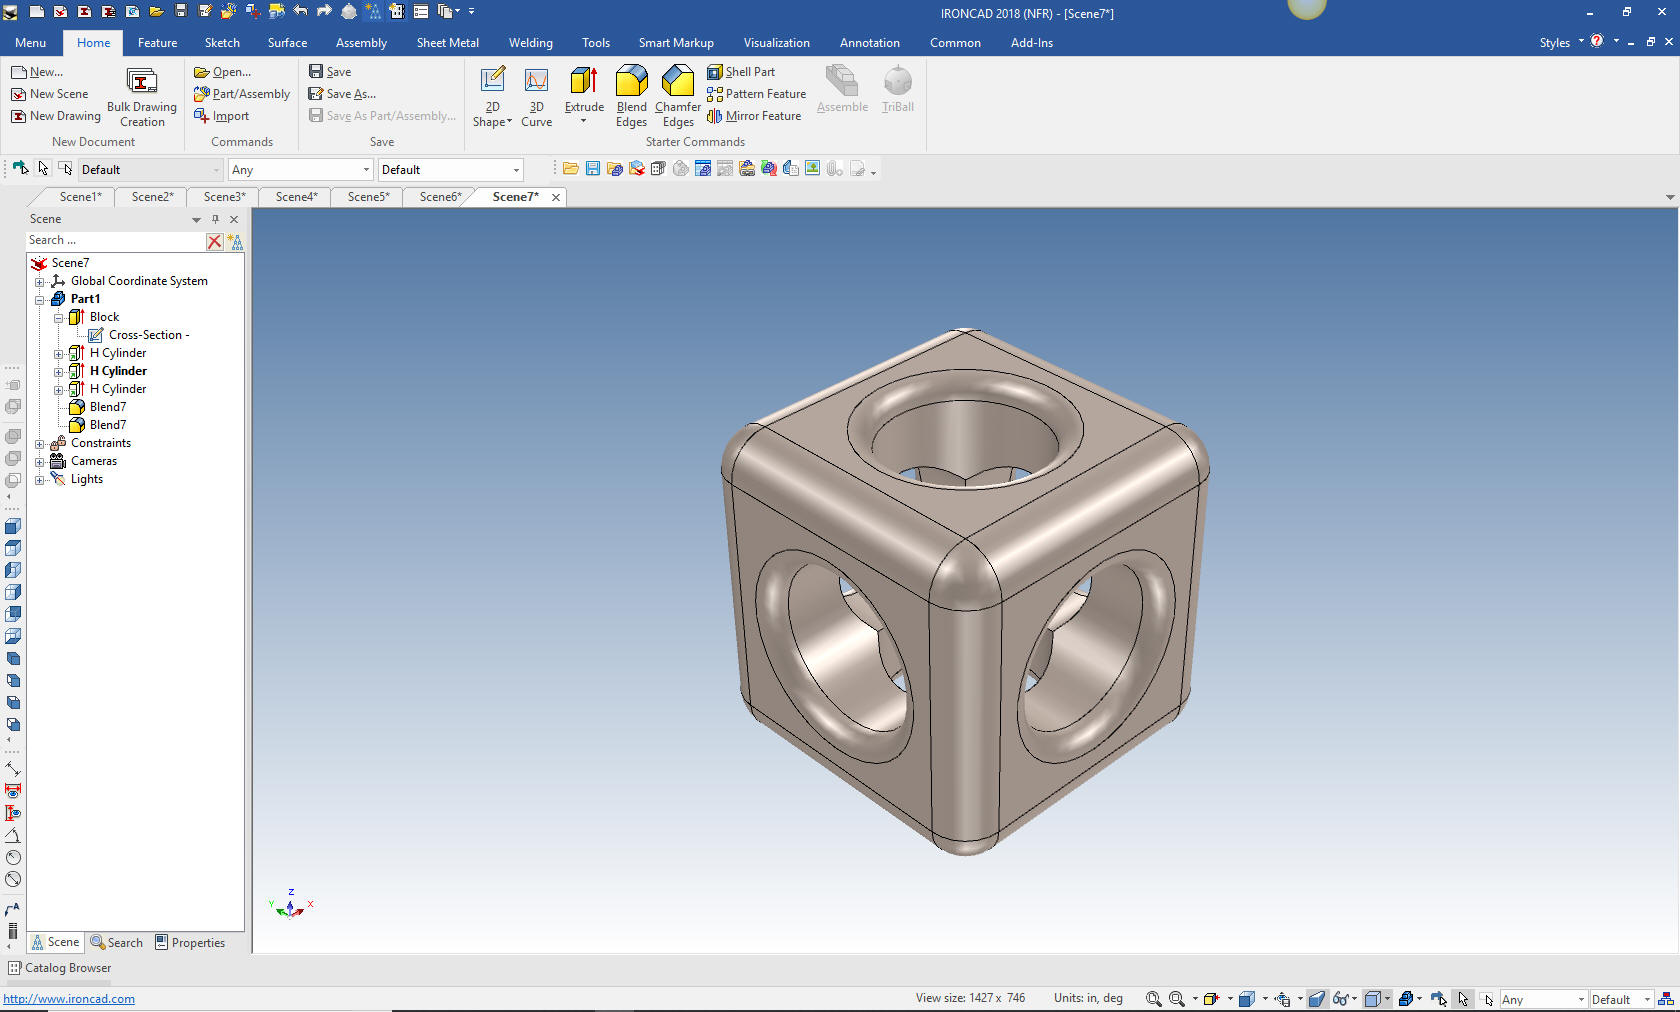
Let's take a look at my new exercise one. We drag and drop a block into the scene
and size it. Here is where we even get more
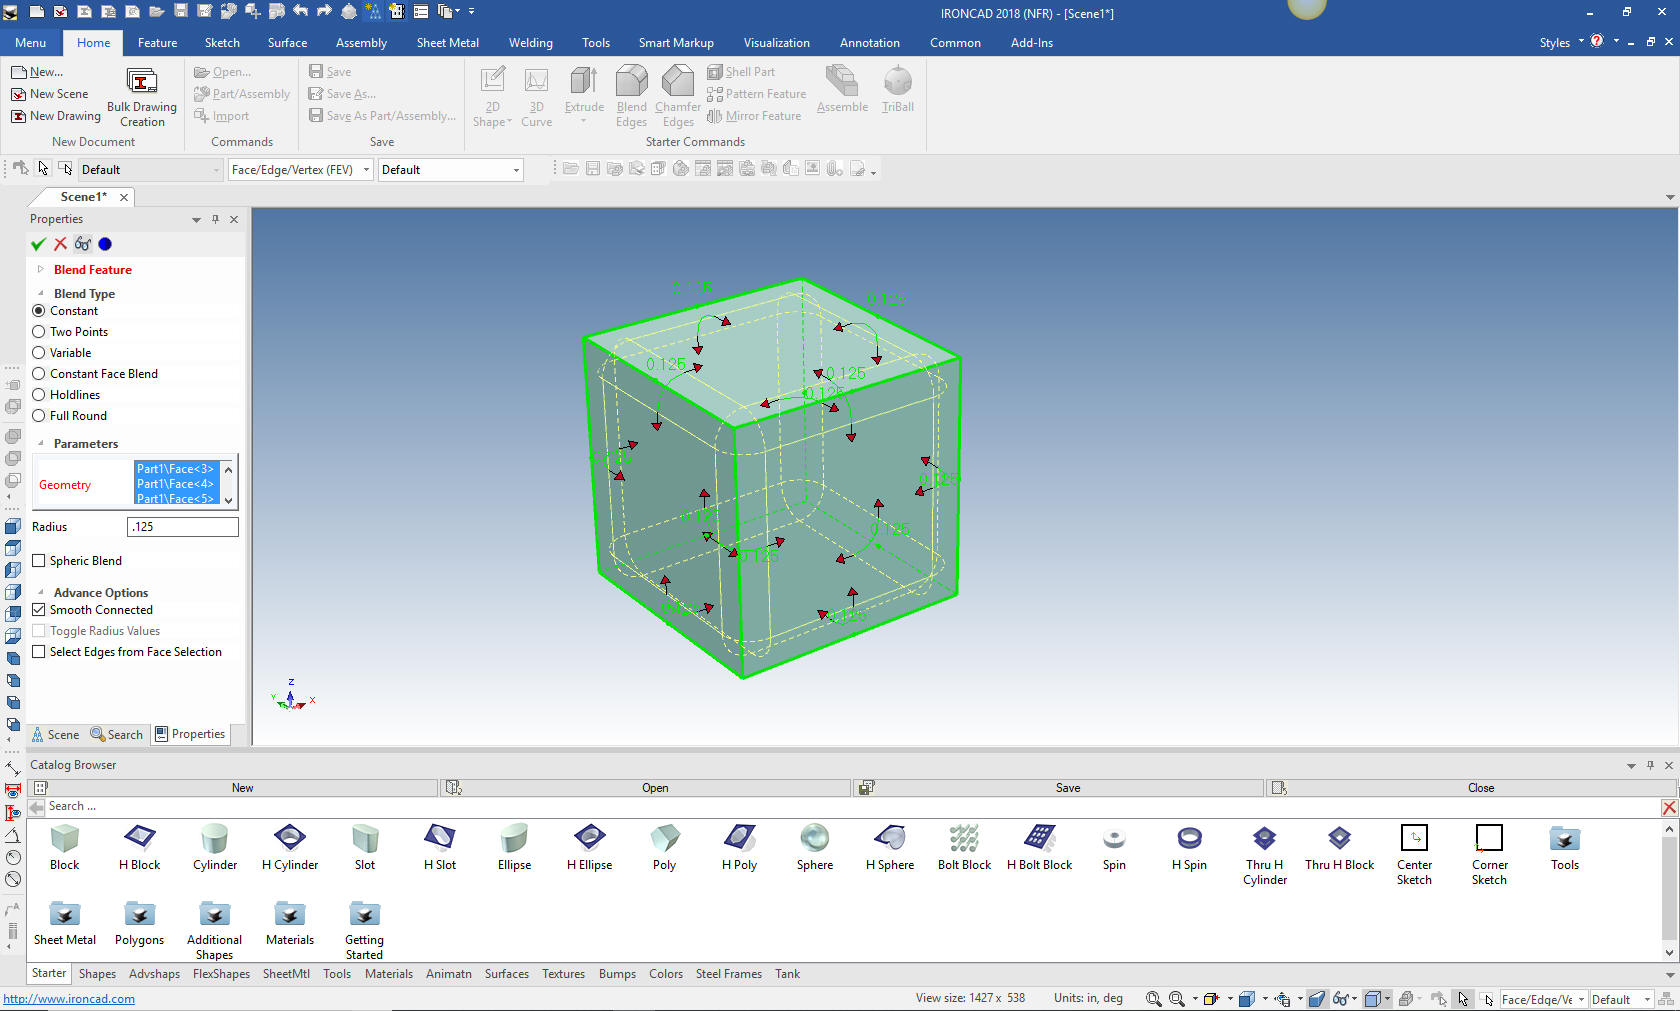
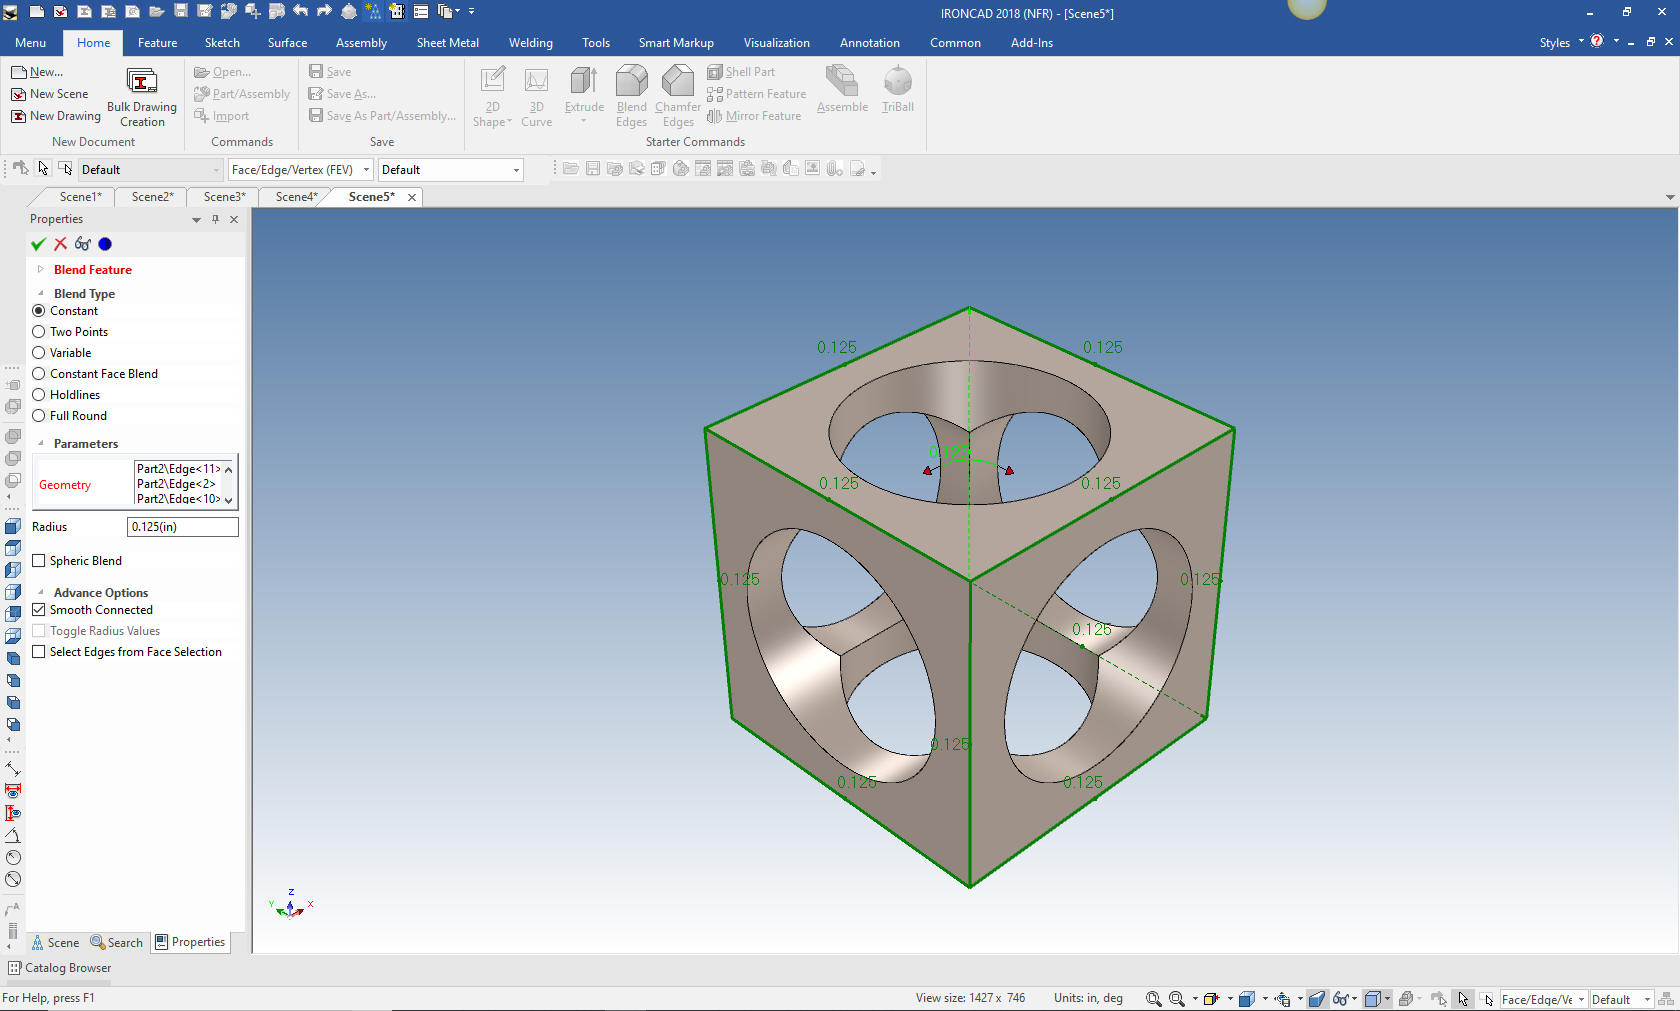
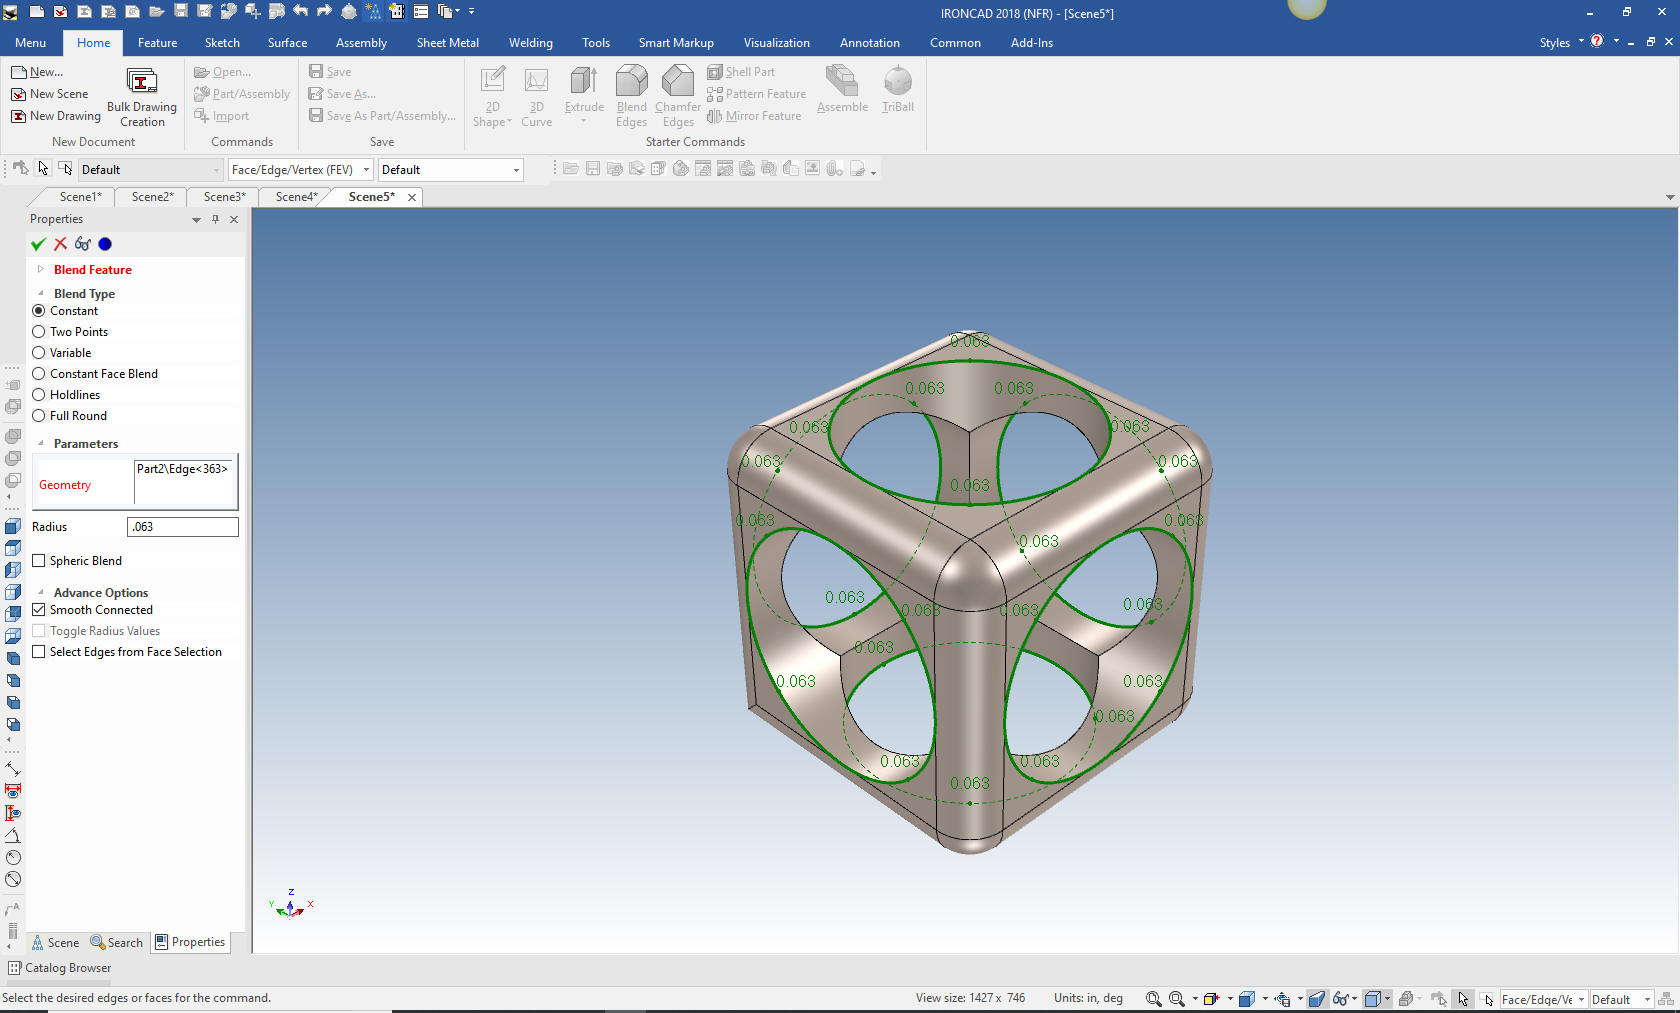
productive. We just select blend, set to .125 and window the block.
All the blends are done in one simple step.
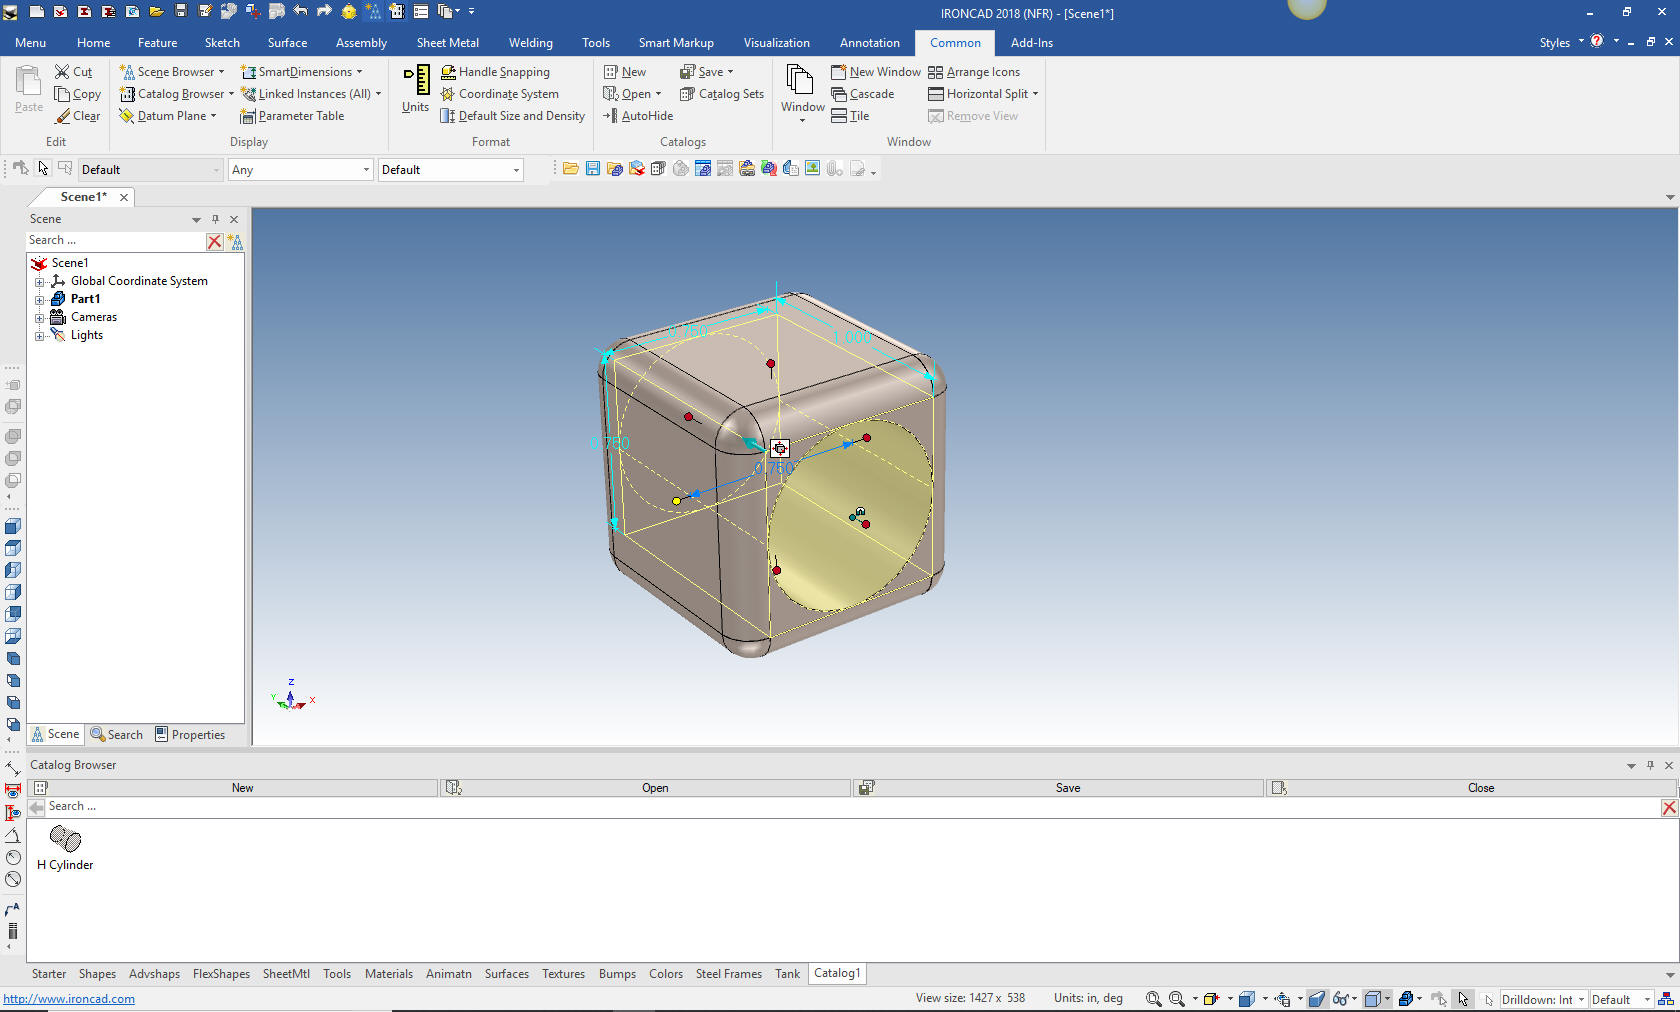
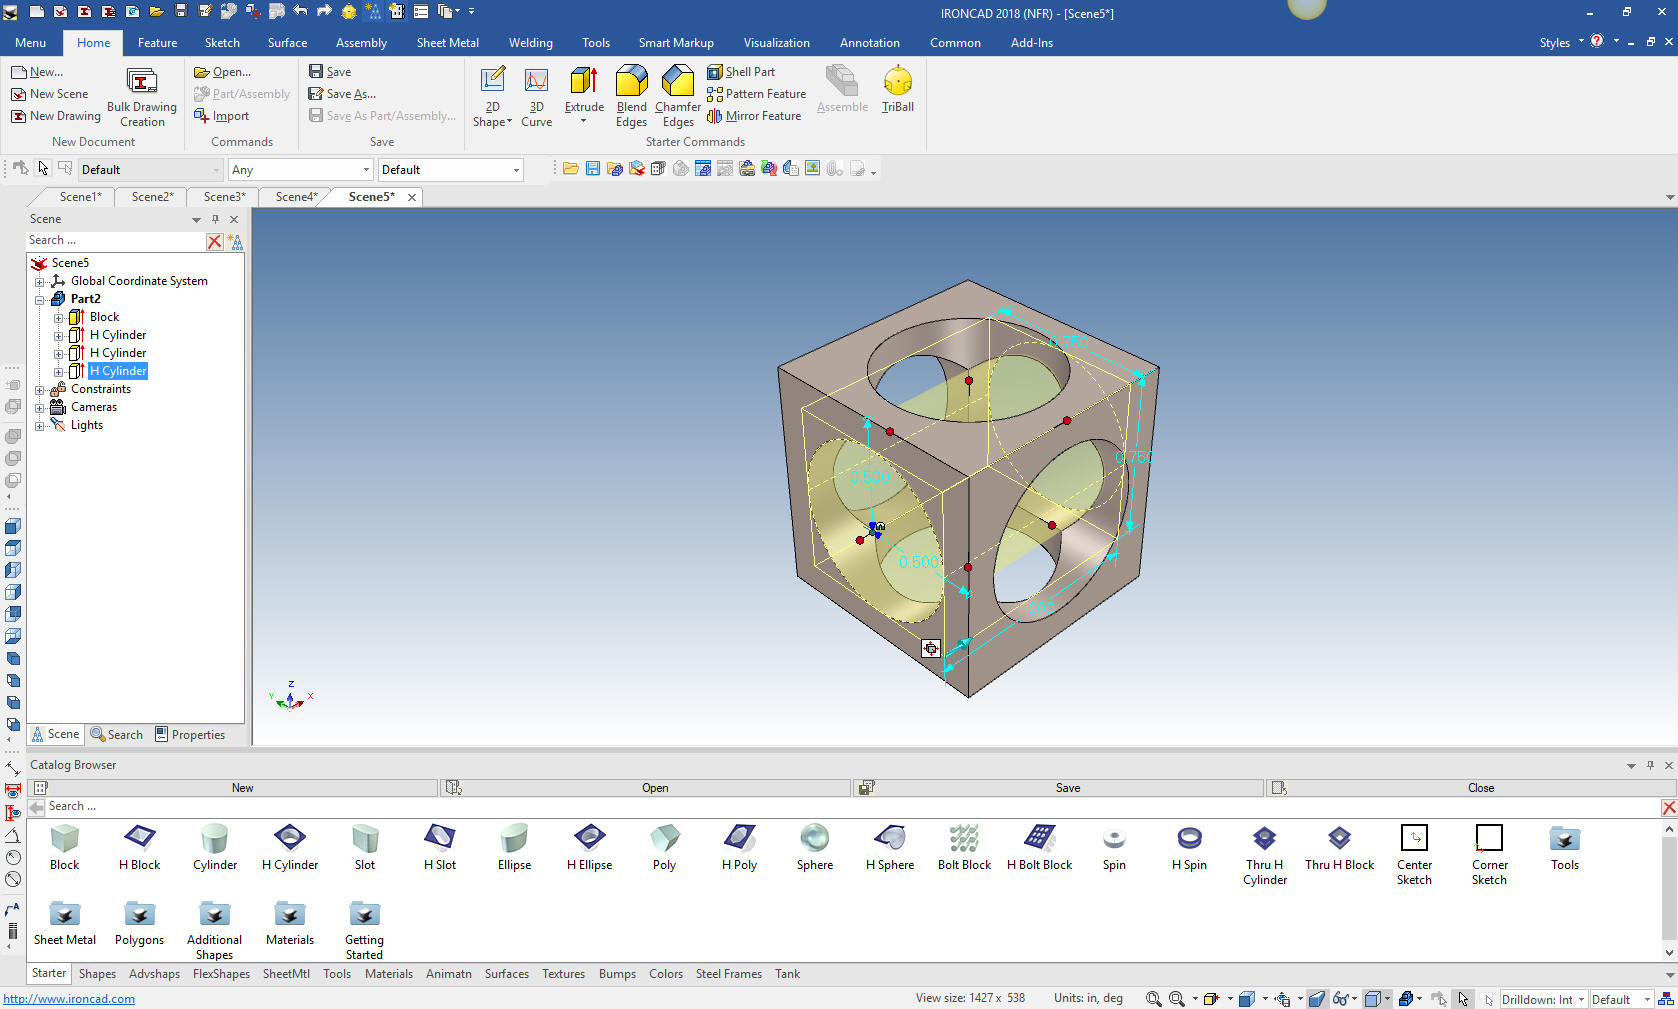
Now we drag and drop a hole cylinder to the middle of the face
and size it. IronCAD automatically recognizes ends, mid-points and
center points for drag and drop locations.
Now, I am going to show you something truly fantastic. Only in
IronCAD do you have this incredible functionality.
We create
a new catalog and drag the hole cylinder feature into it.
Then we just drag and drop the hole cylinder feature from the
newly created catalog to the mid-point of the other two faces. No
need to size it! How cool is that??
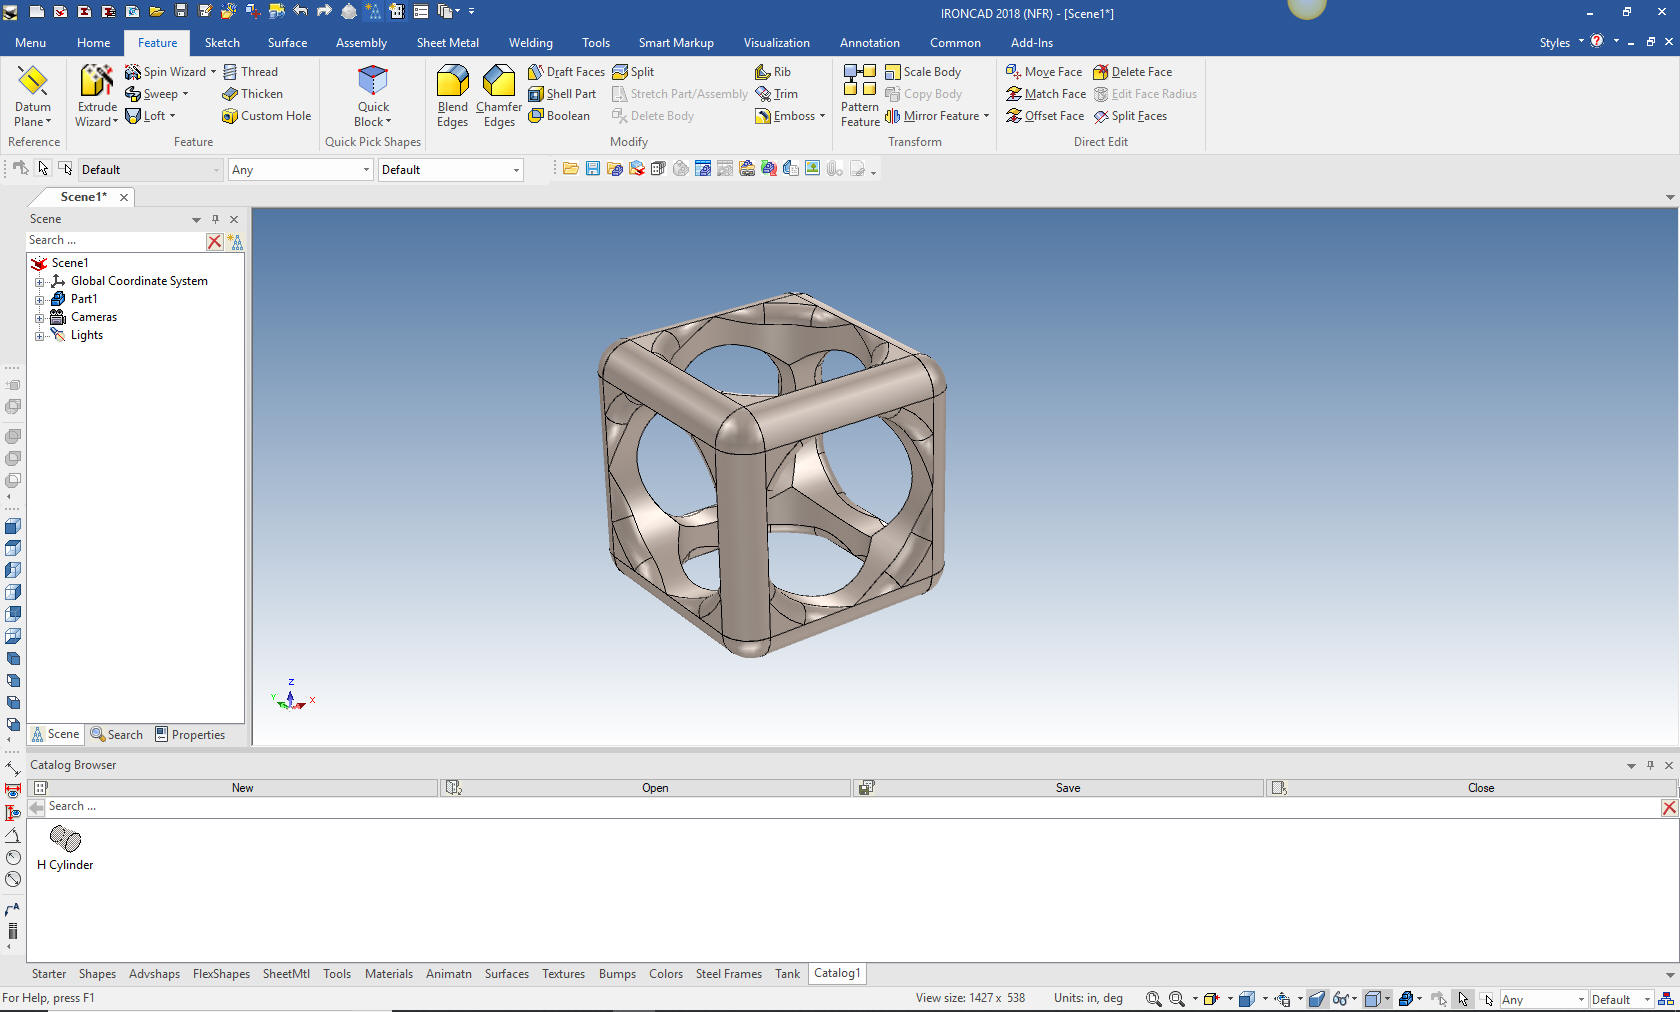
Now the one step blend and we are done!! What incredible
flexibility and fun! How about you? Are you having fun with your
MCAD system?
So, I am showing this to a customer and associate and he had a
different solution I didn't think of, but shows a unique feature in
IronCAD that rarely gets shown. But it takes us back to "One"
Minute. LOL
Now for new
exercise two!
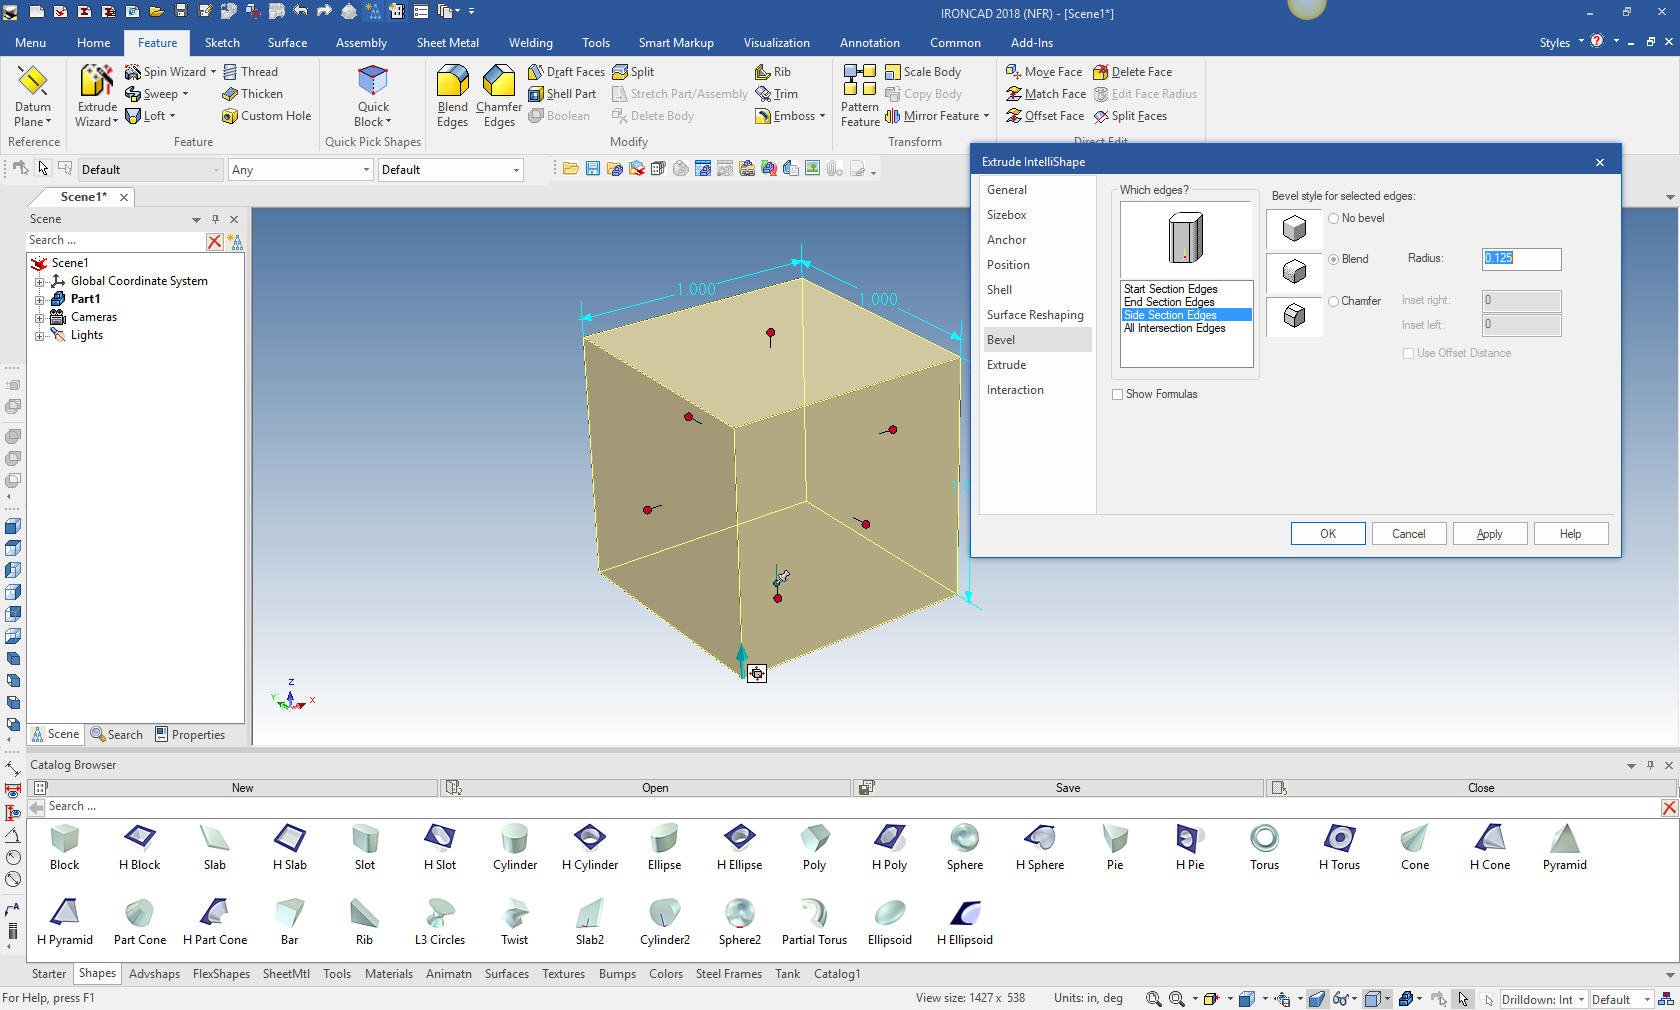
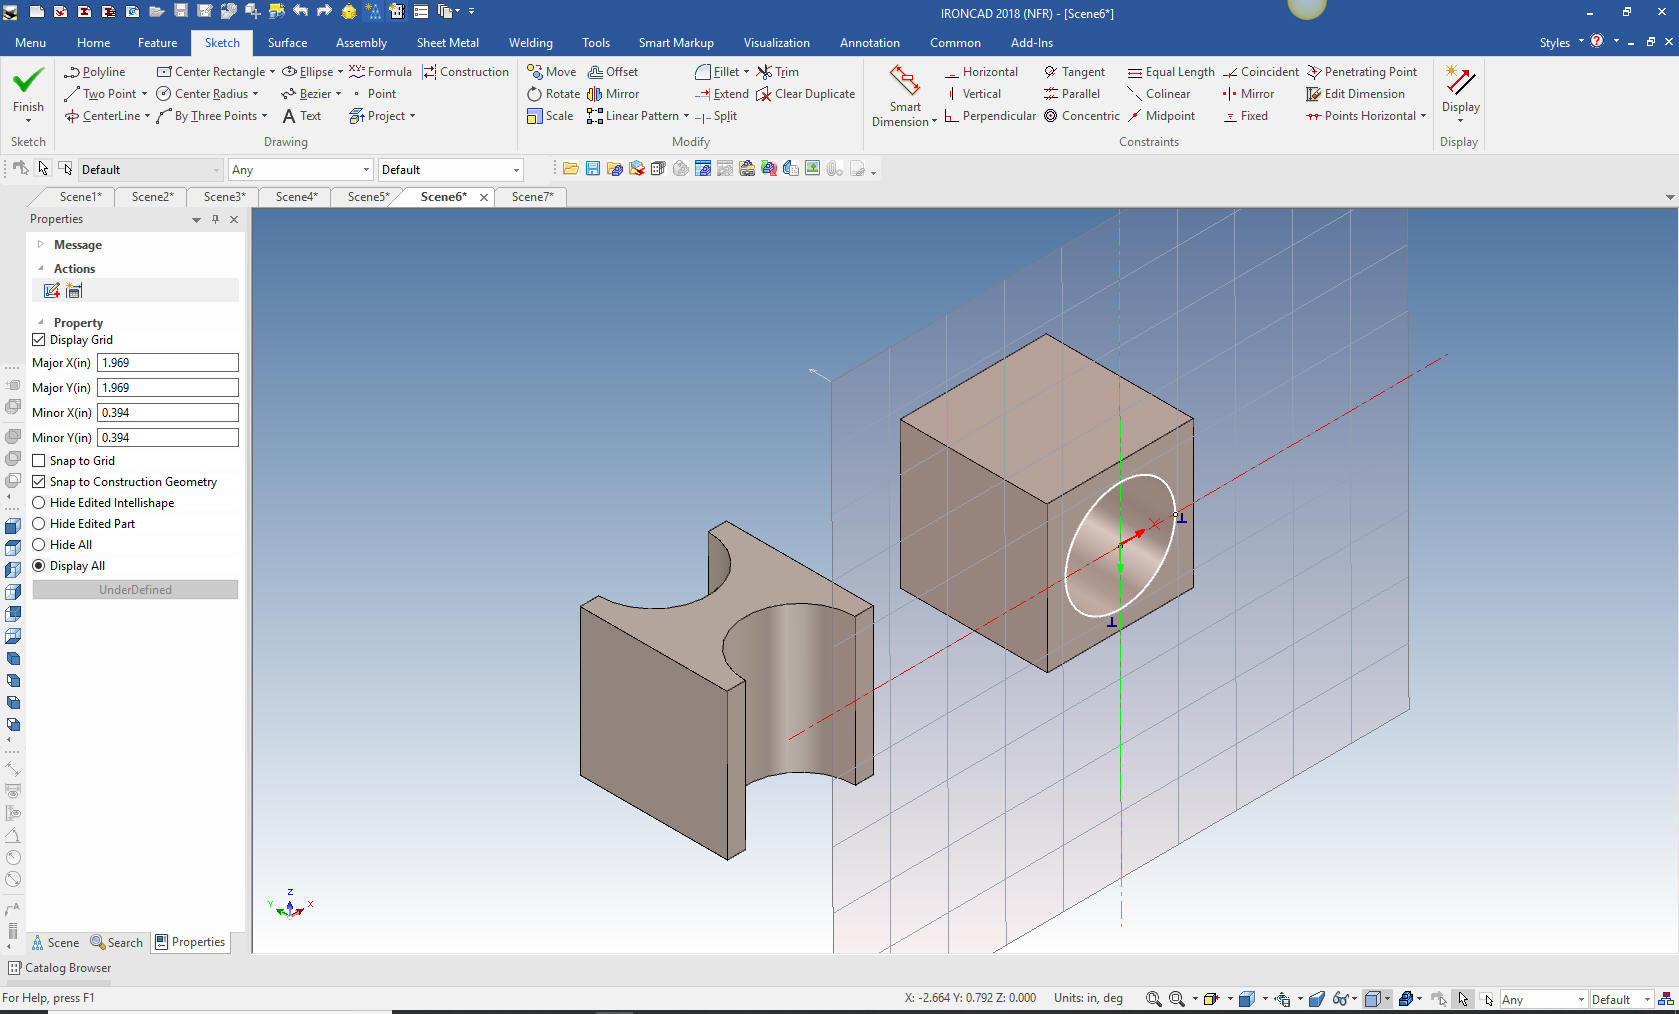
We will
start with the block already defined. We then select the block basic
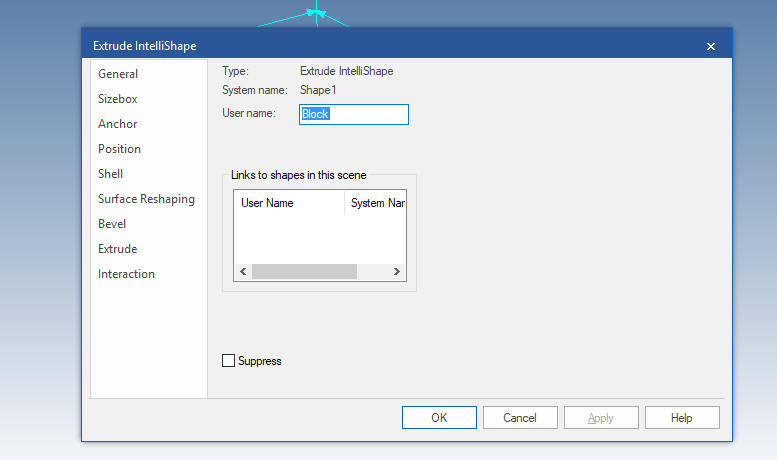
feature and right click and a dialog box comes up and we select
intellishape properties and select bevel and set the start, end and
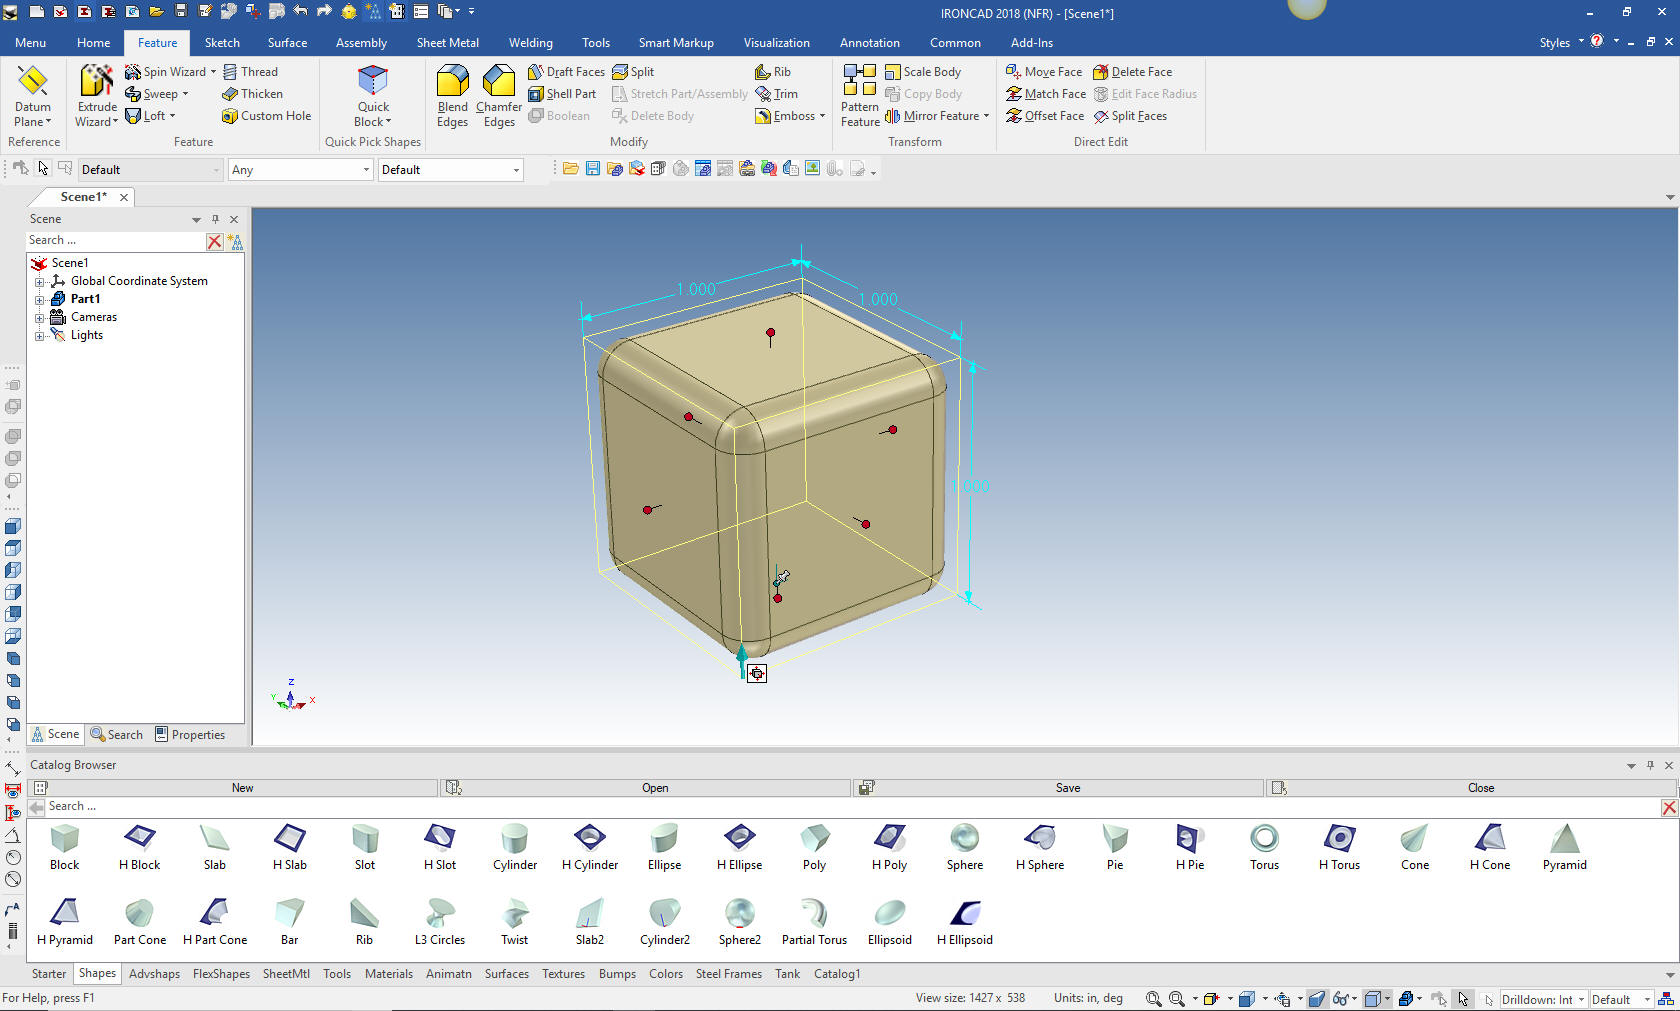
side edges with .125 blend.
You can see we modify the block with a bit of intelligence.
Okay, you are now free to imagine the possibilities.
Look at the other settings. We are editing features! Uh.. While
you while away the hours constrained sketching, extruding or
revolving, I am having fun designing with shapes. Yes, yes we have
to sketch once in a while.
Nope, I am not going to drag a hole cylinder from the standard
shape catalog and size it, remember the defined hole cylinder I drag
and dropped into the new catalog? I just drag and drop it on the mid
points of the faces.
Then the one step blend!!! WOW.. did you guys learn a lot.
I have been selling, supporting and training IronCAD for 25
years. I try and tell the IronCAD folks that our design paradigm is
beyond the belief of those that have been stuck in the Pro/e clone
world of strict convoluted history and constrained sketching, some for 32
years. Sadly, nothing has changed in those 32 years. They have added
a convoluted PLM and MBE system trying to make it more productive.
But you cannot change the basic nature of these rigid programs.
Hopefully, I have opened many of your eyes. You can download
IronCAD, but please let me know through my form below so I can work
with you. We are only authorized in the USA and Canada, but with the
internet the world is getting smaller and I am now being contacted
by many from all over the world. We are working with IronCAD to reward
me for my efforts, so contact me no matter where you are. I am only
a Skype away.
Back to the original post! Be
sure to review these exercises even if you have seen this article
before, it shows the basic process a bit more clearly plus some
other productive functions.
Learn IronCAD
in "ONE" Minute!
When I introduce IronCAD's very
flexible design paradigm I have a hard time to get the Pro/e clone
users, like Solidworks and other programs, that are trained and
experienced in time consuming constrained sketching to understand the
simple drag and
drop modeling paradigm. But this exercise makes the differences very
clear.
I would do a
video, but I really am not good at it. So I will show you step by
step. I will try and get IronCAD support to create one. They are
very good. We don't have three steps in our modeling
process like the Solidworks presenter states about modeling in
Solidworks. We can sketch, we can dimension, but we usually skip
those steps by combining them in dragging and dropping shapes from a
standard or custom catalog.
Here is IronCAD.
My default is inches, so lets get started.
We do not have to
select a part mode we are in a single model environment where parts
and assemblies coexist.
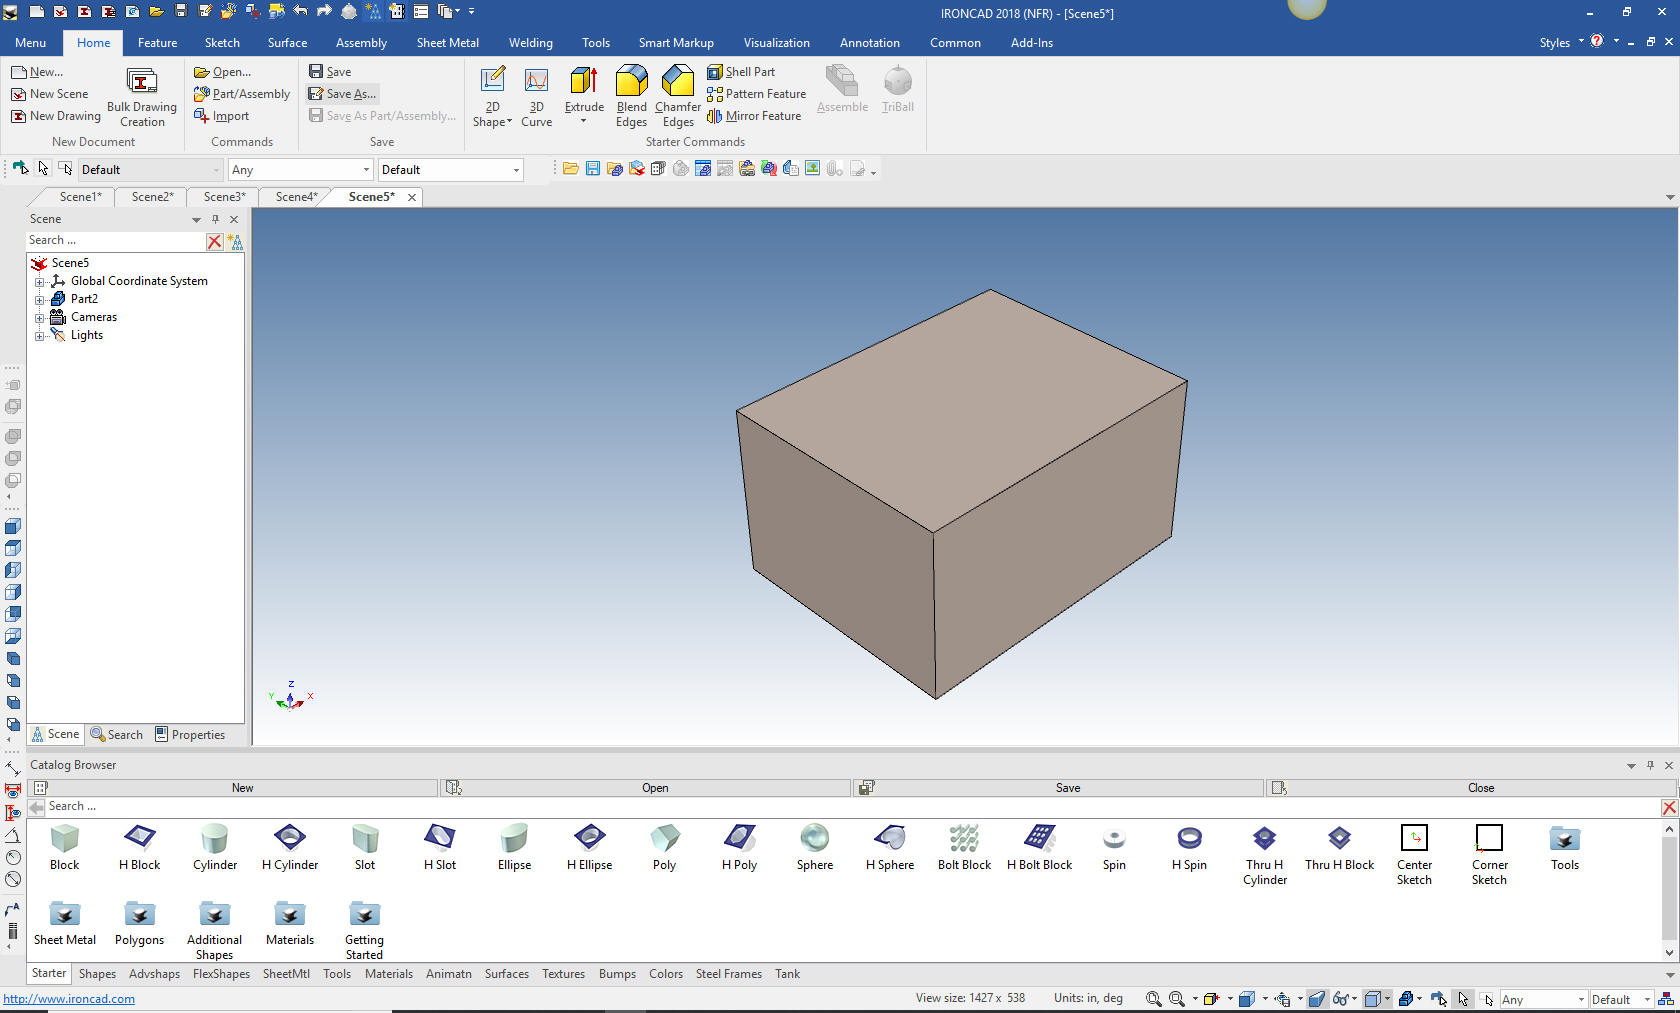
We just drag and drop a
block into the design scene from the standard shape catalog.
Why does IronCAD
call it a scene instead of a workspace? IronCAD was first released
as a graphic design program called Trispectives. It still has much
of the graphic design functionality like integrated realistic
rendering and annimation. It truly is a wonderful mixture
of professional 3D MCAD and graphic design, which puts it in a much
more flexible category as compared to the Solidworks clones.
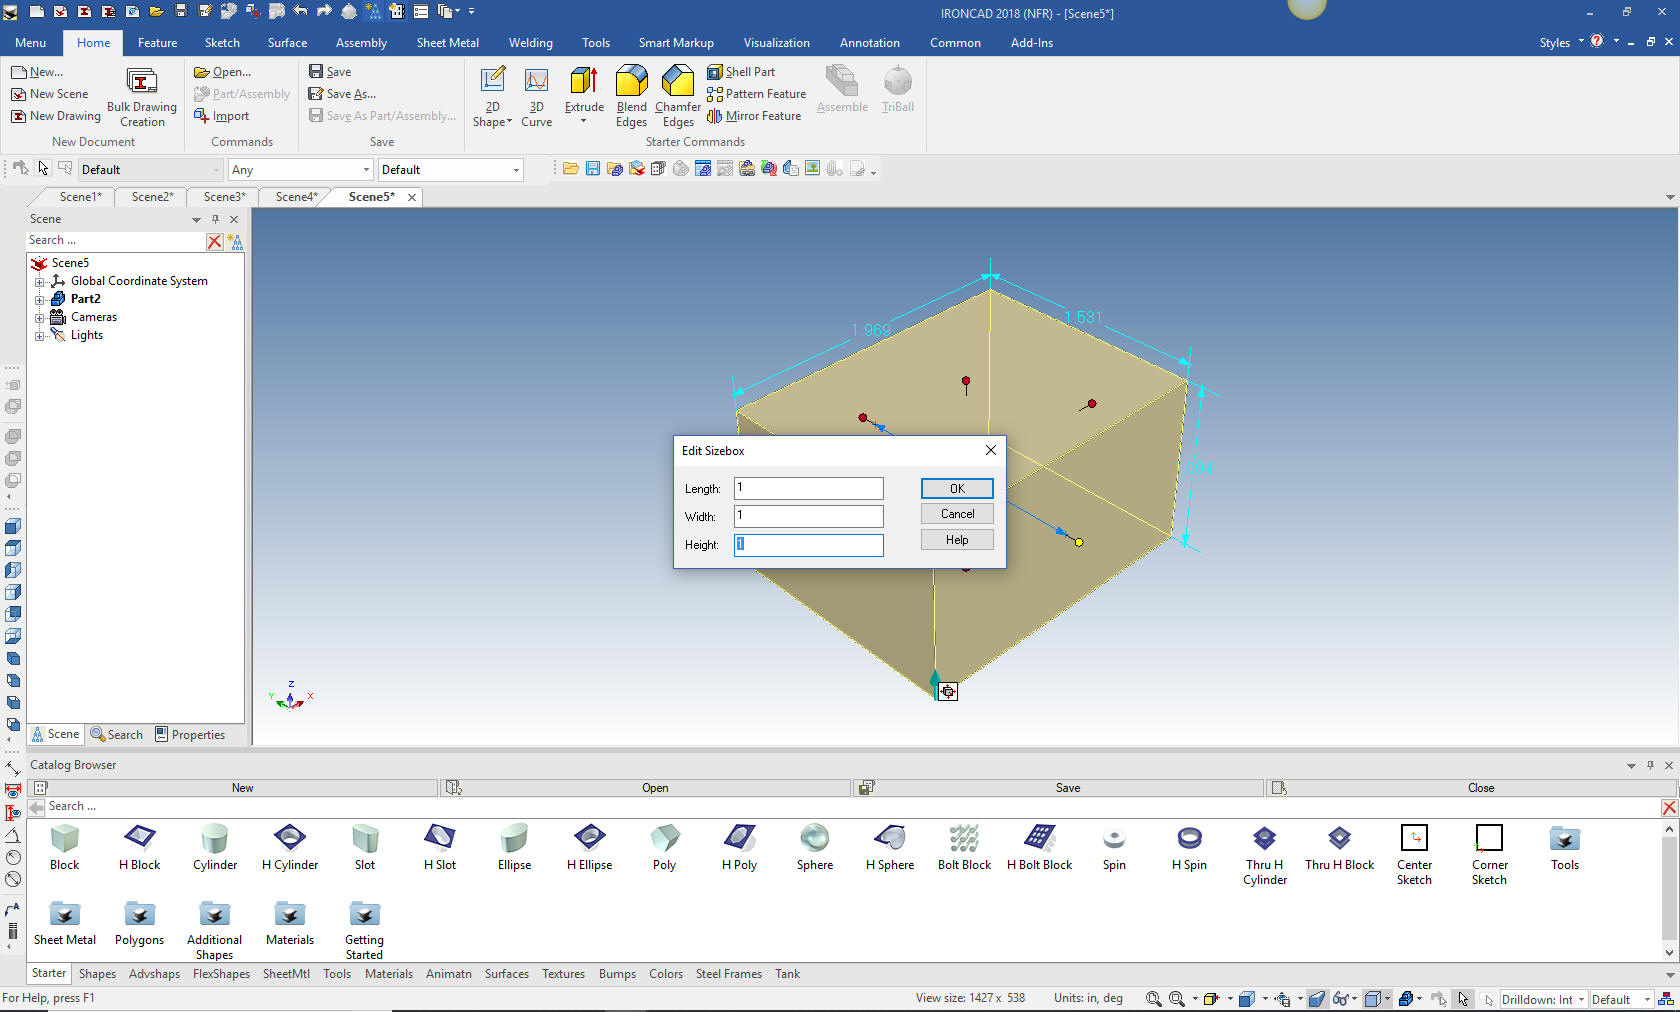
We click down to the feature level and size the block by just selecting one
of the handles.
Now we will drag and drop a hole cylinder to the midpoint on one
of the faces and size it in one step
With that done we drag and drop the other two holes to the other
faces and do the same
Now for the outer fillets
We can put the catalog in
auto-hide (Where it usually resides) to give us more design space in
the scene.
Now the inner fillets. The relevant edges are recognized in one
selection.
And we are done.. Yes, really done
Here is a one button realistic rendering
This shows you the stark difference between constrained
sketching and drag and drop feature based modeling than more
complicated examples. No, we did not use any sketching but we do have
a sketch embedded in the process!
All of the shapes in the
standard catalog are what we call Intellishapes and are based on
sketches, you can modify the shape by pulling on handles in the feature
mode or editing in the sketch mode.
I drag and drop one
block into the scene and size it and then copy it with the Triball.
We can edit the sketch by selecting the edit cross
section command.
These sketches are available to edit. I modify the sketch, notice that I did not
constrain the sketch. This is what I call Streamline Sketching.
We save the sketch and you can see the shape has been modified.
I drag and drop a hole cylinder on the other block and selected
edit cross section and you can see the sketch of the circle used for
the basis of the hole.
But we don't stop there. IronCAD is the only 3D MCAD system with
integrated history and direct edit functionality.
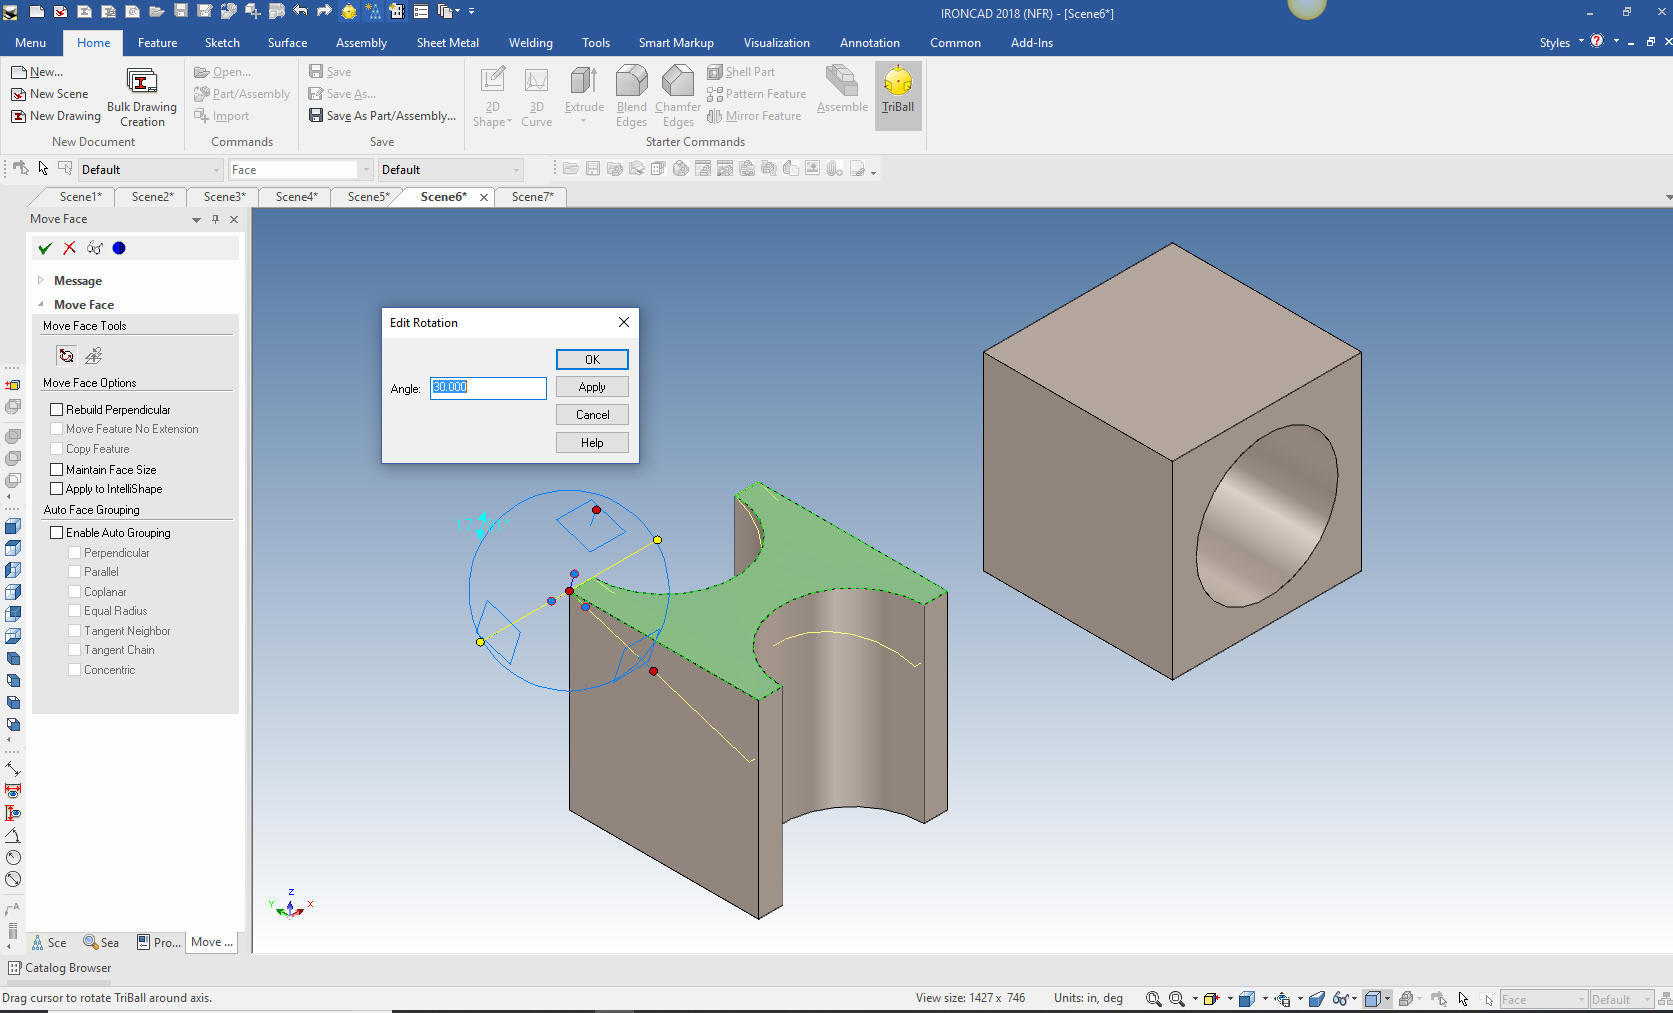
Lets rotate
the top face of the modified shape.
Also, you may not have
noticed but both these parts coexist on one file in a single
modeling space.
In IronCAD you have levels of operation. The
first click is assembly (yellow), second is part (blue), third is feature
(yellow) and forth is face or surface (green).
We selected the
face to move and the Triball is immediately made available, we move it to the edge we
want to rotate around, select the axis and set the rotation to 30 degrees
I have used
other systems with feature and part manipulators and the Triball is
much more comprehensive, powerful and much more user friendly. Often
copied but never duplicated.
How does IronCAD handle a face move like this. No, it does not
add a step in history. It actually consumes the history that is
affected by the move, creating a brep shape in the history. You then continue working with the part with a
mixture of drag and drop, sketching or direct edit which is
reflected in the scene browser (history tree). You could
actually modify a part or assembly from Solidworks or any other Pro/e (Creo) clones faster
than it can be done by fighting through the feature history in the native package.
Solidworks and
other Pro/e (Creo) clones that have direct editing available add a step for each
face move in the history that makes direct editing in the design
process incredibly problematic.
There you go. What you can
learn in IronCAD in 5 Minutes. LOL
Let's have a bit more fun.
Instead of making three
separate holes lets create the other two holes by using the triball
to copy and link them and see what we can do.
When you have
feature linking in your design process it increases your
productivity and flexibility.
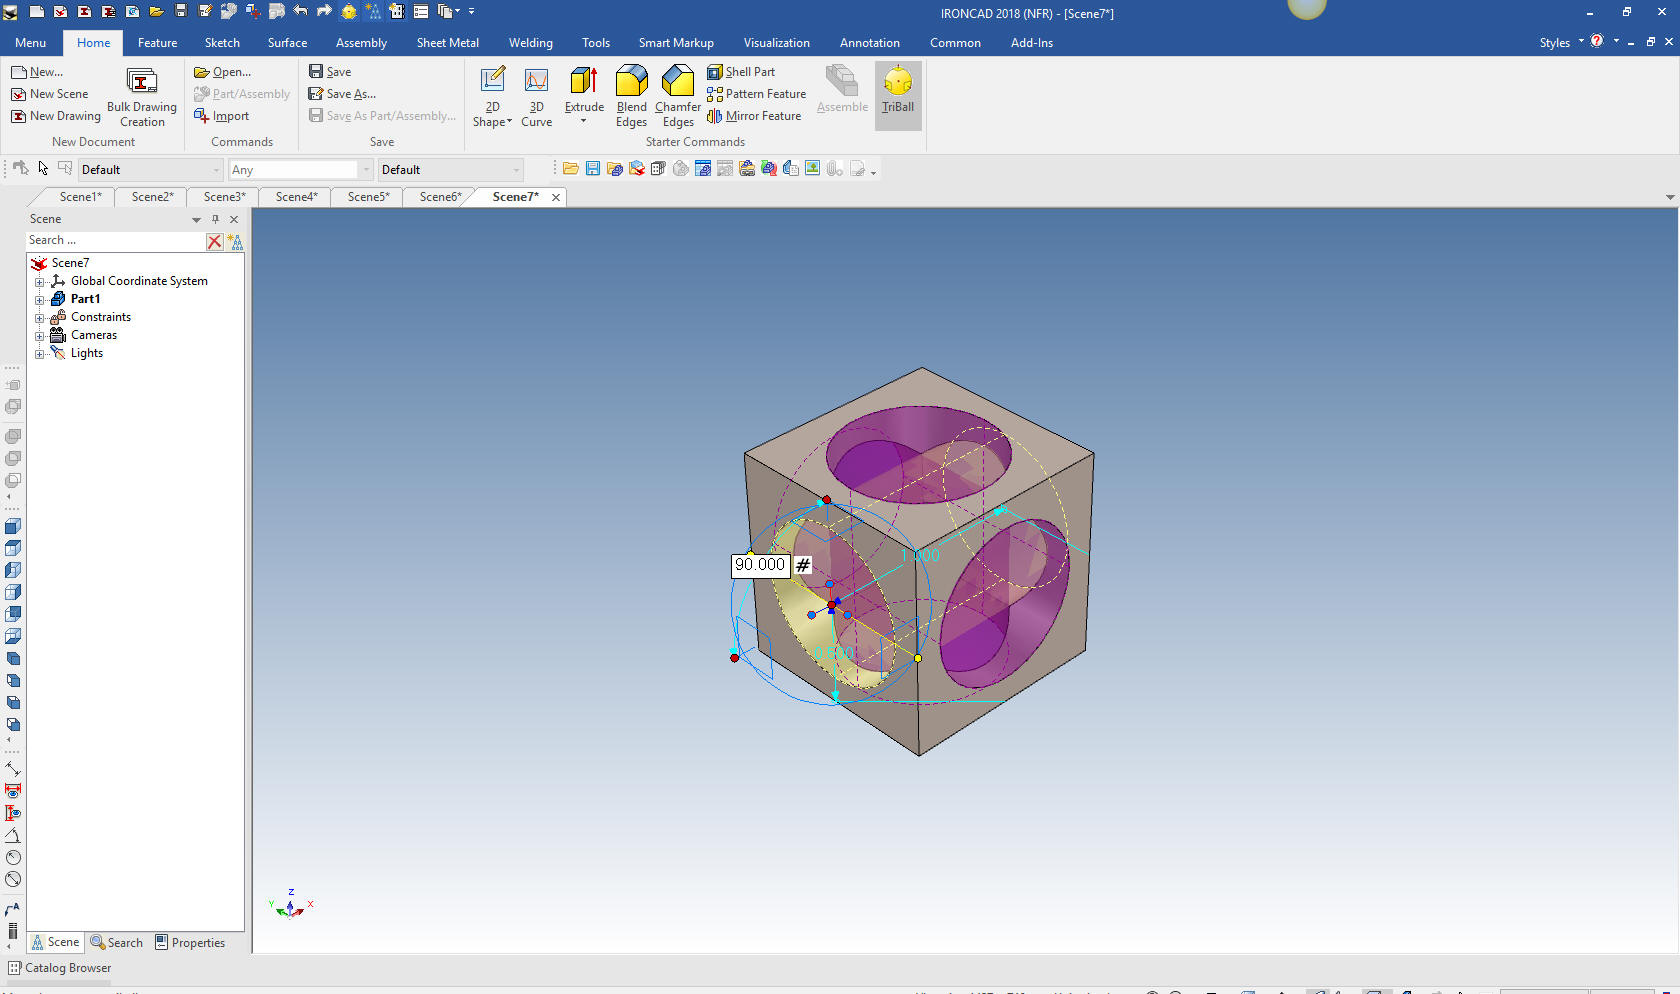
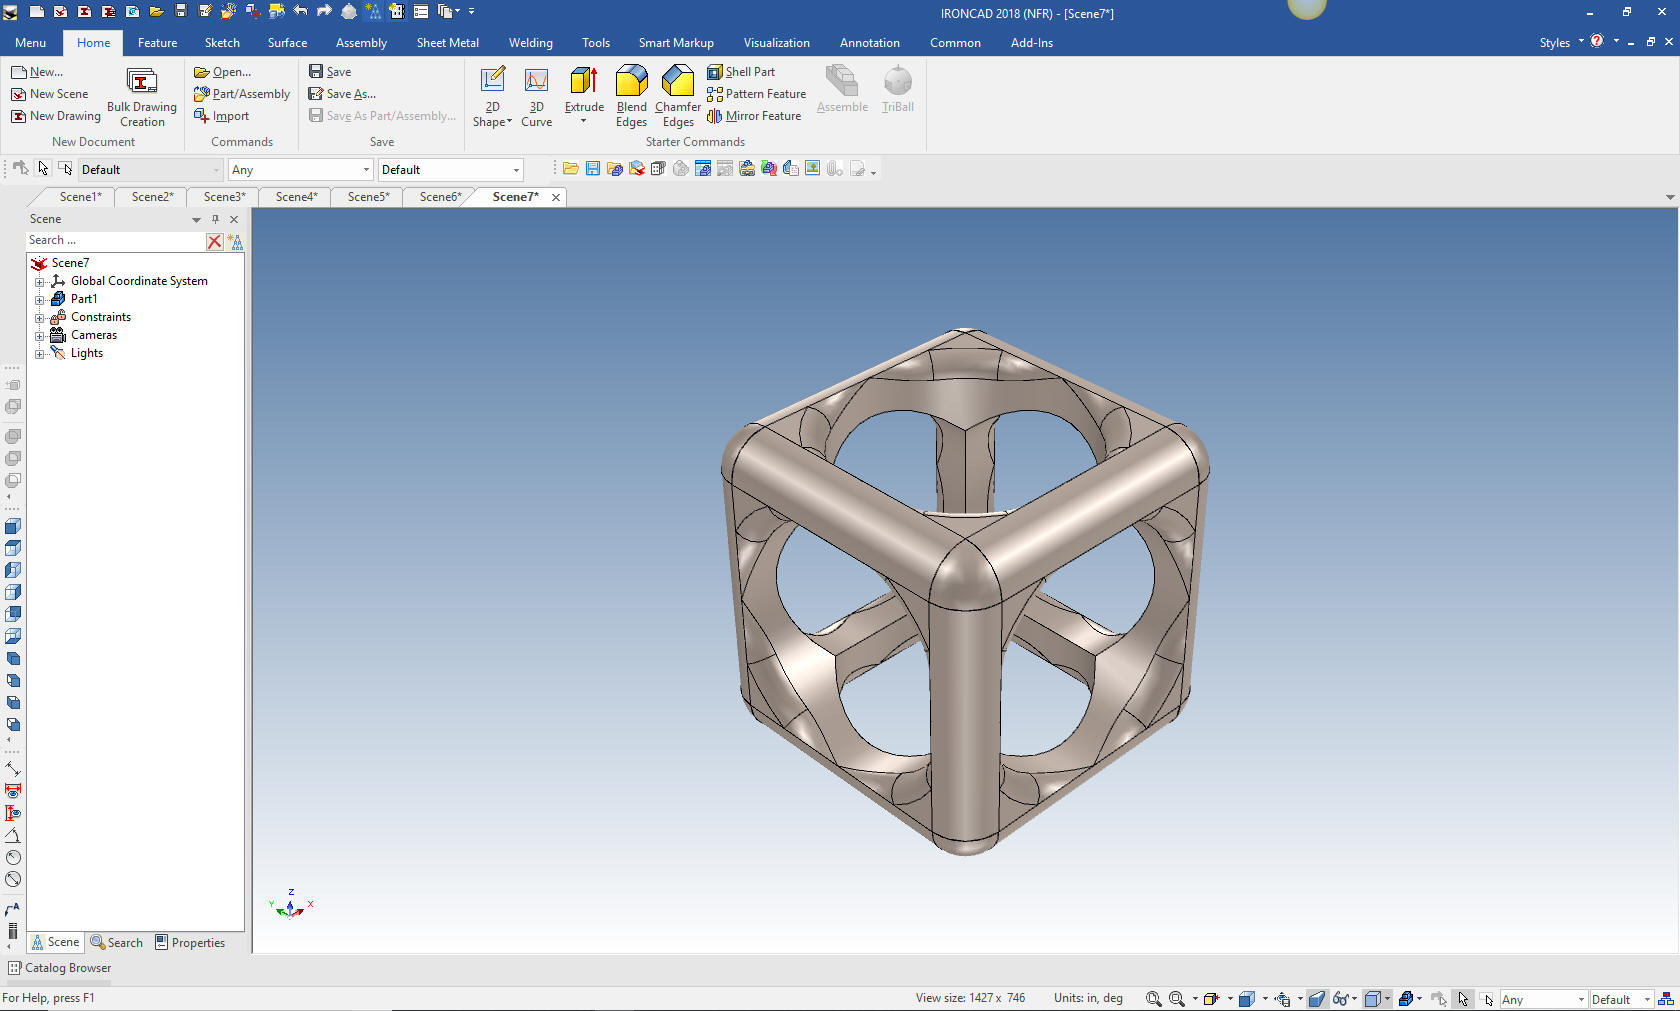
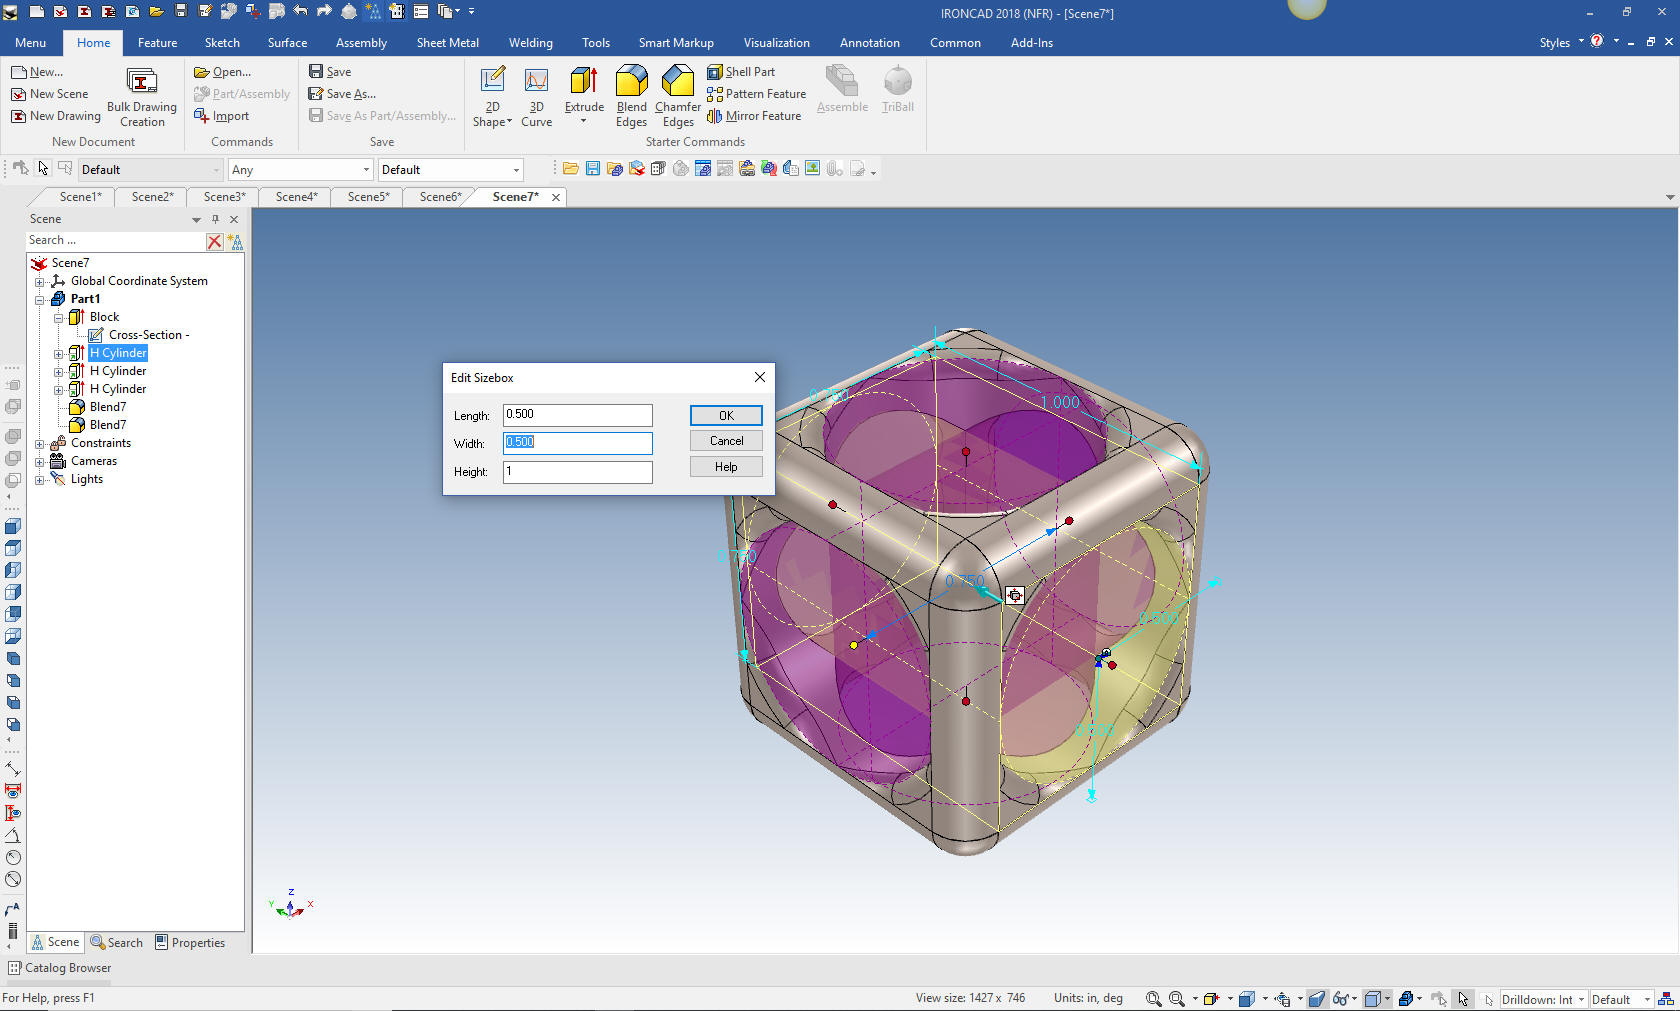
Now we again add the fillets
Since the holes are linked let's change the size to .5 diameter
and see what happens. We select one of the hole cylinder handles and
set it to .5. The other linked features are referenced in purple to
show you what is going to be affected.
Just a small change in the design process produces incredibly
flexible results, very cool and lots of fun! IronCAD offers 5X
increased productivity at the conceptual design stage and 10X with
modifications.
If you would like
to try IronCAD, please download for a 30 day evaluation.
To get more familiar with
IronCAD please got through the following course.
Self-Paced Training Guide - Introduction Course After you feel
comfortable with IronCAD, import a part or an assembly from your
current system and start modifying the parts and assembly.
Assemblies will come into one single model space with all the parts
available, usually named and organized into assemblies and
sub-assemblies. IronCAD will import parts and assemblies from all of
the popular packages.
Give me a call if you have any
questions. I can set up a skype or go to meeting to show this part
or answer any of your questions on the operation of IronCAD. It
truly is the very best conceptual 3D CAD system. Please review these other exercises that
show the unique productive advantages of IronCAD, Streamline Sketching and
Feature Based Modeling over the constrained sketching of the
experienced Solidworks user.
If you are interested in adding professional
hybrid modeling capabilities or looking for a new solution to
increase your productivity, take some time to download a fully
functional 30 day evaluation and play with these packages. Feel free
to give me a call if you have any questions or would like an on-line
presentation.